During renovations in the bathroom, the question often arises of sealing the seam between the bathroom and the wall. It is easier to do this if the bath is installed before tiling - in this case, tiles or panels are attached to the edge of the bath, and the gap between them can be made invisible with sealant or grout. If the bathtub is installed in a room with already tiled walls, sealing the seam is a more difficult process. Poor-quality sealing of the seams in the bathroom leads to the fact that water begins to seep through each joint, which, under conditions of constant high humidity in the room, contributes to the occurrence of mold or fungus. In addition, constant puddles on the floor in the bathroom will create problems for the neighbors below. To avoid these troubles, it is very important to correctly and accurately seal the gaps between the bathroom and the wall.
At its core, the methods for sealing gaps near the bath are divided into two types - for small joints and for wide ones (more than 3 cm).
The first type includes methods such as:
Using grout for tiles.
It is used for grouting the narrowest joints (up to 5 mm), the advantage of this material is moisture resistance, durability, and the possibility of tinting to match the color of the tile. Grout for tiles, including cement, should only be used to hide the seams between the wall and the cast iron bath, since steel and acrylic baths tend to change their dimensions (settle under the weight of water or expand under the influence of hot temperature), which can lead to cracking, destruction of the sealing composition.
Sealing bathroom grout with tile grout
The technology of grouting the seam near the bathtub is simple: first, it is cleaned of dust and dirt, degreased. The trowel mixture is applied with a spatula into the seam joint, leveled in it. After about 24 hours, the grout can be smoothed out with sandpaper and tinted if necessary.
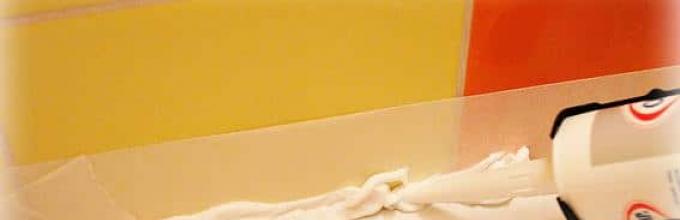
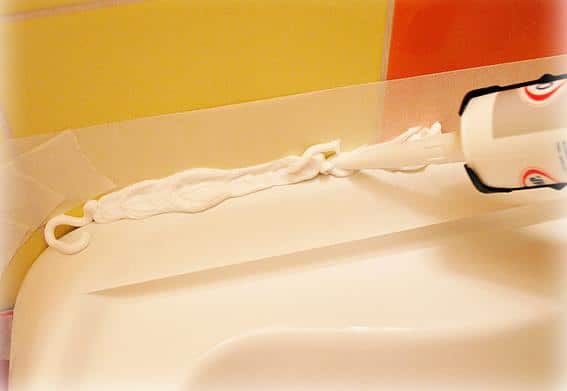
Silicone sealing
It is possible to seal the seam with silicone sealant if its width does not exceed 1 cm. Just as in the previous case, the joint is cleaned, dried, and degreased. The edges of the bath and wall tiles are sealed with masking tape to prevent sealant from getting on them. To seal the joints, use a mounting gun. Silicone sealant is applied across the entire width and length of the gaps, the excess is removed with a damp cloth. The time of complete drying of the material is 8-24 hours.
The advantages of using a sealant is that it does not change its color over time, it is moisture resistant, plastic, and safe. In addition, it, like grout, can be tinted. In addition to silicone, there is an acrylic sealant, as well as a combined one. Experts recommend using a combined one, since silicone sealant can cause rust on the surface of a steel bath, and acrylic is less ductile. You should choose a sealant with antiseptic additives, for acrylic bathtubs - special compositions for polymeric surfaces, while the material should not be too cheap, because in this case it will not have sufficient quality characteristics.
 Seal the seam in the bathroom with a sealing solution
 The use of any sealing solutions has one common drawback: they are not suitable for cases where the tiles have uneven joints: they cannot be masked as much as possible.
The second type of sealing joints between the bathroom and the wall, when the gap is more than 3 cm, includes the following types:
The use of mounting foam
When using foam, moisture-resistant foam should be preferred, which will last much longer than regular foam. The seam sealing process is as follows:
- The edges of the bathtub with tiles must be sealed with masking tape.
- The gap is cleared of dirt and dust.
- The cylinder is kept for some time at a temperature that is slightly higher than in the bathroom - after that the foam will become much more elastic. Then it is shaken well, carefully and squeezed into the joint in small parts.
- Wait for the required time for the foam to dry.
- After complete drying, the excess is cut off with a knife, and the surface is masked with grout or a border. In this case, trimming should be carried out at a level below the edge of the bath, glue is applied to its surface, then leveled with a sealant to a smooth state.
Use of borders
This method involves the use of special ceramic borders for bathtubs, or made from the tiles that are present on the walls. This is an aesthetic, reliable and durable seal, but it requires more time and cost than other methods.
A ready-made ceramic border is convenient to use, but a tile border can be made from the remaining tiles after wall cladding, and there is no need to match it in color.
The border is glued to the tile adhesive, and a sealant is applied to the depth of the joint. The corner is cut at 45 degrees, cleaned with sandpaper, then glued to the ceramic finished corner. The seams are filled with tile grout. The edges of the ceramic border are closed with special plugs.
The tiled border can be made in any desired width. The joints are filled with mounting foam, glue is applied to its dried surface, to which the tile is glued at an angle of 45 degrees, cut to the desired dimensions along the width of the gap. You can lay out a tiled border in the same way as ordinary tiles on a mortar.
Using a border tape
This is a simple and effective method in terms of moisture protection. This is a plastic flexible tape with a fold in the middle with an adhesive applied to the back. It is durable, invisible on the bath, it can be matched to the color of the tile. Curb tape is great for acrylic and steel bathtubs because it seals the joints even when they change dimensions. The tape is mounted as follows:
- The surface of the seams is cleaned and degreased
- The tape is measured and cut according to the length of the joint.
- The gap is filled with sealant.
- The protective film on the reverse side is gradually removed, the tape heats up slightly (this can be done with an ordinary hair dryer), then it is glued with one edge to the bathtub, the other - to the wall.
- In the corners of the walls, the tape is glued with the ends overlapping each other, then the excess is cut off.
- After it is completely glued, it should be protected from water ingress for the time indicated on the package.
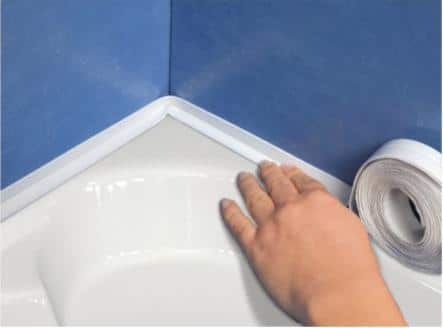 Sealing the seams in the bathroom with a border tape
 The border tape can also be glued to seams previously sealed with mounting foam or cement mortar.
Plastic corner (plinth)
Termination with plastic or polyurethane corners is a relatively cheap way. These are flexible waterproof skirting boards that can be used to seal joints on uneven walls. The installation process is as follows:
- The gaps between the wall and the bathroom are degreased with a solvent (white spirit), dried.
- Skirting boards are cut to the required length in accordance with the dimensions of the bathtub, the corners are sawn at an angle of 45 degrees.
- A protective masking tape is glued to the edges of the bathtub and walls with tiles in order to prevent glue from getting on them.
- A layer of liquid nails for wet rooms is applied to the reverse side of the skirting boards.
- After 2-3 minutes, the plinth is pressed into the corner of the joint for a strong adhesion of the adhesive base to the wall and bathroom.
- When the plastic corners are glued, a transparent sealant is applied to the upper and lower edges of their abutment.
This method allows you to seal joints with a width of more than 2 cm. Some types of plastic corner are framed with rubber pads along the edges, this improves its moisture-proof characteristics. There are also two types of plastic corner, one of which is installed in the manner described above, i.e. outside the tile, and the second - under it. This grouting method is best suited for cladding acrylic bathtubs, as well as cast iron bathtubs with tiled or plastic paneled finishes.
Drywall box and tiles
If the distance between the bathroom and the wall is too large (more than 10 cm), a plasterboard frame can be made to close this gap, which is covered on all sides with a primer, adhesive mortar and tiles. For the same purposes, you can use a PVC panel. It turns out a kind of shelf for the bathroom, practical and at the same time, neat.
Combination of methods
The most effective way to seal seams, which can be used for any width of joints between a cast-iron bath or any other and a wall, is to combine types. A common combination is sealing with mounting foam, on top of which a sealant is applied and borders are glued. Such joints reliably protect the gaps between the wall and the bathroom from leaks and accumulation of moisture.
To avoid the appearance of large gaps, you can follow the following recommendations:
- When overhauling, you should first lay the flooring.
- The fixing of the bath must be carried out in accordance with the installation rules, then gaps can be avoided or made minimal.
- Wall tiling should begin in the direction from the bath to the ceiling.


