There are fewer and fewer people who like to lie in the bath: the majority of people use the shower.
For this reason, there is no need for a container that occupies the main part of the bathroom.
Before washing machines became available to every family, they rinsed clothes in the bathroom, but now this need has disappeared.
Dismantling it and installing a compact shower stall is not a problem now. However, it is not always possible to select a product in a store that fully meets the needs of the apartment owner. In such cases, a homemade shower cabin can help out.
The production of any design begins with paper work - design. At this stage you will need to do the following:
- Get acquainted with the existing types of shower cabins: real designers do not reinvent the wheel - they use the experience accumulated by mankind, making the necessary adjustments to the design.
- It is advisable to read about the principles of ergonomics: this will help you avoid mistakes that could turn your future cabin into a structure unsuitable for use.
- Draw a sketch of the structure on paper indicating dimensions and specifications - a list of parts and their quantity. This will make it more convenient for you to make economic calculations in the future.
- Decide on the materials from which you are going to make these parts.
- Based on the list from clause 3, calculate the required quantity of each material and their cost.
To choose the best option in terms of financial costs, you can develop a couple of sketches. For example, figure out what it would cost to build a corner and rectangular cabin.
For clarity, mark the installation location in the bathroom and evaluate which design will fit better into its space.
![]() Creating a shower tray with your own hands has many advantages - the design will be cheaper, and you can choose any size, deeper and wider than the factory ones. — advice, current trends, materials.
Creating a shower tray with your own hands has many advantages - the design will be cheaper, and you can choose any size, deeper and wider than the factory ones. — advice, current trends, materials.
If you decide to make a shower in a private home yourself, you need to study this issue thoroughly, because the wrong approach to installation can lead to the destruction of the foundation and building structures as a result of constant exposure to moisture. There are many useful tips for carrying out construction and plumbing work.
How to make a shower cabin with your own hands
The success of the event for the manufacture of a homemade shower stall depends on strict adherence to the order of work. In this case, any operation will be easy and convenient. You need to start working with waterproofing the floor in the bathroom. It is important to carry out this work with special care, otherwise friction with neighbors below will be inevitable.
- Pipes are brought to the locations of the mixer and drain.
- They equip the cabin floor (if you plan to use a drain ladder) or install a tray.
- The walls are finished with waterproof materials.
- Mount the cabin frame and cover it with polycarbonate or other material of your choice.
- Doors are installed.
DIY shower cabin
All joints of the structure must be sealed with sealant to prevent the possibility of water leaking beyond its boundaries.
Installation of an inclined floor
Work on installing a sloping floor should begin with arranging a drain. This operation is performed after completing the waterproofing of the floor.
Procedure:
- A drain is installed and connected to the sewer pipe.
- The floor together with the drain is filled with cement mortar so that the opening of the drain protrudes above the pouring surface to a height equal to the thickness of the tile.
- You can build a side around the perimeter of the cabin - this will help prevent water from escaping beyond its boundaries.
- We lay the tiles, ensuring a slope from the boundaries of the cabin to the drain hole.
The entire process of constructing a sloping floor will take at least ten days (including drying of the solution).
Shower floor
Installation of a floor with a pallet
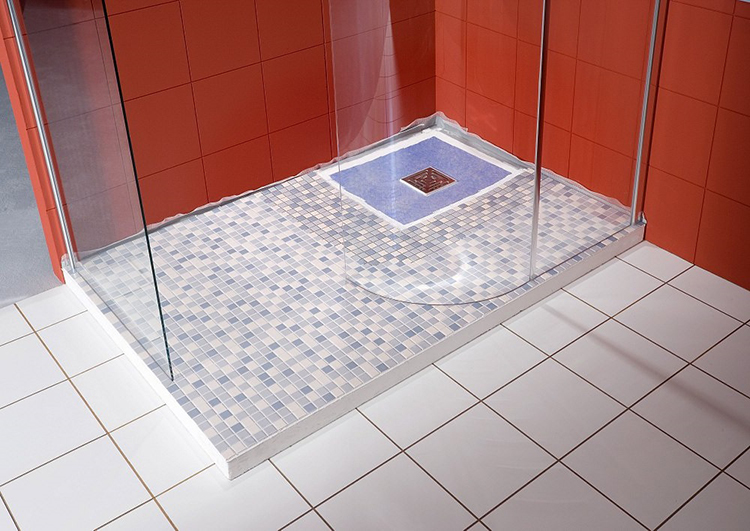
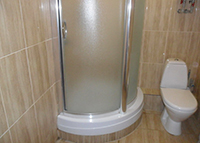
Now let's look at how to make a homemade shower tray. You can buy a ready-made shower tray - it can be easily installed in place, following the manufacturer's instructions. But a cabin equipped with a brick or concrete tray made by yourself can be called truly homemade. It can be given the most fantastic shape, and individual sizes can differ greatly from standard ones.
To build a brick pallet you will need:
- brick, sand and cement;
- waterproofing mixture and metal mesh;
- pan drain;
- self-leveling mixture;
- set of tools: trowel, plaster beacons, building level, paint brushes;
Be sure to purchase a tape measure, a drill and a mixer attachment.
It is more convenient to make the pallet before finishing the floor and walls. The waterproofing compound is applied three times: under the screed, on top of it and before facing.
Shower tray manufacturing process
To keep the shower floor warm, install a “Warm Floor” electrical system under the finishing screed. It can be placed not only under the pallet itself, but also around it.
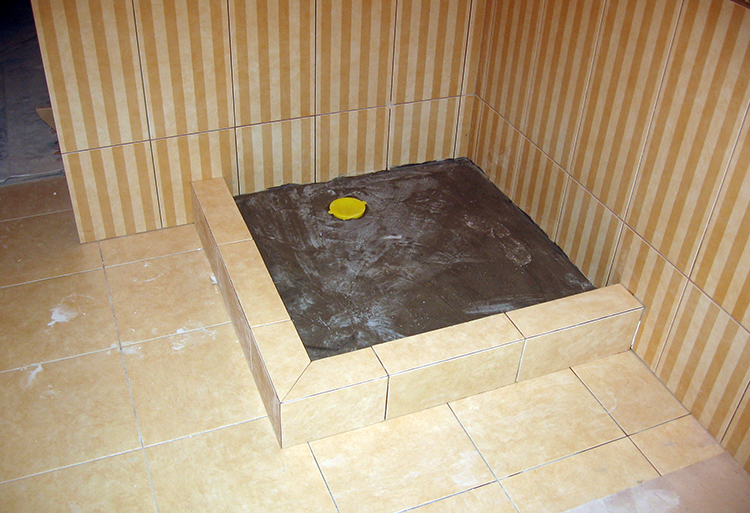
Once the waterproofing has dried, you can begin to form the pallet. You can use any brick for this – silicate or red. In order not to bother with preparing masonry mortar, you can buy a ready-made mixture.
To give the structure strength, a metal mesh is laid on the base.
Now we need to determine the location of the drain and install a drainage system to it.
Your next step will be a rough fill. But first, install construction beacons. Crushed stone can be added to the cement-sand mortar at this stage.
Since the pouring area is small, you can level its surface using a spatula or trowel. The dried screed is treated with a waterproofing mixture - it will not allow moisture to get into the deep layers of the mortar and the floor slab.
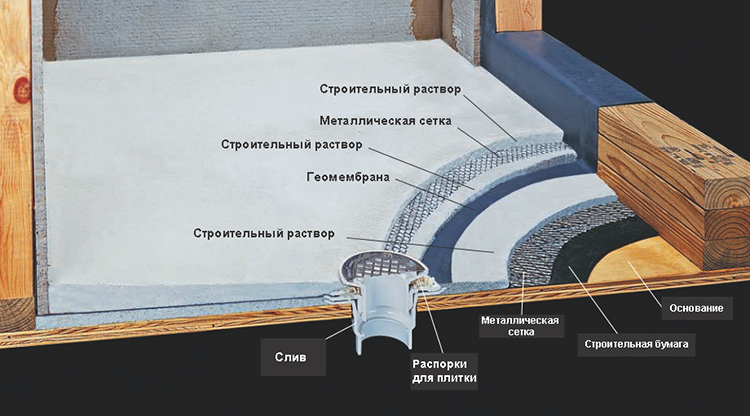
Installation diagram for shower tray and floor
- A self-leveling mixture is applied to the dried surface;
- a smooth depression is formed around the drain hole to remove obstacles in the path of drained water;
- After the mixture has dried, the final waterproofing layer is applied. Particular attention is paid to the junctions of the pallet with the walls and around the drain.
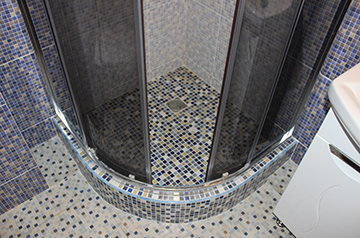
The finished structure is tiled with ceramic floor tiles. A mosaic finish can add special chic to the pallet.
Once the pan is completed, you will not have the opportunity to replace the drain. Therefore, initially choose a high quality product.
Connection to utilities
 Pipes for supplying water to the shower faucet are usually laid below - along the baseboard. But sometimes they are placed along the wall in grooves.
It is advisable to install a water purification filter in front of the mixer.
There are increased requirements for electrical connections to the shower stall. Therefore, it is better to place the wiring on the outside of the cabin.
If you plan to install an outlet in the immediate vicinity of the cabin, it must have an appropriate protection class against moisture and dust.
It is advisable to entrust the installation of the electrical part of the cabin to a professional electrician.
A warning for particularly self-confident home craftsmen: your lack of experience can negatively affect the health of your household, even leading to death.
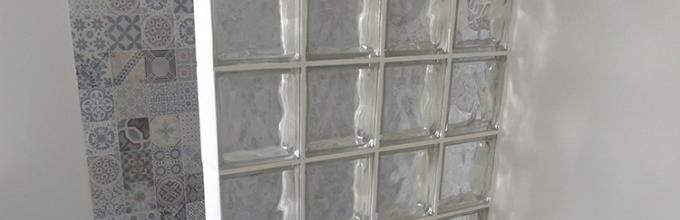
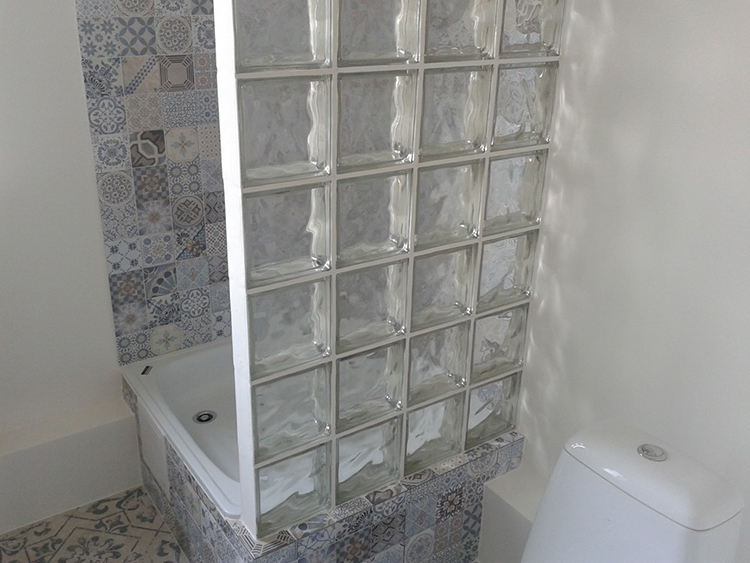
Making shower cabin walls
The manufacture of shower cabin walls begins after the final finishing of the main walls. The easiest way to make it is from plastic or fiberglass.
Polycarbonate is easy to process. With the help of simple devices it can be given any shape in the home workshop.
The profile for roller guides can be attached to permanent structures through finishing. The frame is filled with wall elements after installing the door frame.
If the walls are made of transparent material, you can save on local electric lighting of the cabin.
 Installing a shower cabin requires certain knowledge. You will find basic information in the following article. — stages of installation and configuration of equipment.
Let's consider options for installing a hygienic shower for a toilet.


