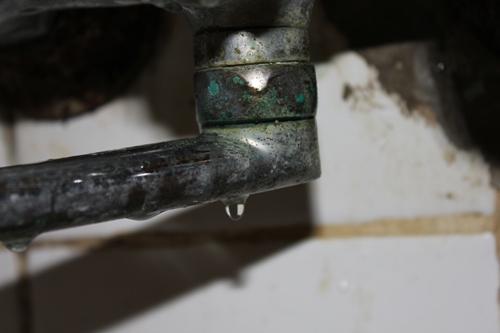
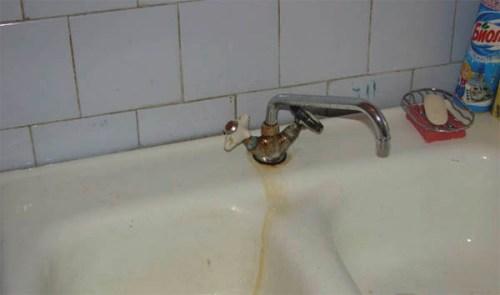
Are you familiar with the situation when you wake up in the middle of the night from strange sounds? In complete silence, a rhythmic “drip...drip...drip...” can be heard from the kitchen or bathroom. This means it’s time to repair the mixer, which you can do yourself with certain knowledge and skills.
My mind becomes clear: “Oh, the faucet is leaking again.” What to do? Well, what can you do here other than call a specialist? Or can you fix the problem yourself?
If you prefer the latter option, let’s look at how you can eliminate this problem without the services of a specialist.
There are three types of faucets. Two of them differ in the design of the axle box crane, and the third has a joystick crane configuration.
First of all, you need to figure out where the water is coming from. If you see water oozing from under the gander, then the gasket is to blame. To fix the problem, you need to turn off the water. Both hot and cold. How and where the water is shut off, of course, you already know without our advice. This is necessary in order to avoid showering while working.
Crane repair - “joystick”
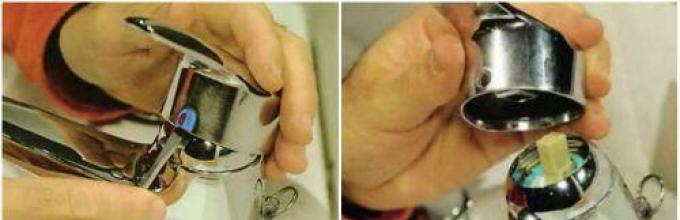
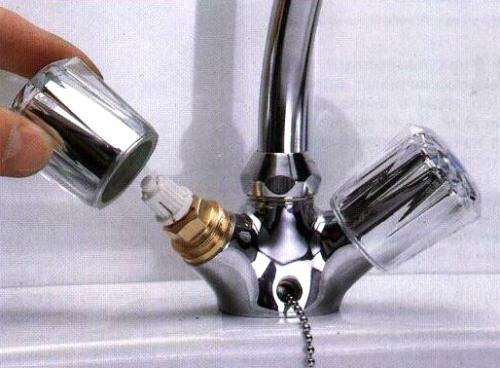
After making sure that the water is turned off, you need to remove the handle at the base of the joystick. Underneath there is a plug with two dots. Red and blue. She comes out. Underneath there is a screw that needs to be turned to the left three turns. Pull the handle up. She must come off. Sometimes, when there is oxide, or the tap has been leaking for a long time, the handle may be difficult to remove.
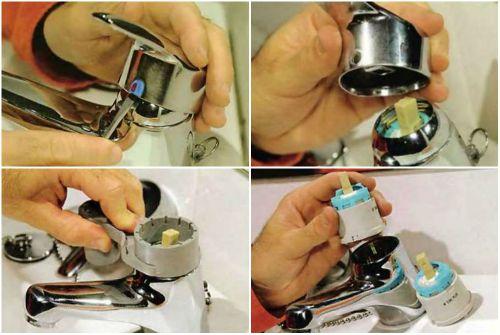
After removing the handle, you need to unscrew the decorative nut. Under it there is a nut that secures the mixer cartridge. Having unscrewed the latter, you can safely remove the cartridge and replace it with a new one, because it cannot be repaired. Install the new cartridge onto the mounting sockets, tighten it with a nut, but do not overdo it. Otherwise, it will work hard and quickly fail.
The same mixer can have different faucets. They can be either screw or semi-turn. They are interchangeable.
In order to remove the crankshaft, you need:
- A decorative plug (a circle with hot and cold water markings) is removed or unscrewed from the middle of the valve.
- The screw is unscrewed with a regular Phillips screwdriver.
- The valve is removed. In some faucets, you need to unscrew the decorative nut to get to the faucet, which is unscrewed with an adjustable wrench. If there is a black rubber gasket at the end of the latter, then only that can be replaced. If there is no black gasket at the end of the valve and white ceramic liners are visible, then it is better to change it completely.
- In some cases, it is advisable to use fum tape when tightening the crane box. But there is no special need for it, because... it contains rubber sealing rings - gaskets. Fum-tape may be necessary when the rubber sealing gasket is not new. After winding 6-8 turns of tape onto the thread of the faucet, you can screw it into place. Fum is not used on ceramic half-turn faucets.
- We assemble the crane. The valve must be tightened securely, but “without fanaticism.”
If it flows from under the gander, or rather, from under its fastening
If it flows from under the gander when the water is opened, but when the water is closed, then the water does not drip, you need to:
- Unscrew the decorative nut that secures the gander.
- Take out the gander.
- On the inside of the nut there is a sleeve with a hexagonal hole inside. It has two rubber gaskets (oil seals, rings). They need to be replaced. To do this, you can unscrew the bushing with a hexagon or try to replace them without disassembling this mechanism.
- If you manage to unscrew the bushing, you can wrap several turns of fum tape around the new seals to make them slide better in the mixer body. Here the Tangit thread is not used. It is used only on threaded connections.
- In order for the seals to last longer, you need to regularly check the filter (the mesh at the end of the gander). It is unscrewed with an adjustable wrench. There are two to three layers of mesh. They need to be cleaned of scale and other debris, if any. If the filter is clogged, the pressure in the gander increases, which is why the turning mechanism of the gander may leak, because. it is not designed for increased main water pressure.
- Clean the gander seat from solid deposits of water and oxide in the body so that the inner surface of the walls is smooth. This is necessary for better sliding of the oil seals when turning the gander.
- Install the gooseneck into the seat by tightening the nut.
The cause of the leak in this case may be a defect or wear of the rubber ring - oil seal or wear of the tow (packing). The seal needs to be replaced and the packing re-wound. This can be done without removing the valve housing, just by removing the “wing” and the decorative nut.
You need to unscrew the nuts, check and, if necessary, replace the rubber gaskets, tighten them well. If the hose continues to leak, it must be replaced with a new one.
If water oozes from under the base of the faucet, you may be unlucky and the plumber did not install the faucet properly. To eliminate the leak, you need to unscrew the eccentrics using an adjustable wrench and, winding a “fum” tape or a “Tangit” thread around them, screw them back. A layer of silicone sealant will not be superfluous either.
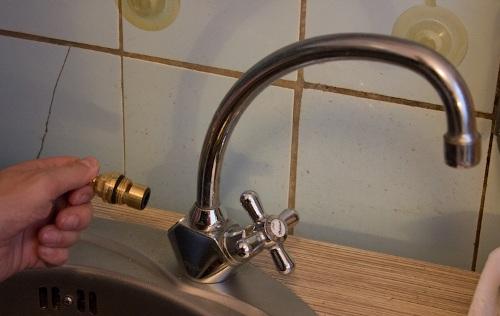
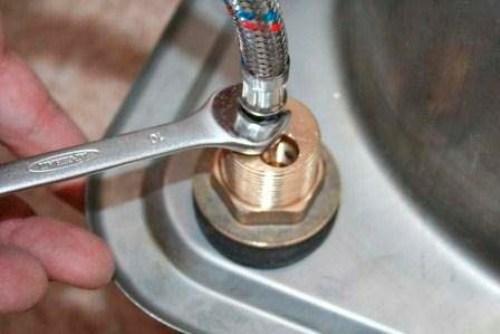
Modern taps are connected to the water supply using a flexible hose. It wouldn't hurt to check it from time to time. It is advisable to change it every three years.
If any complications arise, contact a professional. They will always come to the rescue.


