Sometimes a mistake is made - instead of buying a product for the kitchen, one that is suitable for the bathroom sink. The kitchen faucet always has a high swivel spout, and the water stream from the nozzle is directed perpendicular to the bottom of the sink.
In accordance with the laws of ergonomics, the most suitable option would be a ball mixer, which allows you to open and regulate the temperature of the water with almost one finger. Mixer bodies are made mainly of brass and simulin, coated with chrome or enamel.
On a note. A faucet made of brass is more expensive, but its service life is longer than similar products made of simulin.
Of course, in order to install the faucet, you can invite a plumber, but it is quite possible to do this work yourself if you have a minimum set of tools:
- Socket wrench and open-end wrench (10 and 11 mm).
- Open-end wrench (22 and 24 mm).
- Gas key.
- Adjustable wrench.
- Screwdriver.
Installing a new kitchen faucet on the sink will take no more than fifteen minutes, and if a replacement is made, the time spent will depend on the degree of corrosion at the joints.
Preparatory work
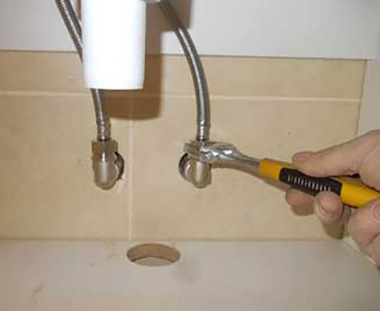
The first step is to block the access of cold and hot water to the mixer with valves, which are usually located in the riser area. Then you need to relieve the residual pressure by opening the mixer valves and disconnect the flexible hoses from the pipes with an adjustable wrench.
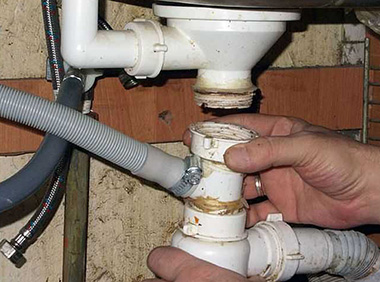
In order to remove the sink, you must first disconnect the sewer siphon by unscrewing the locking nut.
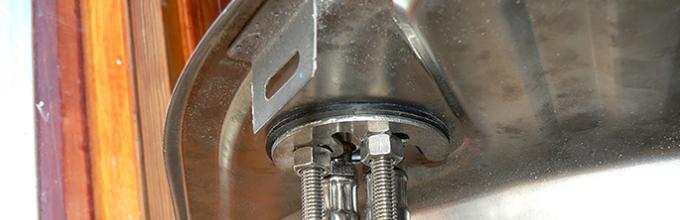
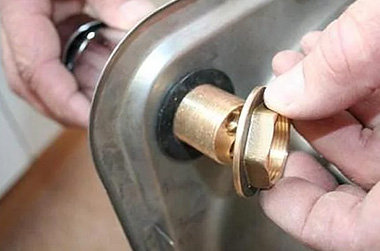
Next, you need to carefully remove the sink from the cabinet, first removing the fixing screws. The faucet can be attached to the sink with one large nut screwed onto the thread of the faucet. Or it can be held on by one or two threaded rods screwed into the body of the mixer and secured with one or two small nuts (through a horseshoe-shaped locking washer).
If the threaded connections are covered with corrosion or oxide, unscrewing them will be very problematic. You need to use WD-40 anti-corrosion lubricant, and if you don’t have one, you can use vinegar concentrate. You need to apply it to the threaded connections and after half an hour begin dismantling the mixer.
Advice. If the use of chemicals does not produce positive results, then the last option remains: carefully, so as not to damage the sink, cut off the nut with a grinder.
Faucet hoses
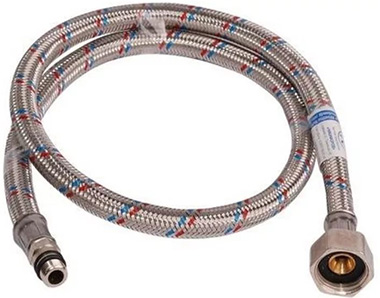
Important. You should not try to install used hoses, since over time the rubber loses its elasticity, small cracks appear that are not noticeable under the metal braid, and the product will not last long.
Mixer installation
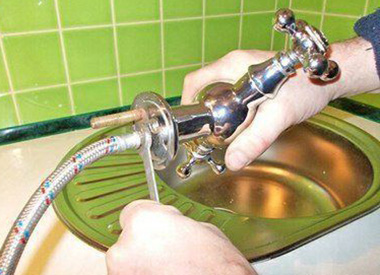
Before installing the faucet on the sink, you should carefully read the instructions in the package. This must be done for the reason that it was written specifically for this model, that is, some changes may be made. Assembly is carried out in the following order:
- First, flexible hoses are installed on the mixer, which are sequentially screwed in by hand along the threads until they stop, then tightened with a wrench about two turns.
Remember. There is no need to tighten the elements too much for the reason that the integrity of the rubber sealing ring can be damaged.
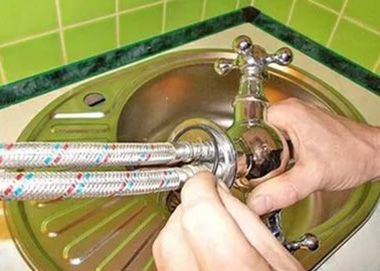
Then a large o-ring is installed on the mixer - the connection point with the sink; you just need to thread it through the hoses
The mixer prepared in this way is installed in the technological hole of the sink.
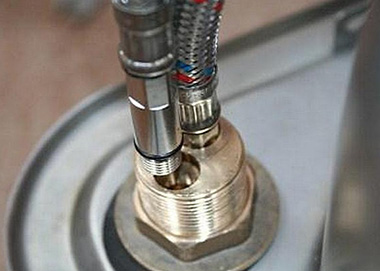
- First option. Fastening with one nut.
- Second option. Fastening with threaded rods.
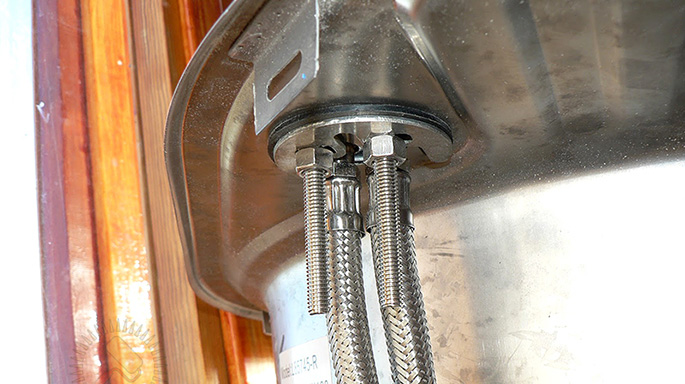
Mixer connection
The sink is installed in place and secured with screws.
Before connecting the mixer, the threaded connection of the pipes must be cleaned of rust and dirt with a wire brush. You should make sure that there is a rubber sealing ring in the seat.
Upon completion of work, all threaded connections are checked. It is necessary to open the shut-off valves first; in case of leakage, it is necessary to tighten the connection parts. If tightening the threaded connection does not solve the problem, the rubber gasket should be checked and replaced.
Warning. When connecting the hoses, you must remember that the cold water tap is on the right and the hot water tap is on the left. The handle of the ball mixer, turned to the right, opens cold water, and turned to the left, hot water.

You must carefully inspect the end of the threaded connection of the pipe for possible burrs that do not provide a tight fit to the rubber gasket. You can remove them using a file.


