The shower cabin is a source of high humidity. Wood, on the other hand, tends to deteriorate under the influence of moisture. Therefore, the following recommendations are relevant when installing a cabin in a wooden house. Read our article for instructions.
Features of installing a shower cabin in a wooden house
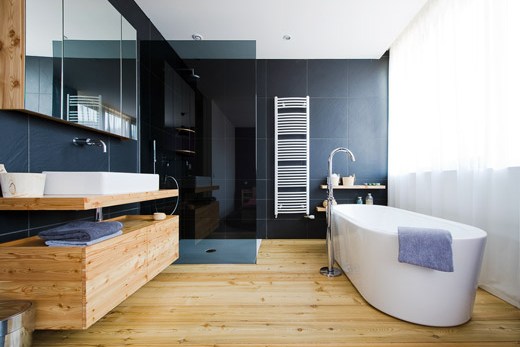
1. Sheathe the walls in the room where the shower cabin will be located with moisture-resistant drywall, tile the floors. Putty the gaps between the tiles, carefully seal them with a waterproof mortar. The same is possible with the use of glass mosaics, PVC panels, and any other waterproof finishing materials.
![]()
An example of installing a shower cabin in a wooden house: the wall near the cabin is protected by mosaic tiles
2.Install the shower cabin on a sheet of roofing material.
3. Provide room ventilation. The easiest option: 3-4 holes with an area of \u200b\u200bthe “palm oct” (1/8 of the area of \u200b\u200bthe palm) at the bottom of the wall of the room opposite from the shower cabin and 3-4 of the same holes in the wall above the shower cabin. Often, the side panels of the cabin are mounted with a gap from the pallet - so that there is an inflow of air into the cabin. But you should not get carried away with ventilation: a draft in the shower is a sure cold!
Do not forget to provide plugs or dampers for ventilation holes for winter time.
4. If there is no desire to mess with tiles, drywall, etc., just thoroughly soak the logs / boards with drying oil.
5. The best option is lining from larch lining. Larch is not afraid of moisture. All Venice stands on piles of Russian larch. Of course, it will be expensive: sq. a meter of larch sheathing will cost more than 1 thousand rubles. But good!
Sheathing of the floor and furniture with larch in the bathroom
Options for non-standard installation of a shower tray
For most modern showers, trays are made of acrylic (see article) with steel reinforcement. The legs for the pallets are positioned so that the load is transferred to the reinforcement, and not to the acrylic. Therefore, any attempt to shift the support points, put the pallet on some "stumps", "pegs", "columns" will only lead to the fact that the pallet will break.
Drawing a template for constructing a podium for a shower cabin
And, of course, they give more scope for the imagination of craftsmen.
In addition, sometimes it becomes necessary to raise the pallet for purely practical reasons. For example, to ensure the drainage of water. Or you got a shower cabin without legs (such designs are commercially available) and you need space under the siphon tray. Then the shower cabin is placed on the podium (pedestal). There is nothing particularly complicated about this.
Installation of a shower cabin on the podium
1.Determine how much you need to raise the shower cabin above the floor. The choice of material for the podium depends on this. In order for the pallet, for example, to be 15 cm above the floor, then you need to make a podium two bricks high. If 20 cm, then from foam concrete blocks 10 cm thick. 30 cm - from foam concrete blocks 15 cm thick (two such foam blocks are approximately equal to four bricks).
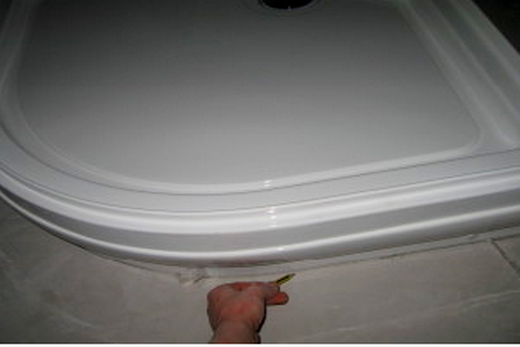
2. Place the shower tray on a sheet of plywood (gypsum board) and outline it with a pencil. Cut out the resulting figure with a jigsaw. This will be the template.
3. Lay the template on the floor. Place bricks (foam blocks) on it. On bricks that protrude beyond the template, mark the areas to be cut.
4. It is better to model a brick at home using a felt wheel with an abrasive coating. It can be attached to a conventional knife sharpening machine. It will take a long time to file the bricks, but it will be done carefully. In principle, the same can be done with the help of an ordinary emery wheel, but every second brick will go into marriage. The easiest option is to beat off the corners of the bricks with a trowel. But it will be rough work.
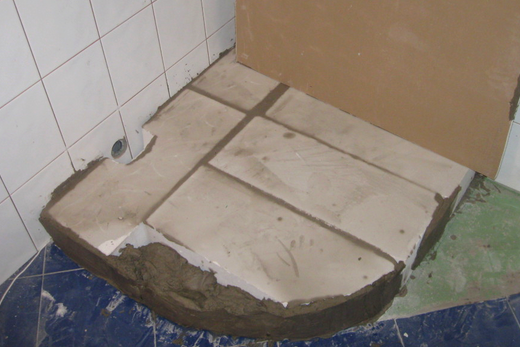
The brick is laid according to the pattern and filled with mortar. You can see the drain hole
5. If the drain pipe from the shower cabin will pass through the podium, then try to lay out the bricks so that the passage for this pipe falls on the junction of four bricks. Then, cutting off the corners of these four bricks, you will get a hole for the sewer.
Making a hole in a solid brick at home is simply impossible. If a siphon and a pipe going to the sewer should be located inside the podium, then provide recesses for them.
By the way, in order not to get confused with the location of the bricks, number them.
6. Place the template on the floor where the shower stall will be. Outline it with chalk. Then remove the template and lay out the bricks in its place - so that the contour of the masonry coincides with the line drawn in chalk on the floor.
7.Fill the gaps between the bricks with cement mortar. With the same solution, straighten the places of brickwork that recede from the template.
8. In principle, the podium is ready. For aesthetics, you can tile it or cover it with a continuation of the “skirt” of the pallet. And install a shower.
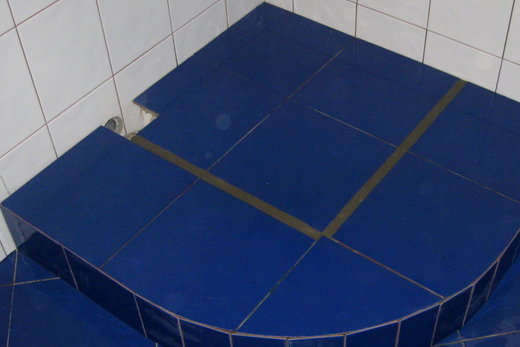
The podium is tiled and ready for the installation of a shower cabin
Installation of a shower cabin on bricks (bars, "stumps")
If the shower tray along the upper edge has flanges bent horizontally outwards, plus the pallet is made of steel or cast iron, then a Russian person has an inescapable desire to install a pallet based on this collar. Or on any other area of the pallet surface that is not intended for this.
There are a great many ways. Someone lays out a “skirt” of bricks around the perimeter of the pallet. Someone adjusts the posts or beams and places the pallet on top of them.
Most often, these activities are carried out by eye and on a whim. But the starting point for starting work is the above-described technology for installing a pallet on a podium using a plywood template, only the podium in the new case is made hollow and somewhat larger in size of the pallet, and the inner bricks of its walls are adjusted according to the template.
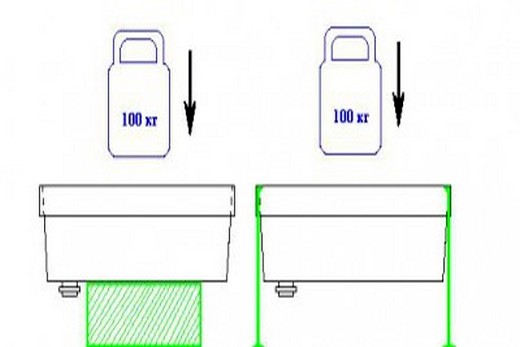
The weight in this picture depicts the person who came up with the illustrated ways to mount the shower tray.
We want to warn you - if the pallet is really steel or cast iron, and there is cement mortar between its collar and brickwork, then in six months it will gnash terribly with any movement of a person in the shower cabin. The reason is simple: the cement will crumble a little, the sand used as a filler under the pressure of steel / cast iron will be crushed, rubbed into powder, and the sound is terrible.
How to put a shower in a private house on a wooden floor
In rural houses, dachas, cottages, the floors are covered with boards, often no more than 4 cm thick. The mass of a shower cabin with a person inside is about 300 kg, and the strength of such a floor covering may be insufficient.
Therefore, it is necessary to place the cabin with support on the load-bearing beams of the flooring (or put it on the floor sections above such beams). As a cardinal measure, arrange a cement screed under the cabin pallet with support on the foundation of the house or on the main basement floor.
How to do it? We present a generalized methodology.
Screed device for a shower cabin on metal supports in a house with a basement
1. Outline with chalk on the floor of the basement the projection of the shower tray where it will stand. Cut the same hole in the floor boards of the room above the basement.
2. Get four steel pipes with a diameter of at least 5 cm and calibrate them in length - so that when installed with one end on the basement floor, the second end of the pipe is flush with the floor of that room on the first floor where the shower cabin will be.
3. At the corners of the drawing on the floor, put a formwork with a height of at least 70 cm. The formwork here is a box knocked together from boards (plywood assembled from metal sheets) without a bottom and a lid. Its dimensions are approximately 12 cm from the side of the box to the pipe installed in the center of this box. If the pallet is small, and you have a lot of cement, then make a formwork common to all four pipes.
4. Install and fix all four pipes in the formwork. The easiest way is to simply hold them vertically with your hands, although you can reinforce them with slats. Fill the formwork with cement mortar.
5. You have cement elevations, from which pipes stick out vertically to the floor of the first floor. After the cement has hardened, weld a steel sheet with a thickness of at least a centimeter ("finger") to the tops of the pipes. Weld steel strips to the sides of this sheet - to get a metal box open from above with a wall height of 3-5 cm. If the drain from the pan goes into the basement sewer, do not forget to make a hole in the pan for the drain pipe.
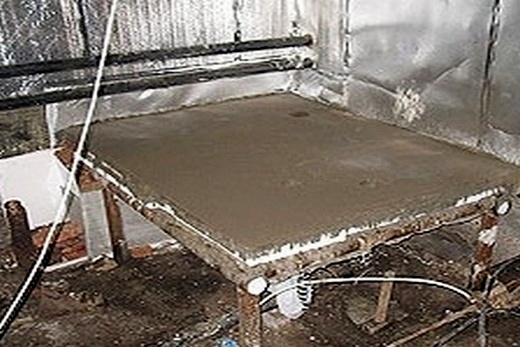
6. Put the pallet in the box and align it horizontally by tightening the threaded connections of the legs. Then fill this container with cement mortar. You have a platform with a screed for a shower cabin.
7. To make the structure stable, weld planks to the bottom, diverging horizontally to the nearest load-bearing beams of the floor covering. Screw these planks to the beams or floorboards from below, from the basement side. Thanks to this, the screed platform is guaranteed not to stagger from side to side. Fill the gap between the floor boards and the platform with mounting foam. Cover the entire structure with the “skirt” of the shower cabin.
8. If your basement is not cement, but an earthen floor, then first you will have to drive piles into it along the contour of the shower tray, then install formwork around them to attach the support pipes, and then proceed as described above.
Installation of a shower cabin without a pallet
In a country house or an individual cottage, where there is no threat to flood the neighbors from below, you can install. On the floor where the cabin will be installed, a screed is placed with a slope to the drain hole. Profiles for mounting the walls of the shower cabin are mounted in the screed, tiles are placed on top of the screed. Drainage of sewage is often imitated by a cement or zinc groove to the nearest bed.
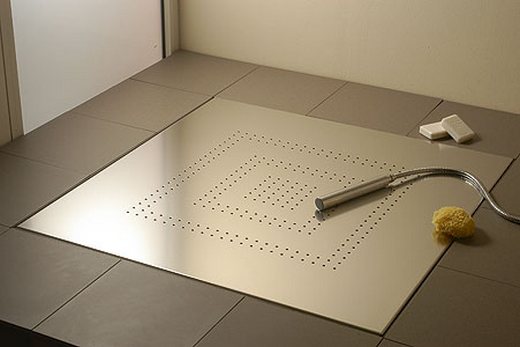
The floor is prepared for the installation of a shower cabin without a tray
It is better to insulate the floor of the shower cabin. A good option is to lay larch boards on top of the screed. And the feet do not freeze, and the legs do not slip, and it is beautiful, and does not rot!
About legal consequences
Isn't it a redevelopment of the dwelling, which must be coordinated with the supervisory authorities? Will they not be fined? Will they be evicted?
Your fears are not unfounded. According to paragraph 1.7.1 of the “Rules and norms for the technical operation of the housing stock”, approved by the Decree of the Gosstroy of the Russian Federation dated September 27, 2003 No. 170, “... laying new or replacing existing inlet and outlet pipelines, electrical networks and devices for installing shower cabins, “jacuzzis”, high-powered washing machines and other new generation plumbing and household appliances” refers to “re-equipment of residential or non-residential premises” and requires approval.
Prepare an application for redevelopment, notarized copies of title documents for the room where the shower cabin is located, the technical passport of the room, the consent of all family members, permission from the body authorized to protect cultural heritage.
Probably, it will be possible to do without a redevelopment project carried out by a licensed construction and design organization. But you will have to make your own sketch of installing a shower cabin in the bathroom.
Failed to agree...
True, we are not aware of cases of court decisions on the illegal installation of shower cabins or “high-capacity washing machines”. There are no open sources and no coordination of such events with the Moscow Housing Inspectorate. It must be assumed that the citizens feel good in their illegal showers, and the law enforcement officers of the regiment have enough other worries. By the way, they can check you only with the permission of the court. Who also has a lot of work to do.


