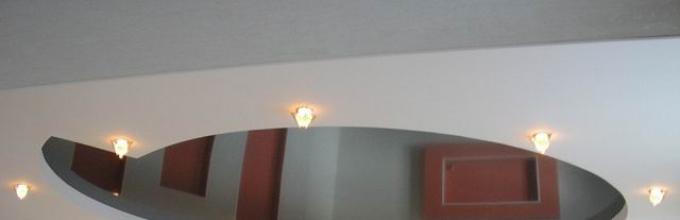
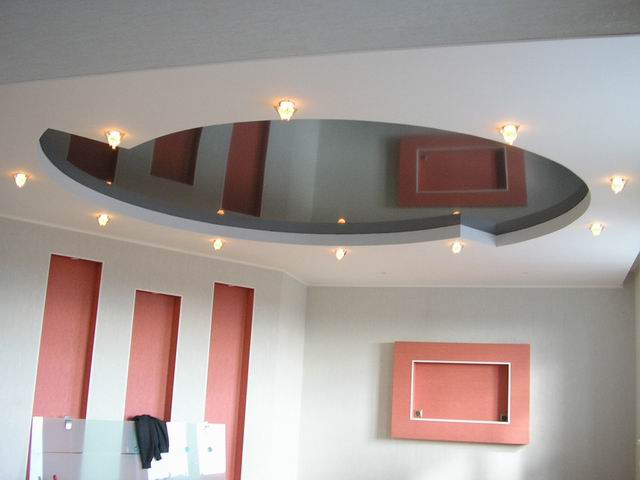
Now stretch PVC ceilings are in great demand, which are represented by a large variety of colors and at the same time a different structure of the canvases. But PVC fabric over the entire ceiling area is not as effective as installing a stretch ceiling to drywall, because, firstly, this creates a multi-level ceiling, and secondly, a play of light, color and shadow arises, which opens up a lot of space for design.
So combined ceilings are the most acceptable, besides, the combination of PVC with drywall will be cheaper than a solid vinyl sheet.
Combination of drywall with PVC ceilings. What can you do yourself?
Drywall frame
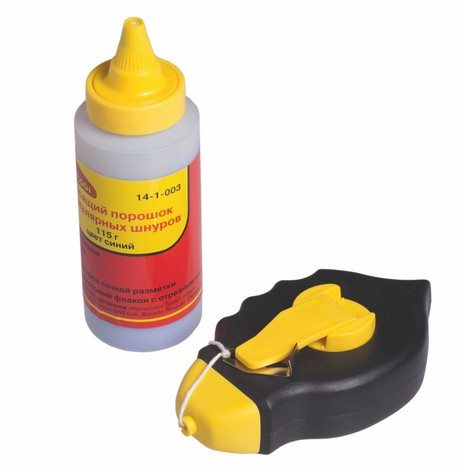
- Between the two marks, stretch the chocline thread and, pulling it, beat off the control line for a guide around the perimeter of the room.
- Now you need to determine what place and what size you will allocate to the stretch fabric, and draw a contour on the main ceiling, that is, make a ceiling design.
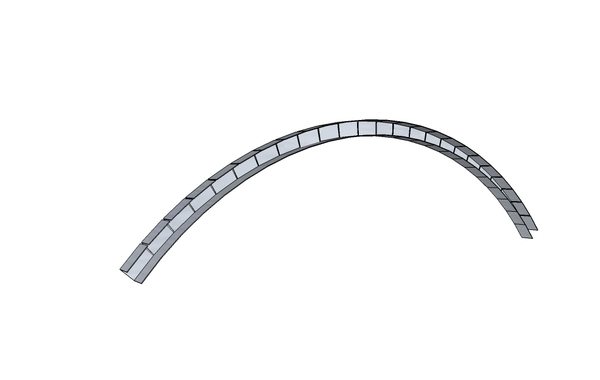
- Now you need to screw the UD profile to the main ceiling along the drawn contour.. To do this, the profile must be cut after 5 cm from the sides of the bend and screwed to the ceiling along the contour line.
You also need to screw the UD profile to the wall, in places where there will be drywall.
- Stretch a nylon thread under the future plasterboard ceiling. Fix this thread on self-tapping screws, which, in turn, are screwed from below into the UD wall profiles.
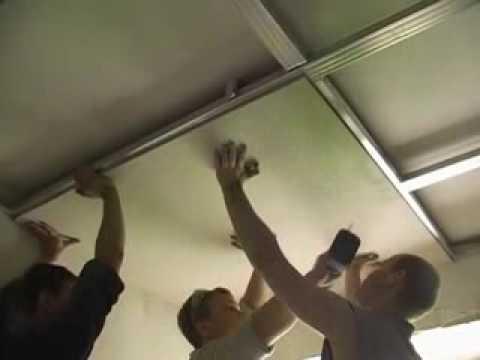
- The next step in order to combine two types of ceiling is to install CD profiles on a horizontal plane on suspensions.
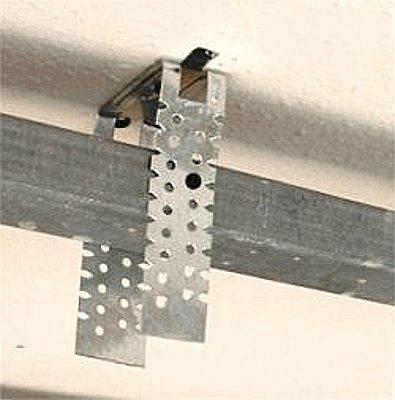
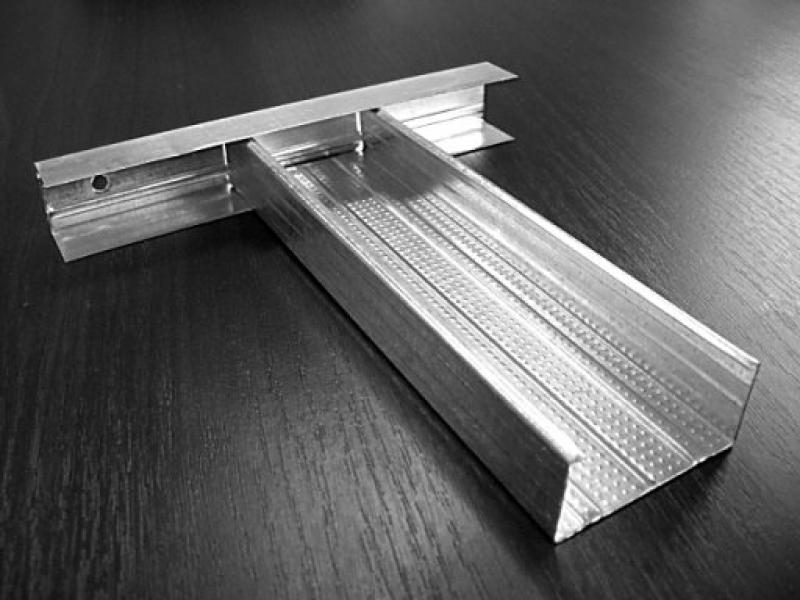
- The CD profile must be inserted into the UD profile and reach a virtual bend (on the main ceiling, the bend is already fixed by the UD profile), being fixed on the U-shaped hangers. Profiles are leveled by thread.
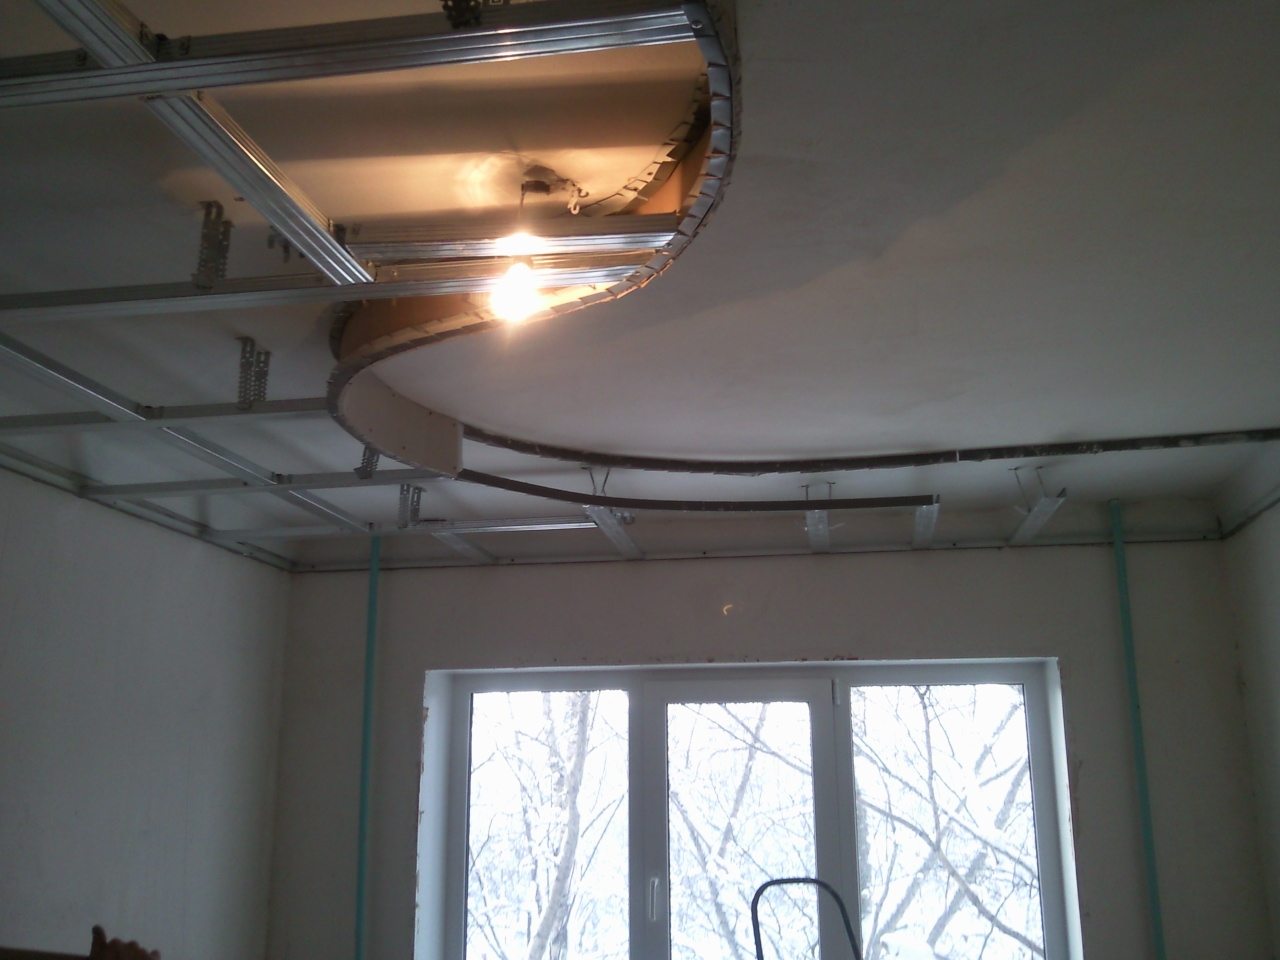
- Cut another UD profile and put it on the cut ends of the CD profiles. Now all you have to do is connect the two cut UD profiles (top and bottom) vertically.
- To connect the profiles vertically, cut off pieces of the CD profile and insert it at the top into the UD profile, and cut off the side jumpers at the bottom and screw it to the UD with the bottom plane. Now you need to sheathe the metal frame with drywall.
- Do not forget to make wiring for lighting and communication communications and hide these wires in a corrugated cable channel, attaching it to the ceiling.
Since you are making a combined ceiling, which includes both drywall and stretch ceiling, the wires must also be brought out to the stretch ceiling.
Advice. To screw profiles and hangers to the main ceiling, use a plastic dowel with a flare so that it does not fall into the voids of the concrete floor.
For this, a dowel-dummy with a diameter of 6 mm and a screw with a diameter of 4-5 mm are usually used.
Installation of drywall sheets

Advice. To screw self-tapping screws into drywall sheets, use a special nozzle for plasterboard.
The lampshade of the nozzle fixes the depth to which the screw is sunk, and the paper does not break through.
Plasterboard plastering
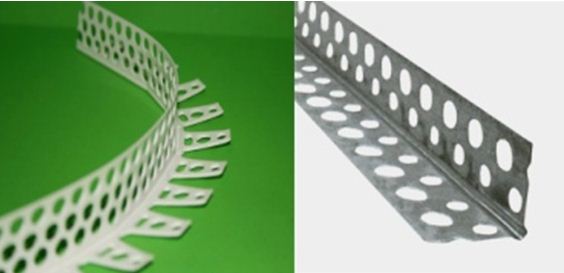
- Perforated corners should be screwed to the outer corners of the structure, to drywall, for a clear expression of the angle when puttying (see) (some of them are simply glued with putty).
- Prime the drywall and give it a few hours for the primer to dry. After that, you can putty and paint the plasterboard part of the ceiling.
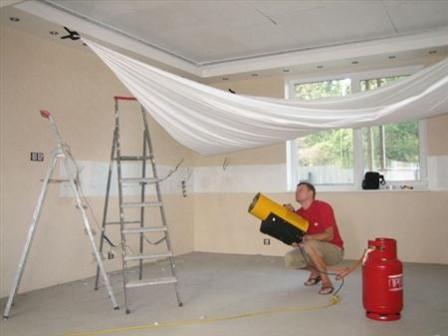
- The stretch ceiling itself should be installed upon completion of all work with drywall. For this, it is better to invite specialists. By the way, a vinyl sheet is mounted on plasterboard walls according to the same principle as on an additional level of plasterboard ceiling.
Conclusion
The combined ceiling creates an excellent combination of two materials with different structures. If we add to this the ability to manipulate color and shapes, then the possibilities for opening up are truly inexhaustible.


