The bathtub can be installed in several ways. With a tight connection of the bath to the walls, you will have to take care of sealing the junction. So that the seam between the bathroom and the wall does not let water through, you can use one of the well-known methods.
Solution use
Today, this method is a thing of the past, but some prefer to go the traditional way and not experiment in their apartment. Purchase the mixture at a hardware store. It’s easy to figure out how to cover up the seam between the bathroom and the wall. Experts advise using a mixture that contains white cement. The sequence of work is not as simple as it seems:
- First you need to close the gap so that the incoming solution is fixed in the seam, and does not fall down.
- The mixture is diluted as indicated on the package.
- To ensure a strong grip, it is necessary to moisten the wall, the side of the bath.
- When the sealing of the seam between the bathroom and the wall is completed, the dried cement must be decorated with fragments of tiles or other materials.
The use of mounting foam
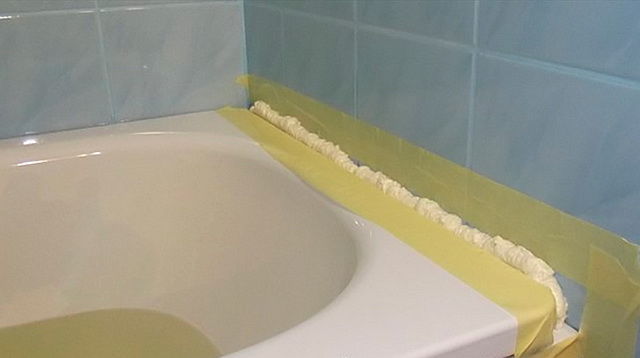
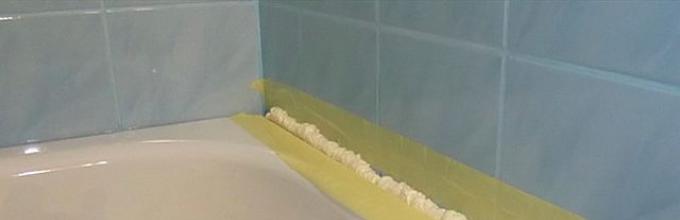
Commercially available modern materials are not as labor intensive as cement mortar. For example. Mounting foam generally requires a minimum of effort. Just buy the waterproof version. Ordinary foam is not designed for constant contact with moisture; its operation in a wet area will not be long. Recommendations on how to seal the seam between the bathtub and the wall with foam are given below:
- Tape the place of work with masking tape. It should cover the surrounding surface from foam splashes so as not to spoil the tile, bathtub, other items and finishing materials. Work is carried out with gloves: it is almost impossible to remove foam from hands.
- The joint is cleaned of dirt, moisture is removed.
- Shake the can vigorously and squeeze out the foam with a jet on the area of attachment of the bathtub to the wall.
- As the foam dries, it will expand. As a result, she will strongly act in different directions. You don't need to touch it until dry. But when it becomes dry, the excess is carefully cut off. The result is an even cut that can be styled according to the overall style of the bathroom. Experts advise using a decorative border, it looks aesthetically pleasing, closes the foamed seam from moisture.
Seal the seam with sealant
If it is difficult to make a choice in the store, you should ask the consultant how to seal the seam between the wall and the bathroom. The seller may advise the following:
- Silicone variety or silicone-acrylic.
- Sealant marked "Sanitary". These materials contain antibacterial components.
- An acrylic bath requires a neutral silicone sealant. The one where there is a mark "For acrylic" is also suitable.
- The color is chosen in accordance with your tastes and the color of the bath finish.
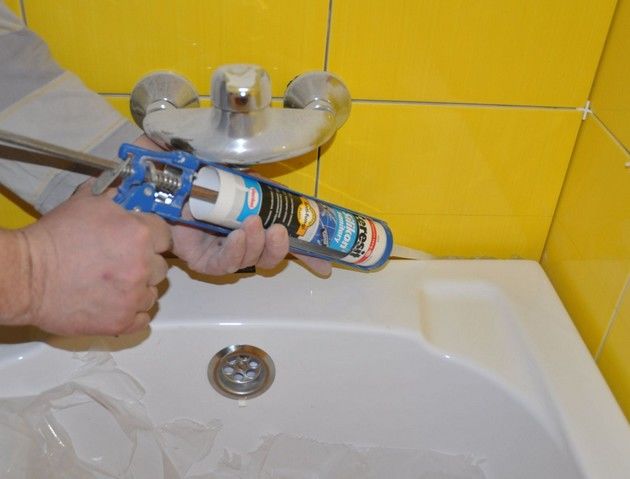
The sequence of actions when working with sealant:
- The surface must be degreased and cleaned.
- Install the sealant bottle in the mounting gun, remove the tip. The wider the tip is cut, the thicker the stream of material will be.
- Sealant must be squeezed out along the edge of the tub.
- To make the strip even, you need to run a finger dipped in soap over it.
- Such a sealing of the seam between the bathroom and the wall will dry for about 8-20 hours. The nuances associated with the technology of work can be viewed on the video.
Use of borders
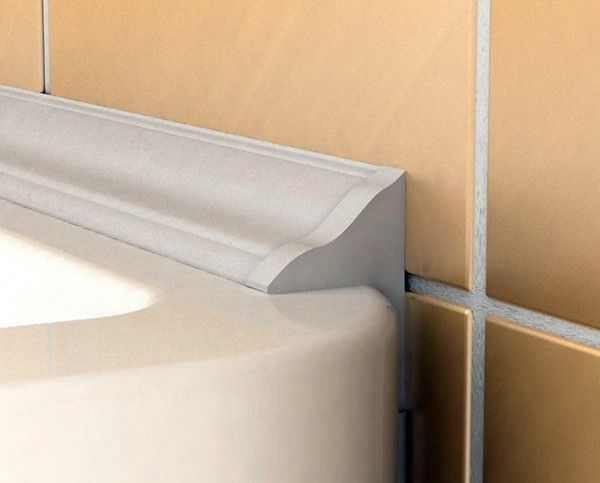
The most effective sealing of seams between the bathroom and the wall is borders, curb tape. The following options are available for sale:
- polyethylene tapes;
- acrylic borders;
- ceramic.
To stick the border tape, follow these recommendations:
- From the roll it is necessary to cut off fragments equal to the length of the wall + 2 cm;
- Glue the longest part first. Almost always, such tapes are self-adhesive, so you don’t have to worry about glue. To prevent the adhesive layer from drying out during work, it is necessary to remove the adhesive layer in stages.
- The glued tape is pressed tightly.
- To paste over the corner, you need to press the strip with a spatula and bend it. In this area, the tapes are overlapped.
Plastic border sticker goes like this:
- Cut off part of the plinth. The edge is cut at an angle of 45°.
- After cleaning the edges, the curb is put in place, it is pasted over with masking tape to protect the surrounding space from pollution.
- Then a transparent glue is applied to the back of the plinth in a continuous strip. How to do this, you can see in the photo.
- The border is installed, pressed.
- If voids remain somewhere, they are filled with sealant for waterproofing.


