- Preparing for the workflow
- Laying methods - nuances
- Trims - features of elements
- Corners - everything is quite simple
- Washed down the front part at an angle
- Trimming corner tiles
In construction, perfectly even right angles simply do not exist, any professional builder will confirm this. And if in geometry there is a theorem proving that the sum of all angles in a rectangle is 360 degrees, then it does not work in rectangular rooms.
Qualitatively designed corners that hide the flaws of the room are an indicator of the professionalism of the master tiler.
That is why laying tiles in the corners always causes certain difficulties not only for home craftsmen, but also for professional tilers. The only difference is that a novice craftsman theoretically knows one or two ways how to lay tiles in corners, and the master knows at least five such methods and is faced with a dilemma which one to use.
Preparing for the workflow
Just as there are no 90-degree angles, there are no even adjacent surfaces to form them. Before laying the tiles, it is imperative to lay out the lining, taking into account all the features and condition of the surfaces on which the tiles will be laid.
In apartments, as a rule, the kitchen, bathroom, toilet and, less often, the floor of the corridor or hallway are tiled. A glazed balcony or loggia can also be tiled both on the walls and as a floor covering. In all of these spaces, tilers encounter interior and exterior corners, niches under the central heating radiator window, and niches in the walls.
The outer corner is formed when facing window and door openings, the perimeter of niches.
All these nuances are taken into account when laying out tiles in rooms and rooms to be tiled.
The layout of the entire room and the final calculation of the amount of tile material and building mixtures required for laying, processing and grouting the tiles will depend on what kind of tile laying at the corners.
Back to index
Laying methods - nuances
First of all, it is necessary to find out by what methods the tiles are laid in the corners and which are applicable in specific cases. At the moment, the following ways of working with corners can be distinguished:
- laying corners with trims;
- installation on the outer corner of a special corner;
- laying butt-to-butt at an angle of 45 degrees along the front;
- laying with washed down ends;
- tile in the corner is laid joint to joint.
Tile masters divide these methods into easy and difficult to work with. But for such an assessment, you must first familiarize yourself with them in detail.
Back to index
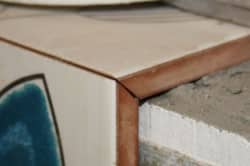
Trims - features of elements

Trim for the inner corner allows you to make a quality transition from one plane to another without cutting the tile.
Trims are decorative elements designed to complete the design of internal and external corners. They can be made from aluminium, plastic or metal. They have a wide variety of colors, which makes it easy to choose a trim for any color scheme of the cladding. In addition to corners, with the help of trims, transitions from one level to another are made, with a decrease or increase, joints of different types of facing tiles, reinforce deformation points and other problem areas of masonry.
Trims are structurally a profile, which in the section can be approximately taken as a right triangle. This conditional triangle is attached to the mating surfaces with legs, and the hypotenuse plays the role of a decoratively designed joint. The front part of the trim (its hypotenuse) can be either convex or concave.
One of the legs is attached with silicone to one of the mating surfaces on the already laid tile. The second leg includes a tile from another surface.
With the help of trims with a concave front part, they make the transition from the floor to the wall, when it is practically a plinth, and also make out the inner corner on the walls vertically.

External corner trim protects end tiles from chipping and hides corner irregularities.
The convex part of the trim decorates the outer corners. At the same time, at the outer corners, the trims additionally perform protective functions, preventing chips and other damage to the corner tiles.
The trims are selected both by the thickness of the tile and by the color scheme. The choice of material from which the trim is made will depend on the planned load on the section of the cladding on which it will be installed.
This method of sealing corners is the most aesthetic in terms of the final result of the work and can be used even by novice tilers. Experienced craftsmen have long mastered it and readily apply it.
The advantage of this method lies in the fact that there is no need to trim the tile completely, or the number of cuts is significantly minimized. From additional building materials, only silicone sealant appears for attaching trims, and from tools - a nail file for metal for cutting aluminum or metal profiles. The profile made of plastic can be cut with a knife.
Back to index
Corners - everything is quite simple
Corners are one of the varieties of trims, but much simpler in design. They have only one leg, and the hypotenuse always has a convex surface.
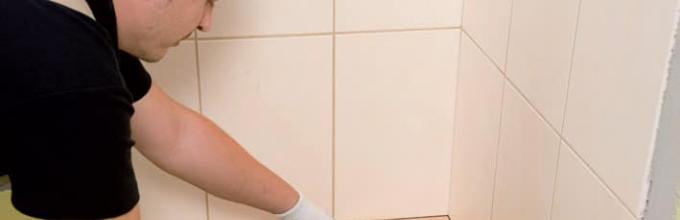
Corners are installed on the outer corners of the aisles, window and door openings. The corners are attached not to silicone sealant, but directly to the adhesive mixture under one of the vertical rows that fits the outer corner. A tile of an adjacent vertical row is brought to the corner "butt to butt".
It must be remembered that all external corners are made only with whole tiles. Although, of course, this is a matter of taste and requirements for the quality of the cladding put forward by the customer. But we must admit that the cuts on the outer corners look not only unprofessional, but also extremely unaesthetic.
Back to index
Washed down the front part at an angle
The most difficult way to lay tiles in the inner corners of the floor surface. It is used by experienced craftsmen, as well as in cases where the angles deviate greatly from the 90 degree mark.
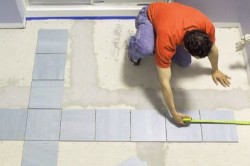
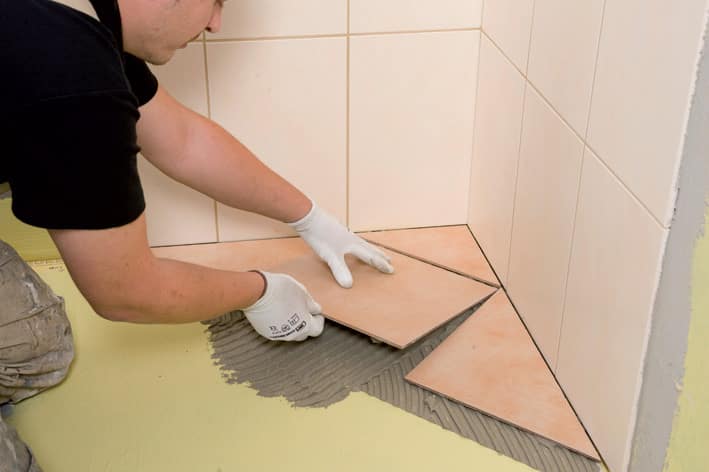
On the floor, tile laying work starts from the center to the corners.
With the classic layout of the tiles on the floor, whole tiles fit the walls and corners, leaving a gap for laying the trimmings. With this layout, a distance remains between the whole tile and the wall surface that is greater than the width of half the tile, so laying the trim is not difficult even for beginners. All cuts are rectangular in shape and, depending on the type and thickness of the tile, can be obtained either with a glass cutter or with a manual tile cutter.
The sequence of laying tiles on the floor surface is as follows.
- With a classic layout, the center of the floor is first determined and whole tiles begin to be laid from it to the walls. Having finished laying the whole tile, they begin to lay the cuts along the walls, while laying occurs until the penultimate cut in the inner corner.
- The last two cuts, which will form the corner, require cutting with a certain angle along one of the smaller sides of the rectangle. With an internal angle of 90 degrees, and such an angle can be obtained by leveling the walls with drywall sheets, trimming occurs at an angle of 45 degrees for both mating cuts.
As already noted, straight internal (and external too) corners are extremely rare, therefore, individual markings are made in each corner.
Washing down the corner of the end tiles is a complex process that requires high precision of the tool.
To do this, the cut is applied close to the corner and a line is drawn along the front side of the tile from the inner corner to the outer corner of the last whole corner tile. The same actions are carried out with another cut, but along another wall.
Cutting tiles with this method of laying corners is best with an electric tile cutter mounted on a stationary frame and with a diamond cutting roller. Then the cutting line will be even and not requiring additional processing.
However, such tile cutters are quite expensive, and their rent is also not cheap. With small volumes of trimming at an angle, you can use a manual tile cutter, but do the trimming with a small tolerance. The tolerance is necessary in order to align the cut line with a grinder and fit the edge of the tile to the masonry site.
When marking corner cuts or solid tiles, it is necessary to take into account the width of the tile joint so that it does not stand out among the row joints.


