In the process of wall tiling, inexperienced craftsmen often face the problem of laying tiles in the corners. Especially in the bathroom, since this is where such areas are an integral part of the interior. To create an even and neat angle, different approaches are used. Some require certain skills and special equipment, others can be used even by a beginner. Let's look at each option in more detail.
There are several ways to connect tiles in corners
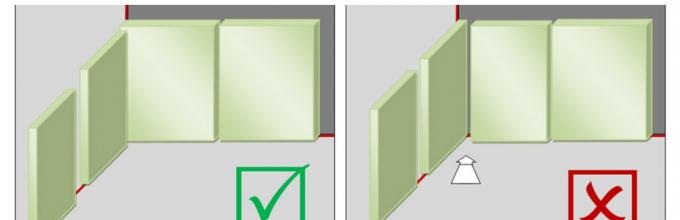
Perpendicular arrangement
The simplest solution to the issue is direct docking. In this case, the elements are laid perpendicular to each other, that is, so that one cut remains visible, and the other is hidden under the upper fragment.
In this case, a corner in any part of the walls is closed with minimal effort. If adjustment of the tile is necessary, it is advisable to place the cut edge under the bottom. The disadvantage of this method is the presence of a seam at the junction. Later it is sealed with grout, but this still affects the appearance of the surface.
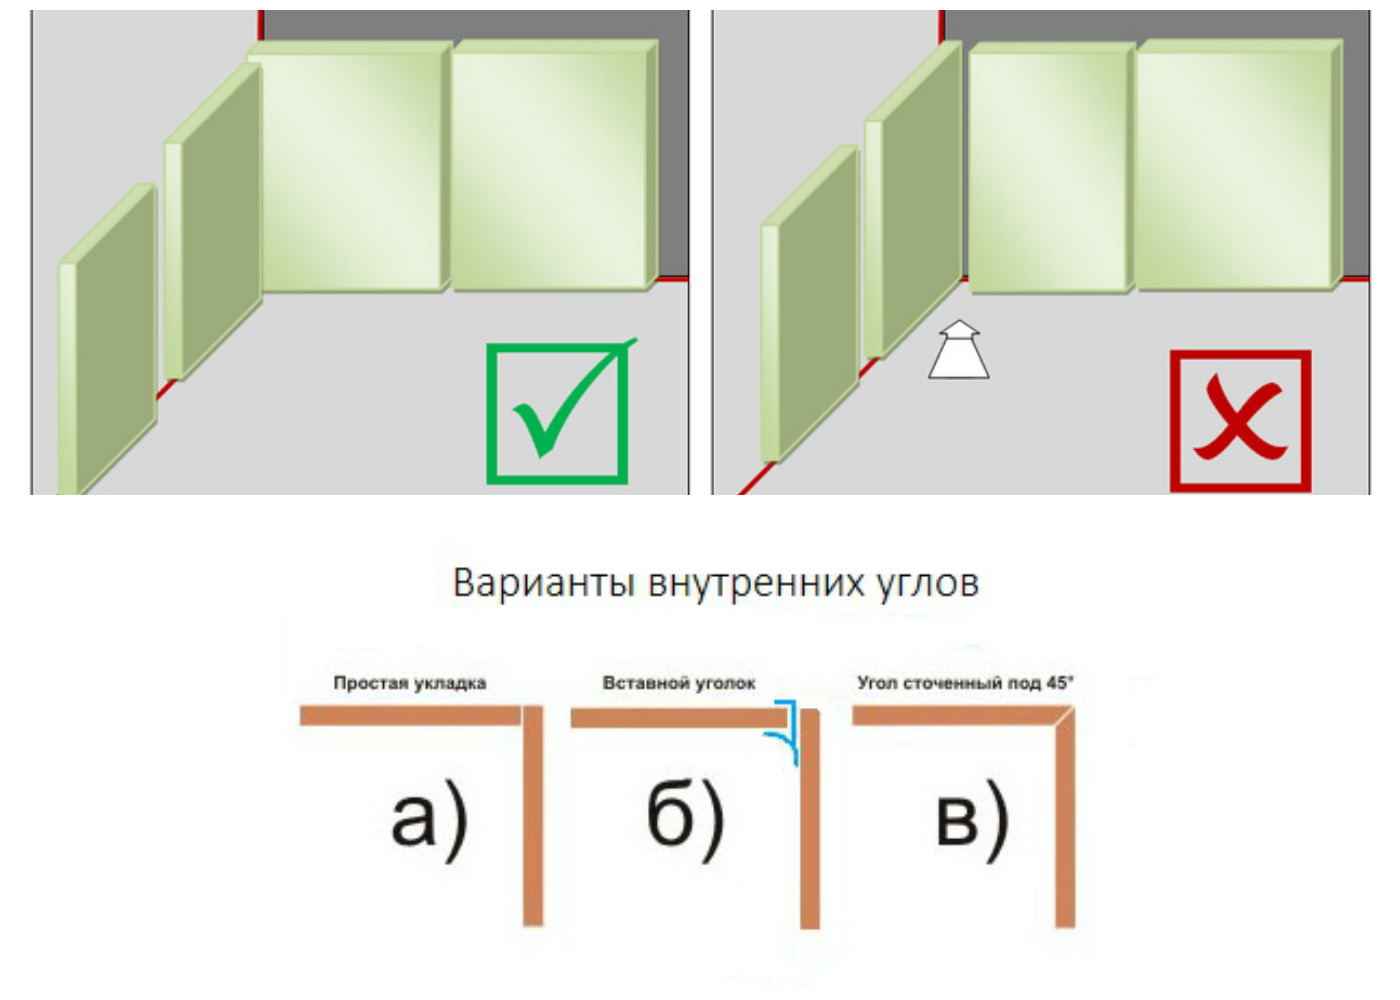
Options for laying tiles at internal joints
There is another way to join tiles perpendicularly in the corners. This method is suitable, for example, for finishing curbs or bathroom frames. The main condition is that the cladding should not be visible from below.
The essence of the method is as follows: it is necessary so that the horizontally located (top) tile hangs over the edge. The corner will turn out neat if the width of the canopy is within 3-5 mm. The only condition is that the edge must be solid.
Edge Trimming
For more accurate work you will need special equipment. The method is based on cutting the edge of the tile at 45 degrees. The task is performed in the following ways:
- grind the edge with a grinder;
- a tile cutter is used;
- sandpaper is used.
The best option is to process tiles with an electric tile cutter with an inclined bed.
How to lay such wall tiles? For this purpose, the tiles are cut and glued into the corner using mortar so that their edges coincide and form a solid covering.
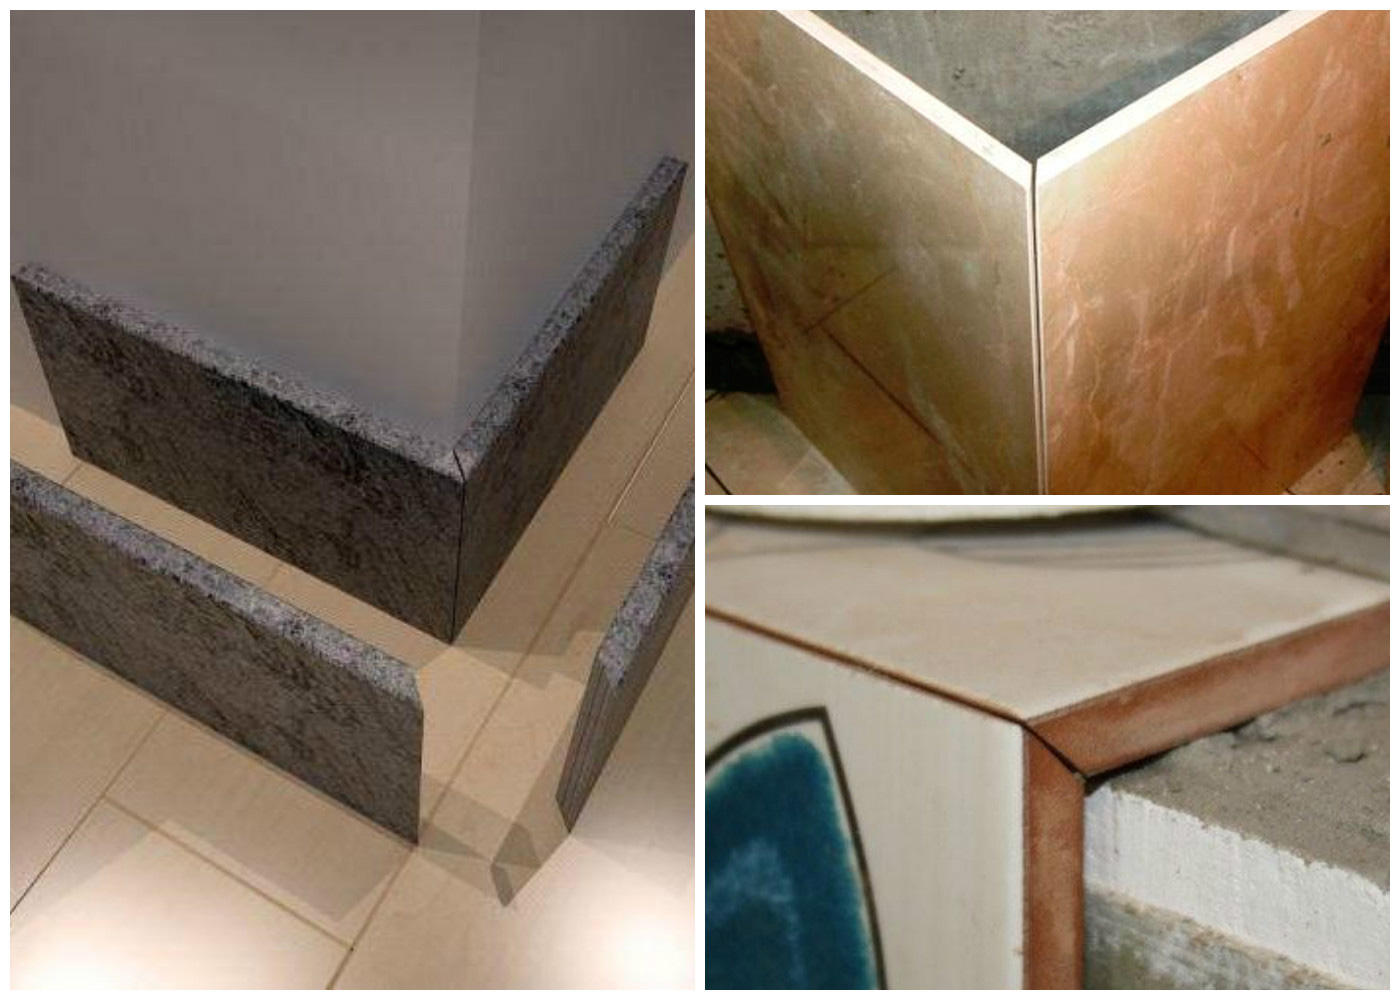
One way to lay tiles in internal and external corners is to trim the chamfer at 45 degrees.
For beginners, laying tiles in the bathroom using this method is not easy. If possible, practice on unnecessary material. Please ensure that the surface of the walls is as smooth as possible, otherwise it will be necessary to lay a layer of glue of different thicknesses, which will disrupt the position of adjacent elements.
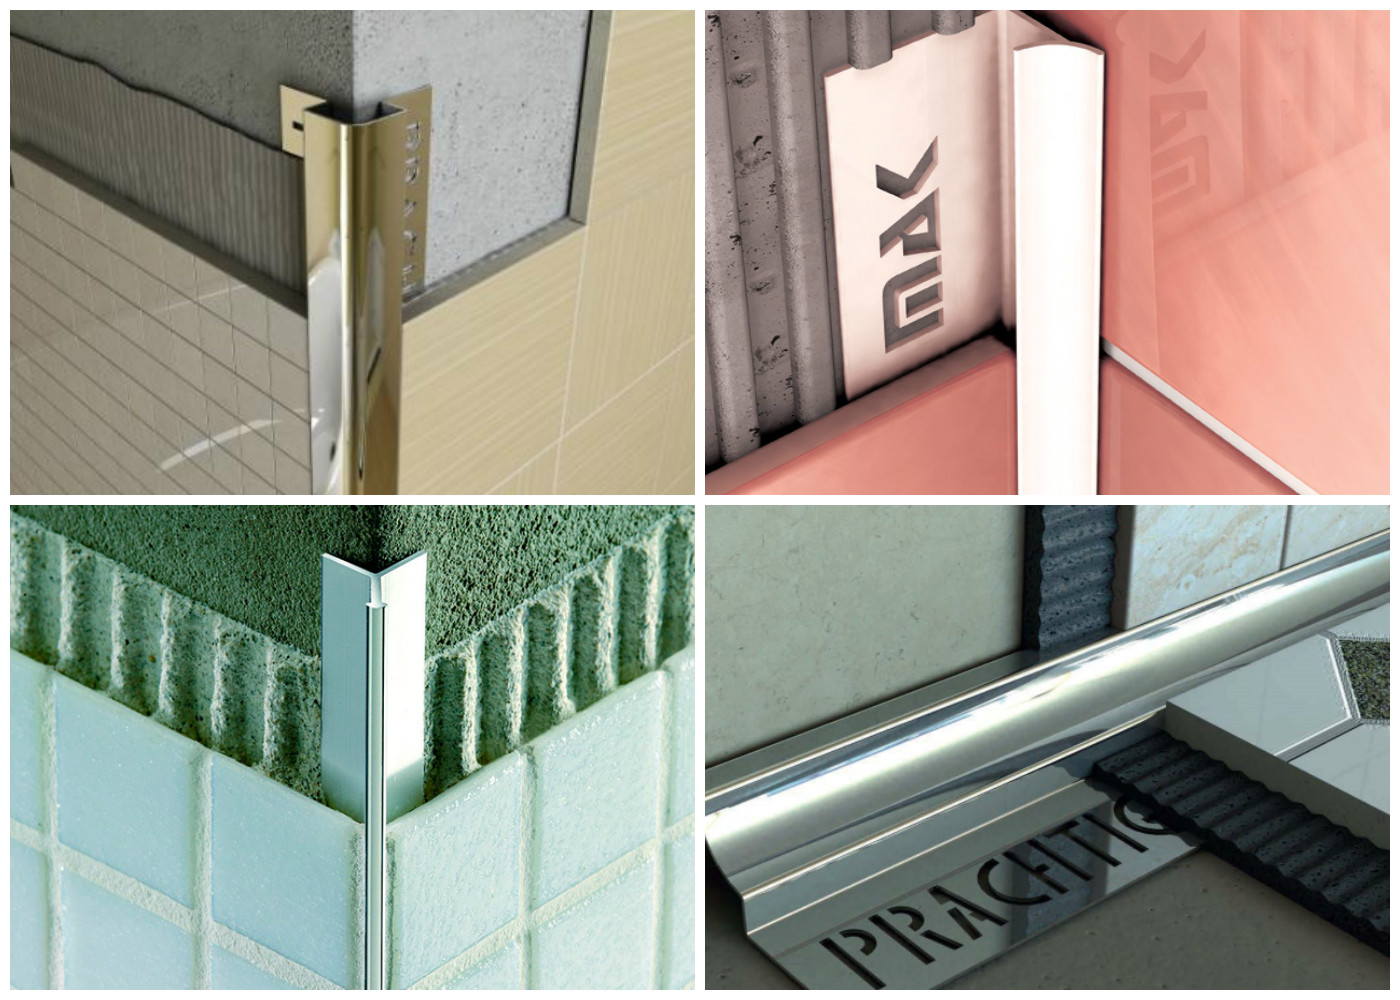
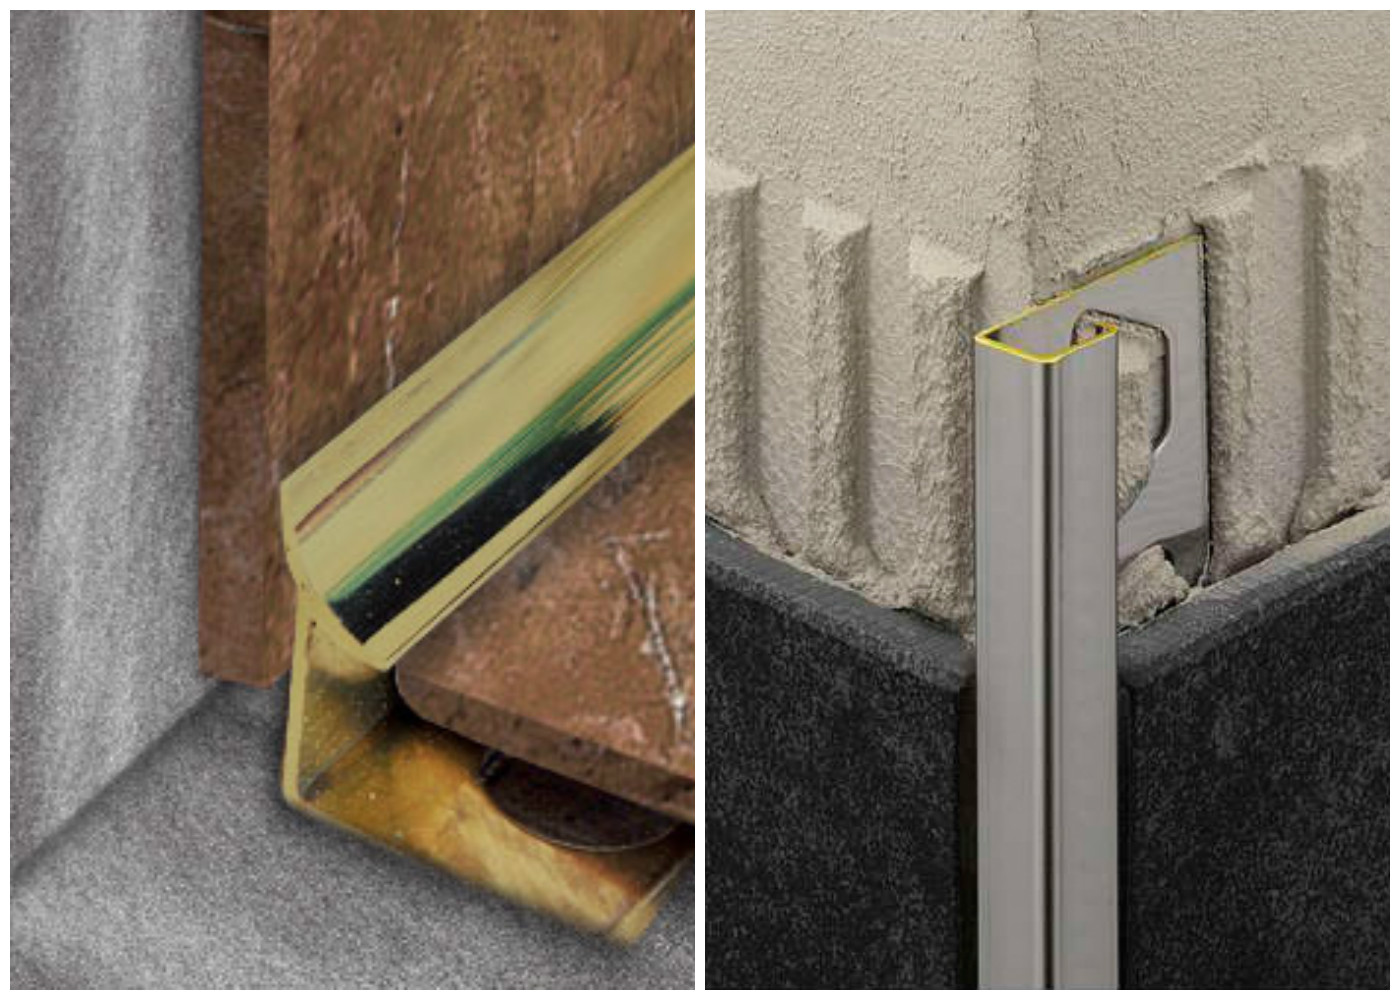
Using Trims
These are special inserts. The method using them is the most popular. They are a plastic profile that forms the angle of the desired direction. An L-shaped pad is used for external projections. And the inner surface has the appearance of a concave arc. Narrow convex models are also used.
One more important issue needs to be resolved - how to glue the plastic corner to the tile. Several options are possible:
- sealant;
- glue;
- liquid Nails.
Often, such trims have a special design that allows them to be laid on the solution. A special plate is driven under the tile and fixed with tile adhesive. This installation is extremely simple, the surface acquires a neat appearance, and the joints are protected from moisture and bacteria.
Some options for cladding inserts
The external plastic corner and trims at the junctions with the plumbing (curbs) are fixed differently, for example, using silicone or acrylic sealant. How exactly to glue the plastic to the tiles in the bathroom does not make much of a difference. This type of finishing of walls or corners of the box is suitable for almost any type of material.
Corner tiles
Another option for processing wall corners involves using tiles of a special format. Some manufacturers produce special corner elements. They look like two perpendicularly connected parts forming a right angle.
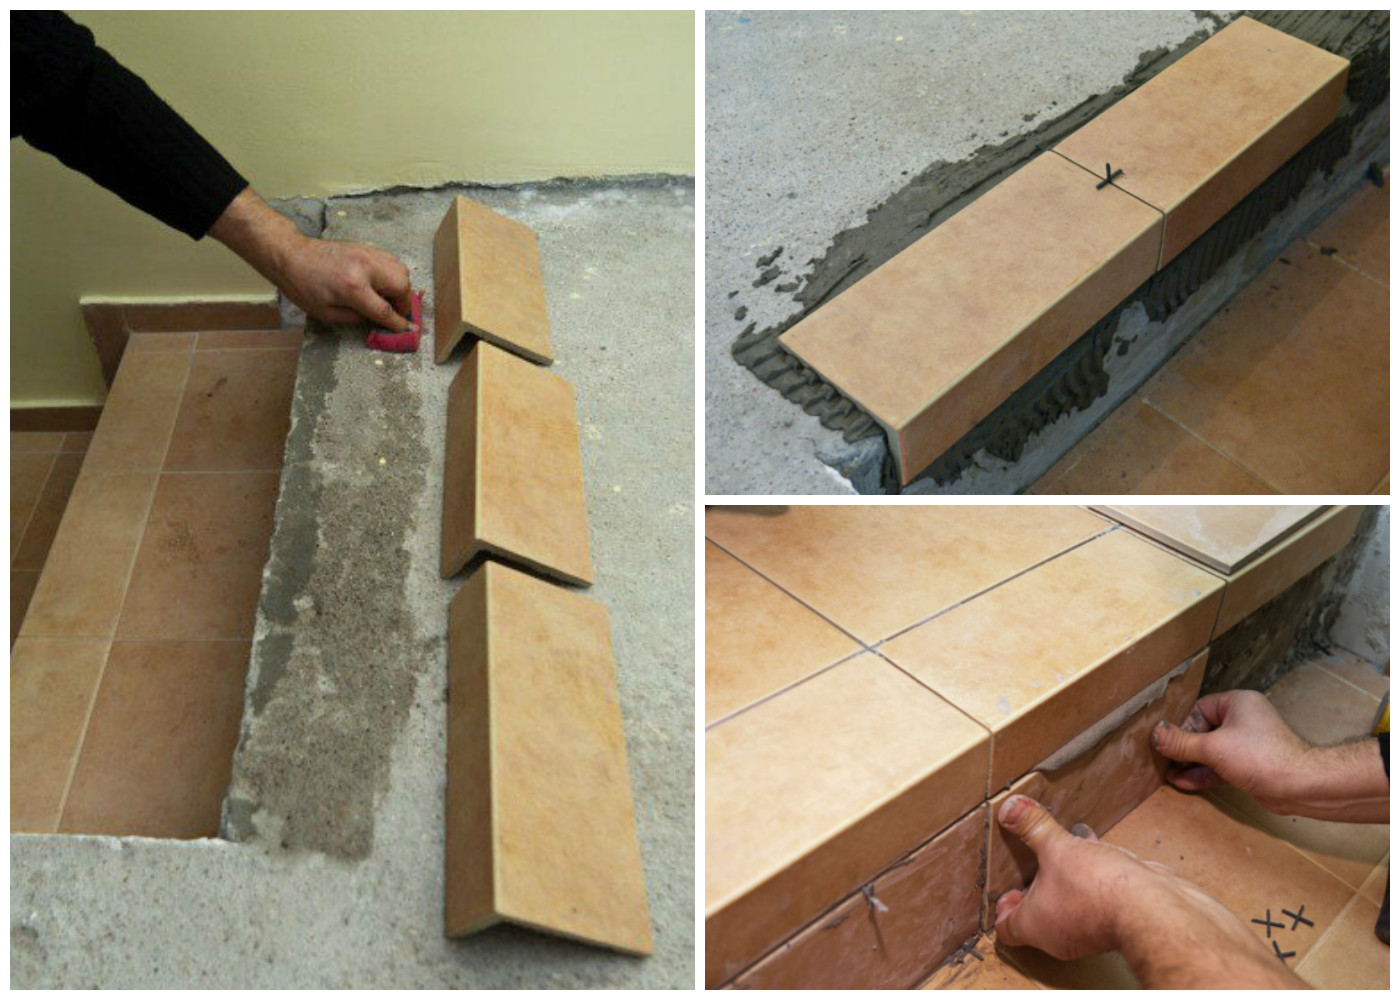
Finishing the steps
Laying such tiles is extremely simple. To glue it, use a solution, as for other finishes. If you use such a corner, laying is done in the direction away from it. However, this rule applies primarily to finishing borders in the bathroom.
Corner elements are an alternative to plastic. It allows you to maintain the integrity of the surface design of ceramic tiles.
Differences between external and internal corners
When carrying out work, remember the difference between internal and external elements. The first option is the space where the surfaces of two walls meet along the perimeter of a standard room. The second is a protruding area.
The most striking difference is demonstrated when installing plastic corners for tiles. Trims have fundamental differences from each other, depending on their purpose for a particular area.
Examples of designing corners using trims
Also keep in mind that it is easier to glue the internal trim tiles, because in case of deviation from the norms, the situation is corrected with the help of glue and grout. In general, the fugue looks more organic on the inner corners of the walls. In the bathroom this is of particular importance, because external projections, for example, when installing a box, are more susceptible to destruction. Over time, the fugue simply crumbles and is washed out from there. That is why it is better to lay an additional plastic corner on the tile, which will not only protect, but also decorate the surface.
Elimination of defects
It is not always possible to do the job flawlessly, especially for beginners. Nevertheless, it is possible to remove some shortcomings. If you cannot lay a corner with ceramic tiles evenly, try to compensate for the flaws with mortar, for example, by raising the adjacent element to the desired level.
When pruning, it is not always possible to achieve a slope of exactly 45 degrees. If not enough material is cut, the excess can be easily sanded down until you have a smooth angle.
Another point is the presence of defects at the junction. There are two options to fix the problem. The first is that installation is carried out in the prescribed manner, and chips and gaps are covered with grout during the decorative finishing process. The second option is that after the mortar and fugue have dried, a plastic profile is glued to the corner to mask these wall defects. Its installation is done using silicone or liquid nails.
Finishing corners is not an easy job, but it can be done if you follow the tips presented above.


