
Comfortable air temperature inside residential premises provide a variety of heating systems. The basis of the overwhelming majority of heating concepts make up special heat transfer devices, in everyday life called batteries. Their installation can be carried out personally, if you know the nuances of work.
We have collected and systematized all the information about the options and methods of connection. Taking into account our recommendations, the installation of heating batteries will be carried out without the slightest difficulties. Without problems with her, all readers will be cited by our article.
Detailed description of options and connecting technologies is supplemented visual schemes, photo selection, video instructions.
To understand which batteries are needed, initial knowledge of the modes and conditions of the heating devices will help.
Below is the conducive sets information about the important parameters of the heating systems when choosing batteries:
1. Internally pressure. The value required for the competent choice of the instrument capable of withstanding the pressure in the heating circuit:
- Private house (autonomous) \u003d 1.5-2 atm.
- Private house (centralized) \u003d 2-4 atm.
- 5-storey house (centralized and autonomous) \u003d 2-4 atm.
- 9-storey house (centralized and autonomous) \u003d 5-7 atm.
- House over 9 floors (autonomous) \u003d 5-7 atm.
- House over 9 floors (centralized) \u003d 7-10 atm.
If a technical capabilities Batteries are lower, there is a possibility of depressurization of the device with other negative consequences.
2. Permissible temperature Heating. Characteristic, denoting the upper temperature limit, when the battery is exceeded, may fail:
- Autonomous \u003d up to 90 ° C.
- Centralized with plastic wiring \u003d up to 90 ° C.
- Centralized with steel wiring \u003d up to 95⁰s.
Operation with violation temperature mode leads to plating seals, strain and loss of tightness of the device.
3. The degree of contamination of the coolant.The parameter of which is most commonly owned by the owners and water supply:
- Autonomous Private House \u003d High, Middle, Low When installing filters.
- Autonomous multi-storey house \u003d high, medium, title when installing a filter system.
- Centralized \u003d low, in rare cases average.
Water supplied by centralized networks into the utility systems of heating undergoes comprehensive cleaning. The content of sand and clay suspension in the water produced from private wells, wells, open sources may exceed the allowable limit.
Traditional battery installation sites
For further selection of battery designs, it is required to determine the points. Place them in places of the greatest penetration of the cold. So come to minimize the effect of drafts on the microclimate of the premises. They are still focusing to guarantee accessibility to periodically.
Battery mounted on the bottom create a heat curtain in rooms with panoramic windows, for example, on verandahs
Battery location zones:
- Window niches. The most common location of heating devices.
- Extended interconnect spaces. One of the popular additional options.
- Corners and "blind" walls of angular rooms. It is used to enhance the heating of rooms with increased heat loss due to the intensive impact of winds.
- Bathrooms, pantry, bathrooms, one or two sides of which are combined with a capital carrier wall.
- Unheated entrances, hallways of private houses.
- Apartment corridors of the first floors of high-rise buildings.
Modern performances of heating devices fit under balcony door or entrance to the loggia.
An example of the location of heating radiators in the same house:
Gallery of images
The most popular and rational arrangement of the heating radiator - under the window, behind the protective decorative screen
If the location under the window is busy, you can suspend the radiator to the adjacent wall in the immediate vicinity of the window
An ordinary heating radiator with difficulty fits into the interior of the bedroom. Exit from the position - Falish Standard or locker
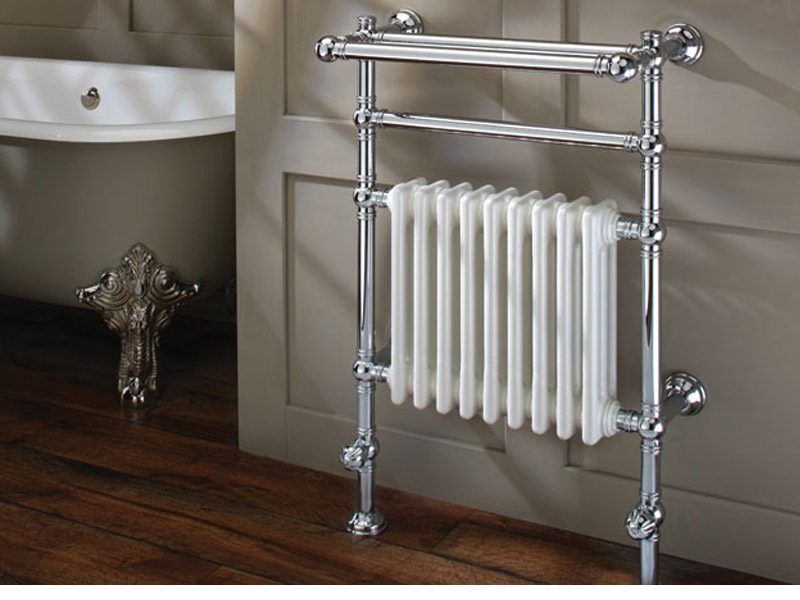
In the bathroom, the heating device performs an additional function of the heated towel rail, so it is often distinguished by the design
Traditional battery location in the living room
How to place a radiator in the children's room
Installation of the battery in the cabinet
Installation of the radiator-dryer in the bathroom
Constructive specificity of heating devices
Constructive batteries are divided into groups, these are radiators, convectors and registers.
Review of sought-after heating devices
The radiator is the most common appearance. This is a heating device consisting of vertical individual compartments sections. In classic collapsible products section - independent work items. They are joined in the required quantity using threaded internal connections. This assembly scheme gives batteries versatility.
Before installing, it is possible to comply with the heating radiator, it is required to calculate in accordance with the necessary thermal power. According to calculations, the number of sections of national batteries is selected. Horizontal cavities of radiators obtained by connecting sections are called manifolds. Top and bottom.
Modern technologies have mastered the manufacture of less universal, but more reliable non-separable radiators with the use of welding and solid casting methods. They do not have joints and seals characteristic of collapsible radiators. Design - for every taste.
Convector - a solid heating device from a tubular or strip heat exchanger with rows of heat sinks. Convectors are available in the following versions:
- Wall.
- Outdoor (channel)
- Plinth.
The register is an unintended heating device from straight smooth horizontal pipes, compounded and combined in a certain way.
Details of the varieties of radiators
Radiators differ by the material used for their manufacture.
Within one species may be different design solutionssometimes unexpectedly original
The heating instrument market can offer:
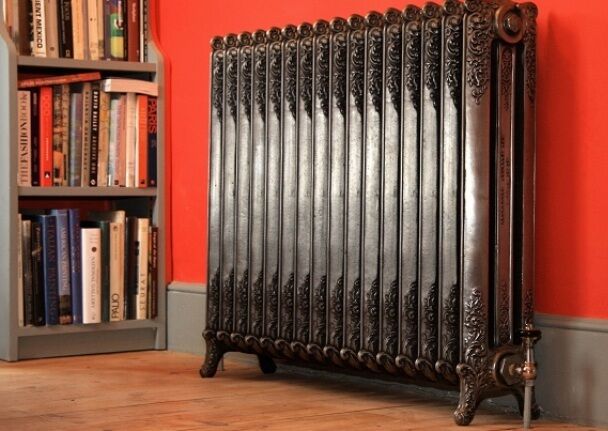
- Radiators cast iron. The genericants of the batteries of this group. Relatively inexpensive. Hold each of the modes of operation. Serve up to 50 years. The main disadvantage - have a lot of weight, which, however, helps for a long time to retain heat when the heating is turned off.
- Radiators steel.Such batteries are structures from steel pipes. They work in all conditions, but less durable cast-iron fellows. Possess low heat transfer.
- Aluminum radiators.Made of light aesthetic material, these batteries give heat better than all. They are racks to all working temperatures, but are afraid of hydrowarders. Aluminum is very demanding for the quality of the coolant.
- Bimetallic radiators.Steel insides, clothed in aluminum, all says it. The main characteristics, like steel, heat transfer - almost like aluminum. Price - bites.
- Copper radiators.This is "eternal" radiators of warmth at least for what premises. The only and most essential minus is the ultrahigh cost.
- Radiators plastic.Innovation in the family of radiators. While they are suitable only for autonomous heating systems of private houses with a coolant, heated no more than 80 ° C.
The most sensitive to the operating conditions. These radiators reliably serve only 15 years. Their use is possible only in autonomous heating systems.
Externally popular models of radiators from different materials similar:
Gallery of images
The traditional view of the radiator, which rightly served our grandparents. The stylized new new models came to replace the old models
Steel radiators are distinguished by a long service life and resistance to heat carrier characteristics.
A small weight is a truly important advantage of aluminum, especially if the heating device must be installed on a relatively weak support
Cast iron heating radiator
Heating device made of steel
Light Aluminum Battery
Heating radiator from copper
Characteristics of convector species
Convectors are significantly inferior in heat transfer radiators, but in some cases successfully complement or replace them:
1. Convectors wall mounted.The batteries in this design are usually made of steel, so cheap. They are unstable to hydrowards, and their use in centralized heating systems is undesirable.
The convectors are decorated like panels like closed radiators, very pretty, fit perfectly into the interiors of any plan.
But those made in the form of pipes, tidying plates - such batteries are suitable only for installation in the utility rooms.
2. Floor convectors (channel).An excellent solution for creating a heat curtain near the door of a balcony or loggia. Made of durable corrosion-resistant materials, they are unpretentious to the requirements of operation.
3. Plinth convectors.Capable to work in all conditions and modes, these batteries are not suitable for creating a microclimate where all other heaters will look cumbersome.
The plinth type is appropriate in the bathrooms and storage rooms adjacent to cold street walls and unheated entrances.
Brief description of heating registers
Sometime, the batteries of this group were made by hand using conventional welding. Registers can be applied in any heating systems, but due to its noncainting appearance, mainly used in the auxiliary rooms: garages, storage rooms, basements. Sometimes they can be seen in the entrances of old high-rise buildings.
Modern manufacturers "put an eye" on this group of heating devices.
Brilliant chrome metal registers can decorate the design repair of any residential space
Calculation of the thermal power of the batteries
The stage of pre-selection of batteries is completed, one can move to the calculation of thermal power required from them. The basis of calculations is taken by the relative power of 100 W for heating 1 m² of the regulatory room.
The full formula includes many correction coefficients and looks like this:
Q \u003d (100 x s) x r x k x u x t x h x W x g x x x y x z,
S. \u003d Square heated room, where:
R. - an additional parameter for the East oriented rooms or north \u003d 1.1;
K. - amendment for external walls in the room:
one \u003d 1.0;
two \u003d 1.2;
three \u003d 1.3;
four \u003d 1.4;
U. - The warming coefficient of street walls:
low \u003d 1.27 (without insulation);
average \u003d 1.0 (plaster, surface thermal insulation);
high \u003d 0.85 (insulation made by specialist);
T. - Weather indicator of the smallest temperature period in ⁰c:
up to -10 \u003d 0.7;
up to -15 \u003d 0.9;
up to -20 \u003d 1.0;
up to -25 \u003d 1.1;
to -35 \u003d 1.3;
below -35 \u003d 1.5;
H. - Ceiling height index in meters:
up to 2.7 \u003d 1.0;
up to 3 \u003d 1.05;
up to 3.5 \u003d 1.1;
up to 4 \u003d 1.15;
W. - Characteristics of the room located above:
unheard and displeased \u003d 1.0 (cold attic);
unheard, but insulated \u003d 0.9 (attic with a warmed roof);
heated \u003d 0.8.
G. - The degree of quality of windows:
serial wooden frames \u003d 1.27;
Frames with double-glazed windows single \u003d 1.0;
Ramas with double-glazed windows double \u003d 0.85;
X. - The ratio of window openings to the square of the room:
up to 0.1 \u003d 0.8;
up to 0.2 \u003d 0.9;
up to 0.3 \u003d 1.0;
up to 0.4 \u003d 1.1;
up to 0.5 \u003d 1.2;
Y. - The value of the battery surface openness:
fully open \u003d 0.9;
covered with windowsill \u003d 1.0;
Challenged with a horizontal protrusion of the wall \u003d 1.07;
covered with windowsill and frontal casing \u003d 1.12;
Fried from all sides \u003d 1.2;
Z. - battery connection efficiency (1.0 ÷ 1.13; For more details, see Drug below).
The calculated value must be multiplied by the conditional coefficient of 1.15. It will provide some heat supply to be able to more accurately adjust the devices to work in low-temperature mode.
Effective connection methods
Before continuing the study, how to choose, install and connect heating radiators and other heating devices, it is necessary to consider the two main types of pipe wiring of existing heating systems. They differ in the principles of organizing the coolant in batteries and return it to the system.
In practice, the pipe serving heat is called "feed". The pipe that returns the coolant is "reverse". Vertical pipe layout (feed or reverse) is called "riser".
In single-tube heating systems, the coolant is applied unevenly. In the distance from the boiler, the devices he will arrive, there are already somewhat cooling. Therefore, one-tube contours have limitations on the length
Traditional wiring options:
- One-tube. The wiring is arranged in such a way that one pipe is played by the role of filing and returning. The batteries in it are "crashing" sequentially. The coolant is bypassing the heating devices in order to connect them.
- Two-pipe. In a two-pipe wiring one pipe - feed, the other is the return. With this option, the battery heating devices are attached simultaneously to both pipes, parallel to each other. The coolant circulates on all batteries at the same time.
The "z" coefficient in the formula for calculating thermal power depends on the options for connecting heating devices.
The most widely used in practice methods of connecting:
Method number 1. Diagonally. Z \u003d 1.0.
Such a connection order is the most efficient, especially if the heating system works badly. The coolant enters the battery on one side from above, passes through the entire inner cavity and goes from below on the other side.
Thermal energy is transmitted to the entire surface of the heating device. For radiators longer than 12 sections, this method is recommended ultimately.
Method number 2. From the side (from above - input, bottom - output). Z \u003d 1.03.
Until recently, the most common intake of battery connection. It is convenient when installing due to the low length of connections.
For radiators up to 12 sections, almost not inferior by heat transfer to the diagonal method of connection. But this is in the existing operating heating systems. If the systems are functioning sluggish, the hot heat carrier will not reach the finite compartments of radiators.
Method number 3. Bottom from two sides. Z \u003d 1,13.
Despite the smallest efficiency, this connection method quickly arrived in new construction, thanks to plastic pipes. The wiring of heating systems are mounted in the floor, and do not drench the design of the premises. With proper heating systems, all parts of the batteries receive a uniform heating.
The final stage of the choice of batteries
The final stage of choice is based on the obtained results of the power required from heating devices.
The finished one-piece structures of radiators, convectors or registers are selected during the purchase.
From the factory passports of products you can see data about their thermal power. When purchasing batteries, the features of the installation locations are taken into account (for example, possible dimensions of the device).
Inspection radiators and registers with individual parameters, specialized organizations are made under the order. Collapsible radiators should be viewed by the number of sections, relying on their total thermal power.
Approximate separate power of standard 500 mm sections from different materials (Watt with a heat carrier in 70⁰С):
Cast iron \u003d 160;
Steel tubular \u003d 85;
Aluminum \u003d 200;
Bimetallic \u003d 180.
Power of collapsible radiators is regulated by attaching additional or disconnecting unnecessary sections.
When choosing batteries different designs For one room, it is more correct to start their selection from non-separable products.
It is also proposed to install between the battery and outdoor wall Heat output screen. For its manufacture, you can pay attention to the modern heat-reflecting materials of the Izospan, foam, aluof.
The air vent - a small size device embedded in that part of the battery where air accumulation is possible. For collapsible radiators - this is a threaded hole in the end of the upper manifold opposite to the supply of the feed pipe
When fixing the heating devices, their deviation from the horizontal level is not allowed. It is allowed to lift up to 1 cm. Side with an air vent for better collection and out of air.
When connecting the heating devices to systems with risers, the centers of the inlet batteries must be not higher than the centers of taps from the feed pipes. If, when connected to the stands, it is assumed to equip heat nodes with cranes or instruments to adjust the temperature, in one-tube heating systems are additionally necessary in their absence.
Bypass is a jumper parallel to the battery connection. This element allows you to organize the management of the heating device. It is a pipe segment connecting the input and output of the battery. The diameter of the jumper pipe should be one standard size than the rising pipe. In two-pipe heating systems, the bypass installation is required.
Due to the highly different coefficients of the expansion of materials, it is not recommended to connect batteries with a plastic liner to a wiring of steel pipes. Conversely, the main plastic wiring excludes the transition to the steel parts of the attachment.
Prior to the end of the installation, it is desirable to pack the packaging shell with the batteries of steel, aluminum and bimetallic not to remove to avoid their mechanical damage.
Preparation of collapsible radiators for installation
If the acquired collapsible batteries do not have the calculated parameters, it should be finalized by disconnecting the extra sections or adding to the desired amount. Between Radiators compartments are tightened with the help of plumbing nipples through round sealing gaskets.
Nipple - short thick-walled tube with outdoor thread. Half - right, half - left. Inside the tube along the entire length there are two opposite longitudinal technological protrusions.
The radiator key can be replaced with a chisel of a suitable length, with a width of sting, sufficient for a confident nipple protrusions. The role of the voice will play the adjustable pipe key.
In the design of the collapsible radiator there is a left thread.
For proper perception of the direction of rotation, unscrewed or spinning nipples is recommended by inserting a key or chisel into the holes of the sections where the thread right. To avoid disconsets of parts, the holes must be alternate through the turnover of another tool.
Fastening collapsible radiators
Radiators collapsible are hung on special brackets. The most reliable arcuate hooks mounted in the capital walls of the premises. This should ensure distances:
From the floor \u003d 6-12 cm, sufficient for cleaning and heating the bottom of the wall,
to the windowsill at least 7 cm to ensure effective convection,
From the heat refrigerant screen or from the wall \u003d 3-5 cm.
Brackets are mounted in such a way as to fall into the intersection space of radiators. For an uncommitable rule, when hanging the batteries, end traffic jams with right thread should be on the right, with left-threads - left.
Marking for hooks is performed in the following order:
- The vertical line of the axial center of the radiator draws the vertical line (when installing the battery under the window, most often is its center) no less than the height of the battery.
- The distance between the intervals of the first second section of the radiator and the latter-penultimate is measured.
- A horizontal line is performed corresponding to the center of the upper collector of the radiator, a length of at least measured distance (including general Sovietsoutlined above).
- The distance itself is deposited to the right and left on the horizontal line spelled symmetrically relative to the axial center line. The two points obtained are the places for the upper hooks. They will keep the weight of the design.
- From the point of intersection of the lines of the horizontal and the axial center vertically, the distance is postponed equal to the intercentrose collector distance (standard is 500 mm).
- Through the intended point, a horizontal line is carried out corresponding to the center of the lower collector of the radiator.
- The distance measured in paragraph 2 is deposited to the right-left on the horizontal line spelled symmetrically relative to the axial center line. The two points obtained are places for lower hooks. They will provide immobility of the design.
- In the outlined points, the holes under the dowels are drilled in which the brackets with carvings are wrapped up or hooks with smooth rods are clogged.
The drilling process is described for cast iron and bimetallic heating devices that have no more than 10 sections, and aluminum radiators consisting of no more than 12 sections. With a larger battery size in the area of \u200b\u200bthe center from above and below, you should add a hook.
Fastening at the place of indisidated species
Brackets for installing non-separable radiators are usually included in the product package. The sequence of marking points of fastening brackets for hanging these batteries is described in the attached installation scheme. The procedure for action is reminiscent of collapsible radiators.
The choice of brackets to secure convectors is diverse. It is due to the location of the heating device.
Brackets convectors hold on the walls, fixed on the floor, suspended from below to the windowsill
By analogy with collapsible radiators, mounted on arcuate hooks, motionlessly sealed in the walls. The total number of brackets is standard equal to four (two - hold the top pipe, two are lower). For nongendry registers, it is possible to use holders for pipes of the corresponding diameter with clamps.
Connecting batteries to heating systems
In connection operations, it is desirable to use a dynamometer tool. The necessary tightening efforts are spelled out in passports of acquired heating devices. To create tightness threaded connections It will take a fluoroplastic sealing material, a shortly called "FUM Ribbon", and Plumbing Flax.
If the battery connections with the wiring of the heating system are carried out by plastic lining, will additionally be needed:
- The apparatus of welding polypropylene parts.
- Or crimping device for metal plastic pipes.
When solving the heating of batteries, cranes or thermostatic instruments are purchased. Some finished structures Immediately equipped with built-in thermostators.
The required amount of the pipe for eyeliner, the configuration of the connecting parts (fittings) depend on the options for connecting to the heating system and are found out after fixing the batteries at the place. Connection receptions "diagonally", "from the side" or "from the bottom of two sides" are determined at the stage of calculating the thermal power of the installed
Installation and replacement of the heating radiator at first glance seems not very challenging task. However, this is not the case - any errors made in the process of work will inevitably cause the consequences, probably quite heavy. In order not to restore repairs in the apartment after flooding hot water Or other unforeseen problems, it is recommended for mounting and replacing the parts of the heating system to access the plumbing. However, it does not mean that the installation of the heating radiator is impracticable.
For success, you need:
- Enough free time.
- Examine the theoretical database: Methods for connecting batteries and rules.
- Thoroughly measure the territory.
- Find the tools necessary for such work.
Installation of heating radiator
First of all, of course, it is necessary to choose a radiator that you need in your particular apartment or a private house. The choice of the radiator should be due to its technical characteristics And your needs. What qualities of the battery affect the choice? Mainly, this is:
- Wear resistance.
- Cost.
- The diameter of the lumen for water circulation.
- Resistance to aggressive media.
Important! If you want to install heating radiators with your own hands, you also need to take into account the materials from which they are made. So, aluminum radiators are easy to install, do not require special skills, knowledge and tools. And when installing pig-iron batteries, welding will necessarily need. It is worth a predetermination with the resources available to you and objectively assess your capabilities.

Checking air descent valve
When preparing for work, first of all, it is necessary to know the type of wiring of your heating system. It may be one-tube or two-pipe.
- A single-tube heating system is most often performed in the apartments of multi-storey houses. With this form, hot water flows through the pipes from the top floor to the bottom. From the disadvantages of such a wiring it is worth noting that in this case you cannot regulate the temperature without installing additional devices. In addition, water on the upper floors is much hotter than on the lower.
- The two-pipe heating system is more common in cottages and country houses. Water circulates on two systems: hot - one, cooled on another. This wiring is deprived of the shortcomings of a single-pipe version: the temperature of the heating devices always remains constant, and is also adjustable.
Options for connecting heating systems
In addition to the selection of the radiator itself, you will also need to decide when installing it, how to connect it to a centralized network. You have several different options available to you, each of which has its own scope:
- Diagonal connection. This scheme is the best choice For long multisective heating batteries. It is distinguished by the fact that the pipe supplying the pipe is fastened to the pipe from above from one edge of the radiator, removing the same - to the lower nozzle on the other side. Among the disadvantages of such a system, you can call heavy repair in case of malfunctions: the scheme does not imply a battery removal without a complete shutdown of heating.

Radiators connecting options
Important! When water supply from below, you lose about 10% of the possible heat.
- Lower connection. This wiring scheme looks most imperceptible. It is used if the pipes are located inside the floor or hidden under plinths. Feed nozzles and tanks are directed perpendicular to the floor surface. The main disadvantage is that this system involves the largest possible amount of heat loss.
- Side one-sided connection. Is the most common and efficient. The maximum heat transfer is ensured by connecting the supply pipe from above, and the discharge - from the bottom from the same side of the battery. When inversion, the heat of heating is significantly reduced, so it is not recommended to change the pipes.
Important! With insufficient warming of long-range battery sections, the water duct extension is used.
- Parallel connection. It occurs through the heat pipeline built into the heating system. In the same way, the removal is also implemented. Such a system allows you to replace the batteries without disconnecting. central heatingHowever, the main minus is that in case of insufficient pressure in the battery system, it is bad.
Important! Connecting the heating radiator with your own hands in this way is carried out rather difficult, this work will be better entrepresented by experimental installers.
- Sequential connection. In this case, the transfer of heat over the system is due to the air pressure in it. Excess air descends with the help of the crane of Maevsky. The main disadvantage of such a system also serves the impossibility of repair without disconnecting the entire heating system.
Rules for connecting radiator
There are no minor nuances in the installation of the heating system, it is necessary to follow all the rules to work efficient and safe. So how to install heating radiators with their own hands? It is worth considering the following points:
- the distance from the top of the battery to the window sill should be more than 5 cm;
- from the bottom of the battery to the floor, the distance should be at least 10 cm;
- the distance from the wall to the battery should be from 2 to 5 cm. In the event that standard fasteners are too short, you need to buy other suitable lengths.

Mounting radiator in limited space
These rules will allow the air to circulate normally around the heating device, preventing unnecessary heat lines.
Important! Battery installation rules are the same for all their varieties, whether aluminum or cast iron radiators.
Before installing the radiator, you need to decide how many sections should be in it. This can be done at the rate that in the standard room with a height of no more than 2.7 meters one section heats two square meters of square. Of course, such a calculation is quite rough to get the best result, you should trust this professionals.
Important! You can also use the formula: 1 kW of the radiator power accounts for 1 square meter Rooms. In the case when there are several windows, you need to increase the resulting value by 1.3 times.
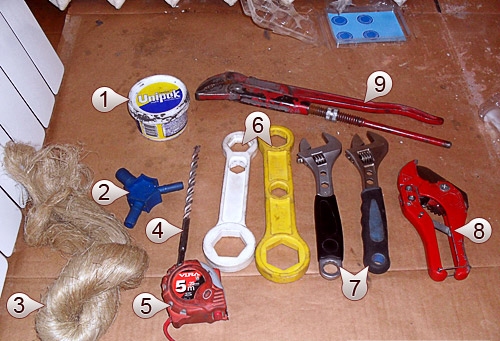
Required tools
The installation of heating radiators with their own hands in the apartment, as in a private house, requires a certain number of tools, without which this process is simply impossible.

Be sure to align the radiator vertically
For its successful, you will need:
- shock drill with a winning drill;
- a set of dynamometer keys;
- screwdriver or screwdriver;
- passatia;
- roulette;
- building level;
- pencil and ruler.
Installation process
The installation process carries anything too difficult in themselves, if you perform it in terms of step by step and unmistakably.
- First, you need to turn off the heating system and drain water from it. In a private house, this can be done with the help of a pump, in a multi-apartment - you will have to contact Zheck. Then you need to dismantle the radiators served.
- Place the wall for fastening new heating devices. At the same time it is desirable to use the level to set the battery as exactly as possible, excluding the battery. It is important that the battery is installed strictly horizontally or with a minimum deviation toward the pipe. This will allow water to completely merge heating season.
- Install brackets, check them on strength, pressing them all your weight. If they are withstanding - hang the battery. For the cast iron and aluminum battery, two attachments are usually enough, for plastic pipes, you need more. Walls before installing fasteners should be predetermined, align and twisted.
- Smonimit shut-off reinforcement, paying special attention to the reliability and waterproof of threaded connections. Connect the pipeline.
Important! In order for the battery does not proceed, it is desirable to use the corresponding dynamometric keys. Especially if you install an aluminum radiator, it is inevitably installed to mount the air valve through which the air will be wateted. The force of the dynamometric key used during installation should not exceed 12 kg.
Accommodation in the house becomes comfortable when it's warm. In order for the heating of the apartment, no problems cause, it is necessary to set high-quality modern radiators. As a rule, this process takes place at the construction stage. But over time, necessarily the need to replace heating batteries.
The need to replace radiators
Reasons to think that the replacement of batteries in your apartment is inevitable - a lot. Someone has radiators from old age and proceed with small jets of water. The mechanical destruction of the part of the heating system and the battery occurs as a result of the hydroedar, which consists in a sharp increase in pressure in the system.
Other radiators do not give enough warmth, hinting that inside more dirt than the necessary coolant. Education on the inner walls of mineral sediments also leads to a decrease in the lumen and a significant deterioration in the passability of the heating system coolant, which in this case water acts.
Sometimes it happens that the power of the radiator lacks for heating the dwelling. And if residents of a private house can change the level of heat in their home by adjusting the gas pressure in the headlet, then living in the city apartments of the panel houses are constantly forced to put up with ordinary convectors, which do not have enough power for high-quality heating throughout the living space.

But replacement of heating batteries is a relevant issue for residents of private houses, as there are many modern technologies To regulate heating in the house and the possibility of saving considerable means on heating when obtaining the maximum efficiency. In addition, when using radiator thermostats, you will have the opportunity to independently choose the desired temperature in the room.
In addition, you should not forget that the time of useful service of old batteries is sometime and expires, and the operation of such batteries is not desirable. Such radiators can be out of order at any time, but they can also cause a serious accident not only in the heating period, but even in the summer. In this case, the price of dismantling and the installation of heating radiators will increase greatly, because there are also the effects of breakdown to eliminate.
Instructions for replacing heating batteries
It is better to study the heating devices in the offseason when the heating system is in a non-working condition. Since in the summer period, the heating is turned off, then the permission to replace the batteries you can take without much difficulty.
1. Selection of heating radiators
Before replacing the heating radiator with your own hands, you need to consider their varieties and parameters. The following types of radiators are distinguished:
- Panel radiators are 2 or 3 panels through which water will pass. Heating of similar radiators is carried out faster than sectional. Connection is the bottom and side. Devices are made of rolled steel.
- The column radiators are two collectors, which are connected with tubular columns. These devices made of aluminum or steel are manufactured.
- Sectional batteries consist of two or more hollow sections, according to which the circulation of the coolant occurs. The number of sections is almost unlimited and is determined most often weighing the radiator. That is, the sections can be increasing until it is possible to suspend this battery. Devices of this type of cast iron, aluminum, steel and bimetal - two heterogeneous metals are manufactured.

Will you be replacing heating radiators yourself, or are you going to invite a specialist - in any case, you should choose the highest quality batteries. In this case, you should pay attention to the criteria for selecting radiators:
- Strength. Batteries can be cheaper, with low heat transfer, but they are in obligatory Must be durable. In the passport of any device indicate the working and test pressure. It is necessary to focus on working pressure, leaving about the reserve and in case of force majeure test strength. For the supply of heat carrier to the height of the ninth floor, a pressure of 6 atmospheres is applied, and on the 22nd floor - already 15 atmospheres! Such pressure is withstanding not every radiator, so the devices and aluminum disappear immediately. Aluminum radiators Appropriate in the private sector, because they have high heat transfer. Cast iron heating batteries are suitable only for nine-storey buildings. Cast-iron operating pressure is more than 9 atmospheres. With similar high pressure, it is better to put a device from a bimetal or high-quality steel. Radiators made from bimetal, combine high heat transfer and increased strength.
- Corrosion resistance. Corrosion resistance is another important factor when buying heating radiators. Along this scale, cast-iron radiators are considered the most polar. Cast iron batteries oppose corrosion is best of all, while aluminum batteries are weak in this regard. Therefore, when choosing aluminum during the fill of water into the heating system, it is recommended to mix anti-corrosion additives to the coolant.
- Heat transfer. The most pressing moment for which radiators actually is installed is an indicator of their heat transfer to heat the room. In the accompanying documents, the battery indicates its power, or may be denoted by the power of one section. To calculate this value, it should be remembered that 1 m2 of the traditional room requires 80 -120 watts of the coolant power, depending on the height and thermal insulation of the walls.

2. Preparatory process
If you succeed, then agree with your neighbors from below and on top of the complete replacement of pipes, as it is considered the most the best optionbecause you do not have to cut in your apartment metal pipes. We persuade them to put a new pipe from the exit of the neighbor's battery from the top to the departure to the neighbor's battery below. So you will greatly alleviate the replacement of old heating radiators, and the neighbors will receive a new plot of pipeline in its apartment.
If you are not lucky, you will have to trim the flooring from the floor and under the ceiling and move to polypropylene reinforced pipes in your apartment. The connection of the batteries is carried out by polypropylene, metal-plastic, metal welding and on the coast. But most often used metalplastic. They are mounted much faster and easier, and they serve much longer than traditional metal pipes.

Before replacing the heating battery with a new radiator, water should be blocked throughout the system. Then use the pump, reload the maximum possible amount of water, and then overlap the water near your radiator. Count how much water can contain in the battery, and stock dishes of the appropriate volume, which you will be substituted in the process of dismantling the old radiator.
Let's start after this to the removal of the necessary measurements:
- Remove the measurements and record the diameter of the outlet of the neighbor's radiator, which lives from above, and the diameter of the radiator inlet in the neighbor's living below.
- Make all the necessary dimensions of the pipeline length, which is needed to connect a neighbor above: Calculate the distance from the exit from the neighbor's radiator above, up to the corner, and the distance from it to the overlap between your apartments.
- Make all the length of the pipe length, which is needed to connect a neighbor below by analogy.
- Calculate the needed pipe length that will be needed in your apartment.
- Find the length of the pipe, which will pass through the floors - approximately 1 meter. In this case, you should take a pipe of the same diameter that you used to connect the old battery.
3. Purchase of consumables
The heating batteries for the house are sold "bare". These should buy such details:
- Three plugs are one deaf and two passing under your diameter. Also, you will need a plug to the "Maevsky" crane for its overtake, so that during the launch of the heating system it was possible to lower the air.
- Gaskets for all stubs.
- Reinforced polypropylene pipes.
- Cranes "American", which are required to complete the radiator and carrying out prophylactic work, as they provide the ability to disconnect it and removal.
- Polypropylene crane, which is useful for the inclusion of the heating system with closed Cranes "American" and allows the coolant to circulate with a removed radiator.
- The trick of the PPR, which has a diameter of 20 millimeters and a similar thread, is required to connect to neighbors batteries.

4. Preparation of the necessary tool
On the this stage You stay to prepare all work tools:
- Soldering iron for pipeline soldering (today many shops give this tool to hire);
- Gas and adjustable key;
- Drill and drill on concrete to attach a new bimetallic battery to the wall;
- Bulgarian and metal disk;
- Level;
- Markup pencil;
- Roulette.
If you could not agree with the neighbors, then the larch will also need to cut the pipe on the floor and under the outdoor thread ceiling.
5. Dismantling of the old battery
If you carefully look at the old heating devices, you will see that they, as a rule, are connected to the pipeline with the help of the so-called Signs - the finished long thread, to which the coupling and lockout are winding, which will serve as a great place to connect a new battery. To dismantle the old radiator, make the following actions:
- To start twist to the end of the threads of the lock nut on the lower and upper eyeliner.
- After that, army with a plumb or level and determine the places of the cut. Tools put so that at least 1 centimeter of thread remains on the pipe.
- The level is very important, since if you ignore this moment, then new radiator Exactly hang out. And the connection of radiators of heating to crooked cut pipes is sufficiently problematic.
- Further cut the pipes on the marked places and remove the batteries from the brackets. From the walls, remove the old brackets that hold the battery.
- If the new battery differs from the old size, proceed so. Cut pipes to the desired size, and then welcome or cut the threads on them. If the old pipes are better to apply welding, because the pipe when cutting the thread can burst on the seam.
- If the pipes should be lengthened, then you can use the insert. You can use Ecoplast, having previously done the rotation of the pipe or attacking the missing length.
- Prepare the residues of the thread to further work. Cross the edge of the thread if necessary, fir the grinder, twist the lock nut from the thread to get rid of burrs.
6. Radiator layout
Battery will be based on places marked. When marking the position of the heating battery on the wall, take into account such moments:
- The distance from the floor to the radiator should be 10-15 centimeters. If you post the battery below, it will be a bad air duct through it. And it will be inconvenient to carry out wet cleaning.
- Due to bad convection, it is not recommended to bring the radiator close to the windowsill. The distance to the battery from the window sill must be at least 15 centimeters.
- It is impossible to press the battery very much to the wall, as the thermal return will deteriorate. The optimal distance is 3-4 centimeters. The distance to the battery from the wall adjust the depth of turning the brackets.
7. Installation of heating battery
The sequence of installation of heating batteries is one for all types of radiators:
- If you work in the winter, then agree with the operational service to turn off the minimum half a day the heating. It is usually not allowed to carry out such work in the heating period. But if the breakdown happened, or in the apartment there is a critical temperature and children live, then you can get permission to replace batteries.
- When the riser is turned off, and is open in the basement of a drain crane, proceed to the procedure. Equip the new battery by Futoushore nuts, and pipe liner - with ball valves.
- Start from the cranes - turn the sealing material correctly on the thread. The main thing is that the connection is reliable, almost all the wizards are used for these purposes. First, it's good to scrum the threads of any paint other than the water-emulsion, then wrap on the carving of the pass. You should wind clockwise, tight and cone, which starts from the edge of the thread. Purchased pass again, scorch abundantly.
- Then screw the crane. It should be twisted so that the threads on the pipeline almost remains. Soak excessive pass paint. After it is completely dried, this connection will not give the flow, and the crane itself will be problematic.
- On each side of the radiator there are 2 internal threads for connecting the heating battery to the system. In these threads, screw the hoods. On one side of the battery, install the nuts with the left thread, and on the other - the part with the right. In order not to get confused, it is recommended to buy passage nuts that allow you to connect the radiator in any position. Food nuts in most cases are installed on paronit or rubber seals.
- After installation, equip the nut with additional equipment. In places where you will connect the battery to the pipes, install the "American" response parts. On the other hand, put the battery downstairs and at the top of the Maevsky crane.
- Install the battery in this form. Raise it and connect the crane with the American. So you will protect yourself from falling the battery at further work. Under the bottom of the battery is better to put something.
- The battery is hung on the wall using special brackets. To accurately install them, you need to mark the placement of the place to attach brackets. To do this, use the level. Drill holes and set the hooks.
- When all 4 brackets are installed in their place, the radiator can be finally hanging into place, while tightening the blocks of the plug-in with a confront key.

Here is the installation of heating radiators you have completed. Run the heating system by filling the coolant before the coolant and at the same time running the air on the top floor using the crane of Maevsky. Open the feed crane and check the node for the presence of leaks. If you performed work in the summer, it is recommended to close the cranes on the liners before the seasonal start of the heating system.
Sooner or later, any heating radiator will have to change. This happens if he failed, starting to leak. Or if on its inner surface for many years of operation, such a number of lime deposits accumulated that it does not cope with the heating function. This requires a high-quality installation of heating radiators, which meets the standards established by SNiP.
 In a private house, mounting can execute the owner. Even if the system starts to flow, it is easy to turn off the individual heating to eliminate the shortcomings. AT multi-storey houses Everything is more complicated. If in the joints of the pipes and radiators, the coolant will begin to swell in 2-3 weeks after the start of the heating season, it is difficult to turn off the heating system of the whole home. In addition, neighbors suffer due to the lack of heating or due to flooding.
Plumbing specialists know how to properly install heating radiators in the apartment, so it is better to entrust this work to them.
Even if after starting the system, an accident happens, they will be responsible for what happened. They will have to eliminate it for their own funds, as well as pay damage caused by residents. If the installation of heating radiators is carried out by masters, the price of which was too high, the consumer is not affordable, work will have to do it yourself. To do this, you need to get acquainted with the instructions attached to a new heating device, study the installation scheme.
Before making the installation of heating radiators with their own hands, check out the following stands of SNiP 41-01-2003 "Heating, ventilation and air conditioning":

After purchasing the heating radiator, the installation is performed depending on the type of system and the connection scheme.
Types of heating systems
From the type of heating system in an apartment or the house directly depends on the level of heat supply. According to the pipe connection scheme, 3 types of systems can be distinguished: one-tube, two-pipe system and using a collector.
Single pipe system
 A single-tube is mounted so that the coolant comes on one pipe (sequentially) to each radiator, after which it is cooled on it back into the boiler. Such a system is the simplest for installation. Everywhere installed in high-rise buildings. Its disadvantage is that each next radiator gets an increasingly cooled coolant, and the room warms worse. There is also no possibility of local repair of one battery. If it is necessary, it will have to turn off the entire riser.
Two-pipe system
 It implies the receipt of a hot heat carrier to each radiator separately (parallel compound), on one pipe. Thus, they all warm up to one temperature. And the cooled fluid enters a separate inverse tube and moves to the boiler for reheating. In this case, the rules for the installation of heating radiators are simplified. After all, it is possible to disconnect from the system of only one old radiator.
Collector system
 The collector system is very complicated. It is designed for cottages. It assumes a large consumption of pipes, since individual pipes are bodied to each battery. Only professionals can be mounted such a system.
Connection schemes
Before you independently install the heating radiator, decide on the method of connecting it to the network. Most often such schemes are used:


You can ask the specialists from how much heating radiator is worth establishing, and perhaps agree to their services. Experienced masters Let's prompt what kind of connection scheme to choose, and what will need auxiliary elements for mounting.
Installation
 Performed at any time of the year. Cannot be installed in the system with natural circulation Liquids of more than twelve battery sections, and with artificial - more than 24. Before installation, you need to purchase a pass or sealing tape, sealant, shut-off and thermostatic equipment, as well as fastening from the corresponding material, for example, a certain length brackets, a split different size. The size of the threads of the Signs must correspond to the size of the batteries and pipes.
 Insofar as additional details Nedo-cheese, and the cost of mounting heating radiators can also be called low, with specialists can be problematic. In addition, this work includes and disassembling radiators of heating price for which although not high, but still affects the total cost. And therefore, disassembly in any case is better to perform yourself in order not to overpay.
To do this, first drain the coolant from one radiator, which changes, if it can be localized, bounce the valves at the entrance; or from the entire single-tube system. In the production of works in an apartment building, contact ZHEO, so that its employees move water from the riser on which it is replaced. After that, you can remove the old radiator.
To install the heating radiator yourself, it is pre-installed on it a shut-off-adjusting equipment.
 As well as mount the crane of Maevsky, with which it will later be possible to produce air from batteries. The brackets are installed on the wall, pre-carefully placing the place to install. It is believed that for the installation of medium in size of the radiator, you will need 2-3 bracket to hold its upper part, and 2 for fixing the bottom.
 Fasteners are aligned by level, and install the battery on it. If the brackets are installed correctly, it should fit tightly to the supports, do not fumble. A small trifle: the heating device is installed with a small slope (0.3 cm for each meter of its length) so that Maevsky crane is located near the upper point. The actual installation of the heating radiator, the price of which is reduced due to the independent installation, begins with the fact that the caps are unscrew from the battery.
 If you install bypass with valve. With a two-pipe system, only a Sgon is connected on which the valve is installed. Then the Signs are connected to the pipes. This requires dynamometric keys. They will have to buy, which will increase the cost of installing the heating radiator, but without them can not do. They will allow not overdoing when tightening nuts and other fasteners, since the instructions for each auxiliary element indicates a permissible dynamometer.
 The weak compound is also dangerous due to the possibility of leaks. The joints seal the palauls, moistened with oil paint, or a special seal. You can also cook them. After mounting, the connection needs to prescript. It will be caused by the indispensable plumber, as to buy the crimping tool is expensive. At the end of the work, you need to trigger the system, and, if necessary, immediately eliminate the shortcomings.
After reading how to install heating radiators properly, it is worth thinking whether it is necessary to do this work independently. If there are no skills in the installation of heating devices, it is better to hire professionals, after learning prices for the installation of heating radiators in the settlement where they will be mounted.
 If you are installed aluminum or, leave them in the package until the end of the installation so that when accidentally damage does not damage the surface. It is noteworthy that the installation of iron heating radiators also has its own characteristics. They are heavy, so require the installation of a larger number of brackets. In addition, these details must be deeper into the wall, especially if it is brick.
 If the wall is made of drywall, the heavy battery is not hosted on it, but is installed on special floor stands, and a pair wall brackets Need to prevent falling design. In addition, if the mountable device is pig-iron, then its connection with pipes is performed welding apparatus. That is, in this case, the installation of heating radiators by gas welding is almost always used, and it is not necessary to neglect.
Of all the above, it follows that the installation of heating batteries can be quite simple, if it is initially good to prepare to it, and to study all the instructions that attached to the device. After performing all the procedures in the installed sequence, the heating system will be durable and will serve not one decade.
Heating radiators differ in each other design and metalfrom which they are made.
Each of the types in greater or less suitable for apartment.
Bimetallic. The design has elements made from different metals. There are pairs of aluminum copper and aluminum-steel. Good solution for the apartment. Have the largest heat transfer among radiators. Easy mounted, have a high working pressure - 35 atm. It is relatively expensive.
Aluminum radiators It is relatively easy to install, they have good heat transfer. Operating pressure - up to 18 atm. What does possible installation in high-altitude houses. Almost do not corrosion. Not installed if the pipes are made of copper, since this metal is a reaction with aluminum, which destroys both the pipe and the device.
Cast iron Distributed in old houses of small floors due to the low operating pressure of MAX 12 atm. Not very suitable for apartments, since, firstly, they are heavy, which makes the installation process difficult. The devices slowly heat and slowly cool, which makes it difficult to adjust the temperature in the room. On the other hand, these devices do not react with the coolant, durable.
Steel. Inexpensive solution for apartment buildings in several floors. Quickly rust, so the service life is small - 15-25 years. But they are easy to mount. Combined with any pipes. Ability to build up with additional sections is absent.
 Exist special prescriptions By installing thermal radiators. They are spelled out in SNiP. The device must withstand the pressure of the coolant in the heating system
The metal from which the radiator is made should not be with pipe pipes galvanic couple. This happens, for example, when the interaction of aluminum and copper. The reaction of such a compound will lead to corrosion.
Distance between the device and the protruding part of the windowsill must be 10 cm. If this indicator is less than 75% of the depth of the radiator, the release of the heat flux will be difficult.
Between the lower edge of the device and the floor should be a clearance of at least 10 cm and no more than 15 cm. With a small distance, heat exchange will pass inefficient and slowAnd with a large temperature difference in the height of the room will be observed.
Important: The upper plane of the radiator sections should be in the same plane, the scatter is in more than 3 mm inadmiss.
In case the device is not installed under the window, but near the wall, the distance between these two surfaces is not less than 20 cm.
Radiator location
 The heat device is installed in such a way that its heat transfer was maximum efficient.
Best place - Under the windows, since it is through them the greatest heat loss. If the room has an external cold WallExtra radiators are installed on it.
Pipes in the heating system:
- Steel tubes Traditionally installed in apartment buildings of large floors. Tear high pressure and temperature. Sounded corrosion.
- Metal plastic Began to be used when laying the heating system recently, but they have already managed to become popular. Comfortable when installing radiators.
- Polypropylene pipes Also enjoy popular. The simplicity of installation is caused by the possibility of inconphigible connection by means of the diffusion welding method.
- Polyethylene pipes Although not often used due to several high prices and a small area of \u200b\u200bapplication. The latter is associated with a feature of the design, or rather, the bend radius.
- Copper - A rare solution due to the high cost and high demands on the coolant. Installed only in private homes.
Furnitura
Accessories include auxiliary elements. Designed for airbag or other gases from the radiator. The presence of air in the heating device is called "air bag". It can cause incorrect radiator work.
Attention! Before you fly air in heating radiators, carefully examine the instructions in order to avoid depressurization of the system.
There are also reflective screens on sale, which are attached on the wall behind the heating device, are designed reduce heat loss. Evaporators on the radiator that support indoor air humidity. Fans that set to the device itself to increase the heat transfer and dryers.
What prevents effective heating?
Indoors can be cold not only because of bad work Devices, but also because of the obstacles that the person is installed. The heat transfer is reducedif a:
- the radiator is closed with long porters;
- the device is closed with upholstered furniture;
- there are protruding window sills;
- on top are decorative lattices.
Connection diagrams and installation of an additional radiator
There are several Installation circuitsheating radiators in the apartment :
- Side. The most common connection scheme due to high heat transfer. The pipe on which the coolant is supplied is connected to the top nozzle, and the discharge - respectively, with the bottom.
- Lower Use mainly in apartments, where the pipes are hidden in the floor or pass under the plinth. Nozzles for feeding and removal are located at the bottom.
- Diagonal Used to connect radiators, the number of sections that are superior to 12 pieces. Warm fluid is fed to the upper nozzle on one side of the battery, and is output through the lower on the other.
- Consistent can be used only in systems with high pressurewhich is able to ensure the movement of the coolant for all radiators.
Installing an additional radiator:
- Displays a coolant from the system.
- Choose a place for fasteners and install brackets.
- Collect radiator. This uses a special sealing flax. To delay the connections, you need to use a dynamometer key.
- On one of the lateral unused holes is set crane Maevsky. The rest are stuck through the plug.
- The radiator is installed on the wall and exhibited horizontally and vertical.
- A thread in places of connection with the riser is cut, the remaining necessary elements are attached. All connects to one system.
- At the end - mandatory verification of tightness.
Before independent installation Batteries in the apartment must be thoroughly prepared. Even minor errors can lead to an accident and additional money costs. The radiator itself should be selected, evaluate which connection scheme will be the most efficient and pre-prepare the necessary toolkit.
If you have elementary technical knowledge and skills to work with a tool, install a radiator is quite real. It is important to explore the question, follow the instructions and weigh every step.
Master class on installing heating radiators in the apartment with their own hands Look at the video:
What are the errors when replacing heating radiators, find out from the video below:
Schemes for installing heating radiators in the apartment - Look more. Look at the video:
How to connect heating radiator with the greatest efficiency Find out of the video below:


