Storing gladioli bulbs
When to dig.
On the one hand, you should not delay harvesting in order to prevent the corms from being in cold, damp soil - harvesting is best done in dry weather, when the soil is not too wet (it should easily fall off the corms without contaminating them), but also not dry and hardened. In both cases, it is quite difficult to select all the children. And since the children remaining in the ground are able to maintain germination for several years, the area becomes clogged and the varieties can get mixed up. Gladiolus bulbs left in the ground do not tolerate frosts below 10C or lower.
On the other hand, you cannot start digging too early, since the ripening of corms in varieties of early and medium flowering periods occurs within 30-40 days after flowering or cutting off the inflorescences, in late varieties within 45-50 days. If individual plants begin to form a peduncle too late, then, unfortunately, it is necessary to cut it out (or break it off) so that the bulb has time to fully ripen.
Cleaning procedure.
The early and middle ones are removed first, and then late varieties gladioli. In addition, they take into account one more important nuance. Among equal harvesting times, they try to dig up dark-colored varieties of gladioli (cherry-red, purple) and lavender-blue first, since they earlier lose their natural immunity to fungal diseases. Lastly, gladioli grown from tubers (babies) are removed.
Thus, for middle zone The harvesting period for gladioli corms is September - October.
If the dug up corms are very dirty, you can carefully wash them in running water and dry them. Some gardeners treat the dug up planting material with insecticides (if they are affected by thrips), fungicides (if the leaves looked unhealthy at the time of digging), and healthy gladioli in a solution of boric acid or potassium permanganate. The time for which the bulbs are placed in the solution depends on the drug and is indicated by its manufacturer. For boric acid and potassium permanganate, this is about half an hour.
Gladioli cleaning.
For dug up plants, it is necessary to trim the stem, leaving a small stump (about 1-1.5 cm). Sick plants are collected in a separate container and, after harvesting, are burned.
Corms must be dried for about two months before storing. We lay them out to dry according to variety in separate trays (if possible in one layer) in a well-ventilated area. The first 10-15 days - at a temperature of 25-30º C, then another 1-1.5 months at a temperature of 20-22º C.
During the drying process, the corms should be periodically turned over and inspected for signs of diseases and signs of thrips activity. Diseased corms must be removed and destroyed. At the first signs of thrips reproduction, the corms should be placed in plastic bags, not injected a large number of aerosol insect repellent, tie the bags tightly and leave for at least half an hour - an hour. You can warm the corms for 5 minutes in hot water(+50º), then dry thoroughly. An indicator that the tubers are sufficiently dried is the easy separation of the old corm from the new one.
Some novice gardeners have a question: whether or not to peel the bulbs before storage from the integumentary scales. On the one hand, thrips multiply under it, and if drying is not done well, pockets of mold and rot may appear. On the other hand, the integumentary scale protects the corms from drying out. We believe that it should not be cleaned, long-term drying before storing; modern insecticides allow planting material to be stored all winter without much loss.
There is a method of treating corms with molten paraffin, which protects against drying out and mold. To do this, heat the paraffin in a water bath and immerse the scaled corms in it for a few seconds. This method (waxing) is considered one of the most reliable, but it is also the most expensive and labor-intensive. When planting, you should not clean the paraffin; waxed corms are germinated and planted directly in the “clothes” of paraffin.
Poorly dried corms, due to increased humidity under the scales, begin to develop fungal and bacterial diseases, are poorly stored and die. Therefore, it is necessary to store only well-dried and healthy corms without signs of disease. All gladioli corms with signs of disease and cracked children are discarded.
If there is a small variety or the gladiolus variety is very valuable, and the damage is small, then you can cut out the damaged areas to healthy tissue and cover it with brilliant green (brilliant green) or treat it with a strong solution of potassium permanganate.
Before storing the corms, it is necessary to inspect them again, first removing the uppermost, thin scales, and placing them according to variety in bags made of highly breathable fabric or non-woven material, not forgetting to include a label with the name of the variety. Place the bags in boxes or boxes and place them in a dry basement. A small amount of planting material can be stored in a household refrigerator. Optimal temperature storage - 3-10º C, but not lower than 2 degrees at low humidity.
Some gladiolus growers recommend breaking off the stump remaining from the stem before storing it. This stump, and especially the place where it turns into the integumentary scale, is ideal for the life of thrips. By removing it, we deprive this pest of unnecessary protection. On the other hand, when the stump is removed, the probability of drying out of the open growth bud increases. Therefore, if losses from thrips are large, we remove the stump. If the pest doesn’t particularly bother you, you can leave the stump.
Place the children, separated from the corms, into varieties, if necessary, rinse them from adhering soil, dry them and store them with labels.
In winter, about once a month, it is necessary to check the planting material and remove diseased corms to avoid infection of healthy bulbs. The appearance of gray mold on the bulbs indicates increased humidity during storage. It is necessary to ventilate the room, if possible add hydrophobic materials (vermiculite, perlite, silica gel) to bags, drawers or bags with bulbs. Wipe moldy mole bulbs with a cloth soaked in an alcohol solution or vodka and dry thoroughly. Gray mold, if its spread is prevented, unlike fusarium, has virtually no effect on the quality of planting material. 
Gladioli corms overwinter well both in apartments and in private houses. Of course, you need to take into account several “nuances”, otherwise all the efforts of the amateur gardener will be reduced to zero.
Winter inspection of corms
First steps after digging
Excavated gladioli corms should be thoroughly washed from the ground. Usually I finish digging in the first ten days. This year the gladioli sat in the ground much longer. I dig up gladioli only with a garden fork. I wash all the corms (with roots) from the ground with water from a hose or in a bucket of water. I immediately cut off the stem, leave a short stump, then bring the gladioli into the house. In order not to confuse the varieties, I place the corms in different containers, in which I put tags with the name of the variety.

Luxurious gladioli flowers
In the house I wash all the corms again. Then I place them in a weak solution of potassium permanganate (or Maxim) for 30 minutes. After this, I remove the corms from the solution and lay them out to dry until the next day. Once again I check the condition of the planting material. Already more thoroughly. All problem areas are clearly visible on the “skin”, lightly colored with potassium permanganate. I store healthy corms, even those with small flaws, separately from the entire collection. After all sanitary treatments, I place the gladioli by variety in cardboard boxes of a suitable size. I put open boxes on kitchen cabinets. It's warm and dry there. I immediately mark the date when the corms need to be removed and stored in a cool place for winter. This will happen in 30 days.
How and when to remove roots and old mother corm?
I experimented a lot before I came to the conclusion that it is better to remove the old wrinkled corm with roots not immediately, but after about 1 - 2 weeks. Dried up Bottom part can be removed easily and quickly, leaving a clean bottom without any nicks on the upper replacement bulb. There is no point in delaying this until the end of drying. I leave the covering scales.
Storing corms in a cool place
In a private house there are more suitable places where you can keep corms until spring. These are dry basements, storerooms and other rooms where the air temperature is kept within the range of plus 5 - 8°C. There, planting material can be stored in cardboard boxes or in nets (stockings, knee socks) suspended from hooks. The main thing is that the air temperature remains low above zero at all times. Planting material packed in a plastic bag is less likely to remain healthy. If the basement (cellar) is flooded with water, and the air humidity increases greatly, then the corms must be urgently removed and dried, and then a new storage place must be found for them.
In apartments or rooms it is more difficult to find a suitable place. In this case, the refrigerator comes to the rescue. The corms are placed in boxes of cookies, chocolates, tea, etc., which are wrapped in several layers of newsprint. What you need is paper, not plastic bags. The bundles are kept in the refrigerator in boxes designed for storing vegetables. The paper can be secured with tape or tied with rope. It is better if the inside of the boxes is lined with paper napkins or a paper towel. In such conditions, the corms breathe, remain dry and never become moldy. In polyethylene they run the risk (with a high degree of probability) of fogging up, getting wet, moldy, etc. Of course, I check the condition of the planting material several times during the winter. Some amateur gardeners dip the corms in melted paraffin before storing. They consider this option more reliable. I was told that gladioli are preserved well if their corms are pollinated with wood ash before storage.
It's easier with children. I usually put them in toothpaste boxes. If it is important for me not to confuse the varieties, then I first wrap the bulbs in paper napkins or paper handkerchiefs, on which I write the name of the variety. I store them until spring in the same cool places in which the adult corms are located.

What to do if mold appears on the corms?
Mold is most often caused by moisture. Either the corms were poorly dried, or moisture entered during storage. Such planting material should be washed with a sponge using any detergent. Tar or laundry soap. The mold must be washed off, the corms must be disinfected and all rotten areas must be cut out. Sections can be treated with brilliant green. After this, the corms are dried well in a dry, warm place and packed again for storage. Of course, the old bags and boxes in which the gladioli were located are no longer used.
Several years ago I read an article where the author suggested heating spoiled (moldy) planting material in hot water. The appearance of the article coincided with an unpleasant event: that year, groundwater. The paper absorbed moisture, causing mold to appear on some of the corms. Those gladioli that were cleared of it, washed, disinfected, dried and repackaged were not damaged at all. Processed hot water(everything was done “according to the instructions”) were not in better condition. They survived until spring, but later I discarded them.
© A. Anashina. Blog, www.site
© Website, 2012-2019. Copying texts and photographs from the site podmoskоvje.com is prohibited. All rights reserved.
(function(w, d, n, s, t) ( w[n] = w[n] || ; w[n].push(function() ( Ya.Context.AdvManager.render(( blockId: "R-A -143469-1", renderTo: "yandex_rtb_R-A-143469-1", async: true )); )); t = d.getElementsByTagName("script"); s = d.createElement("script"); s .type = "text/javascript"; s.src = "//an.yandex.ru/system/context.js"; s.async = true; , this.document, "yandexContextAsyncCallbacks");
Gladioli in winter: how to store at home, how to preserve, care
In order not to accidentally cut the tuber with a shovel, it is driven into the ground at a distance of 20 cm from the tuber. When digging, you can help slightly with your hands, supporting from below, so as not to lose the children.
This is a wonderful seedling material for next season. After digging, each one is shaken off the ground and stacked according to the variety. When the digging has come to an end, the stems of all tubers are shortened to a height of 20 cm.
From those dug up, it is worth removing those that are clearly affected by disease or severely damaged by worms or larvae.
Gardeners, explaining how to properly store gladioli bulbs, assure that the preservation of tubers in winter by more than 50% depends on the quality of their drying.
Pain in the joints and back is an extremely unpleasant phenomenon, as anyone who has experienced it can confirm. Sharp or aching, they exhaust a person and push him to search for different ways and remedies that can bring relief.
Not long ago, a Chinese patch for joint pain appeared on our market. Centuries-old traditions and experience of oriental medicine show its high effectiveness in treating diseases of muscles, bones, and cartilage tissue.
Find out more
Often, fan heaters and other similar devices are used for this - the temperature during drying should be at least 26-30 degrees.
The main things for preserving gladioli bulbs in winter are:
- Temperature. From 4 to 8 degrees Celsius.
- Good ventilation. Excessive moisture is a dangerous enemy of tubers, provoking their rotting and disease.
- Common places to store bulbs are basements and refrigerators. Some people use electric cellars, which are sold in specialized stores. They are equipped with thermostats, and temperature control when using them is greatly facilitated.
Clean paper is placed at the bottom of the dry boxes, and the bulbs are sprinkled with sand or ash. Some growers add dried mint or garlic cloves (which should be renewed once a month) on top for added protection.
The boxes are moved to a well-ventilated basement, when sharp decline temperature, you can throw a warm blanket over the bulbs for a short time.
Some sort the dried tubers into specially prepared bags (or just old stockings) and hang them in garlands in basements or loggias.
Answering the question of how to properly store gladioli bulbs in a city apartment, experts recommend a regular refrigerator.
Corms survive the winter well in the vegetable compartment in paper bags or plastic bags.
In the latter case, do not forget about ventilation - make holes in the cellophane for breathing, and always first wrap the bulbs with paper - by its appearance you can control the humidity of the tubers.
On a note!
If paper forms wet spots– storage conditions are unsuitable!
Sometimes a clove of garlic is also placed in bags with onions.
An innovative plant growth stimulator - increasing seed germination by 50% in just one application. Customer reviews: Svetlana, 52 years old. Simply incredible fertilizer. We heard a lot about it, but when we tried it, we surprised ourselves and our neighbors.
Find out more
When storing bulbs and baby gladioli, check their condition monthly. At the first sign of rot, fungus or sprouts, immediately adjust storage conditions; discard diseased tubers, never keep them with healthy ones, and in the spring you will receive high-quality planting material for your garden.
Gladioli in autumn: preparation for winter, care, application of fertilizers, technology and timing of pruning
How to prepare gladioli bulbs for winter - instructions
Now gladioli are divided into classes. The class depends on the size of the peduncle. Peduncles are miniature, giant, small-flowered, medium-colored and large-flowered.
Gladioli in autumn: preparation for winter, care, application of fertilizers, technology and timing of pruning
Caring for gladioli in the fall: preparing for winter, pruning, using fertilizers for autumn feeding
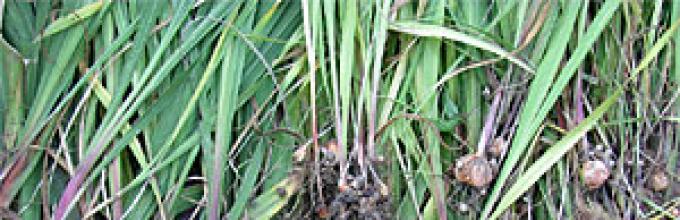
Digging of fennel bulbs starts towards the end of September. Only warm and sunny weather is suitable for it. When digging in wet weather, there is a risk of not noticing a large number of small bulbs. After successful wintering they can disrupt the purity of the hybrid gladioli variety.
To dig up the bulbs, use a shovel or a fork with wide and flat teeth. This is explained by the fact that over the summer many young children are formed around the mother’s bulb. To capture them all, you need to retreat from the stem in a circle of at least ten centimeters. It is best to pull out the dug bulbs by the leaves.
Sorting the bulbs by size and variety is mandatory. Healthy specimens no more than 4 years old, rounded, with approximately the same height and width, should be stored. Flat bulbs should be sorted and replaced with older ones. Of these, the largest specimens are left, which bloom before the small ones.
How to protect planting material from pests
Rinse the bulbs in cool running water. Then hold them for 2-3 minutes in a solution of potassium permanganate or in liquid laundry soap. This will prevent the development of various diseases in the future. You can also use special medications.
You can use another option for processing the bulbs. To do this, dilute 20 g of chlorophos in a bucket of water and dilute 10 g of potassium permanganate separately in another container in a liter of water. It is necessary to keep the corms in each solution for up to 20 minutes.
Tips are the only problem with gladioli. They can climb under the scaly layer of the bulb and calmly overwinter in it. Tips affect both children and adult plants. Insects develop instantly in warm conditions, so you need to be extremely careful to prevent the death of planting material.
Just in case, it is worth treating the bulbs with special preparations. “Inta-vir” has proven itself well; take 1 tablet per 10 liters of water. The bulbs are soaked for 30 minutes in the solution and then dried for 7 days.
If you are unable to find this drug, you can treat the bulbs with ordinary water heated to 60°C. Processing time – 10 minutes, then place the bulbs in cold water with a temperature of 12°C, and then dry them well.
Another effective way to get rid of pests is to buy powder to control cockroaches and simply sprinkle it on the bulbs. After 1 month, it is advisable to repeat the treatment. Decide for yourself whether to do such a manipulation or not.
There are few pests that attack gladioli, but they exist. The main enemies are slugs. They eat away soft areas of leaves, because of this, decorativeness and appearance colors. In addition, slugs gnaw the tubers, which leads to the death of plants.
These pests mainly attack those beds that are overgrown with grass. To avoid this, it is recommended to remove weeds regularly and in a timely manner. Along with their removal, you can fight these pests with the help of special preparations, for example, Thunderstorm or Meta.
The best folk remedies for pest control:
- salt;
- mustard powder;
- dark beer.
Mustard powder and table salt help a lot. These products are sprinkled on the soil and the plants themselves. Their consumption depends on how densely the flowers are planted in the garden bed, and is selected individually in each case. Salt and mustard burn the delicate skin of slugs, therefore they are a serious obstacle in their path.
Another pest that gnaws at gladioli tubers is the mole cricket. It is also very dangerous for these flowers, because it can destroy them. If there is a mole cricket in the soil, growing gladioli will be quite difficult. It is better to deal with it in advance.
There is an excellent remedy against this pest. folk remedy- This is a dark beer. The best way to combat the mole cricket has not yet been invented. To use it, you need to pour any dark beer into a regular glass, bottle or deep plate and bury it in the garden bed so that the neck of the bottle, the edges of the glass or plate barely peeks out above the garden bed. It is better if they are slightly recessed.
A bear can smell the smell of beer a mile away. She comes to this smell, climbs into the container as if into a trap, but can no longer get out. After some time, she dies in such a homemade trap.

Many flower growers love gladioli and have been growing them for many years. And in this article they give their practice-tested advice to beginning gardeners. Beautiful buds can be seen in many areas in summer. How abundant the flowering will be and what the size of the buds will be depends on the preparation and germination of the bulbs.
It is important to know when to take gladioli out of the refrigerator for germination. You should also correctly determine the soil temperature: the most optimal is 8.. 10 degrees. Usually the soil warms up this much in April or May, so they begin to germinate flowers 15-20 days before the soil warms up.
When should you take gladioli bulbs out of the refrigerator for germination?
Gladioli are removed from the refrigerator (basement) for germination 2-4 weeks before planting. This must be done in the last days of March or the first days of April. Properly prepared gladioli in the fall will turn into high-quality planting material in the spring.
During storage, the bulbs look like this:

As soon as the gladioli are taken out of the refrigerator, they need to be prepared:
- carefully examine, remove dry husks, sort, discarding diseased, shriveled or softened heads;
- if the bulb is slightly affected, the defect can be removed with a knife, but the cut area must be anointed, for which brilliant green, iodine, and crushed coal are used;
- In order to thoroughly disinfect gladioli bulbs, strengthen the roots, and saturate them with moisture, they need to be kept in an antibacterial solution (potassium permanganate, karbofos, boric acid) for several hours.
- per 1 liter of warm water vitriol – 0.3 g, boric acid and potassium permanganate – 0.2 g, cobalt nitrate – 0.1 g.
Prepared bulbs should be placed in a box for germination and left at room temperature. You need to lay them out evenly, with the sprouts facing up. It is advisable that they lie in a row. Gladioli will germinate in about 2-3 weeks.
1 week before planting, cutting should be carried out, and the corresponding places should be disinfected, sprinkled with coal, and dried.

When a sprout of 6-8 cm appears, the root tubercles or roots swell, which means the bulb has sprouted well and it’s time to plant it in the ground.
The soil should be light and loose. Bulbs should be planted at a distance of 15 cm or more.

When gladioli bloom, you need to carefully inspect their buds and promptly remove wilted ones. Flowers can grow in the same place for a maximum of 2 years, then you need to change the location.
Gladioli corms overwinter well both in apartments and in private houses. Of course, you need to take into account several “nuances”, otherwise all the efforts of the amateur gardener will be reduced to zero.
FIRST ACTIONS AFTER EXCAVATION
Excavated gladioli corms should be thoroughly washed from the ground. I usually finish digging in the first ten days of October. This year the gladioli sat in the ground much longer. I dig up gladioli only with a garden fork. I wash all the corms (with roots) from the ground with water from a hose or in a bucket of water. I immediately cut off the stem, leave a short stump, then bring the gladioli into the house. In order not to confuse the varieties, I place the corms in different containers, in which I put tags with the name of the variety.
In the house I wash all the corms again. Then I place them in a weak solution of potassium permanganate (or Maxim) for 30 minutes. After this, I remove the corms from the solution and lay them out to dry until the next day. Once again I check the condition of the planting material. Already more thoroughly. All problem areas are clearly visible on the “skin”, lightly colored with potassium permanganate. I store healthy corms, even those with small flaws, separately from the entire collection. After all sanitary treatments, I place the gladioli by variety in cardboard boxes of a suitable size. I put open boxes on kitchen cabinets. It's warm and dry there. I immediately mark the date when the corms need to be removed and stored in a cool place for winter. This will happen in 30 days.
HOW AND WHEN TO REMOVE ROOTS AND OLD MOTHER BULB?
I experimented a lot before I came to the conclusion that it is better to remove the old wrinkled corm with roots not immediately, but after about 1 - 2 weeks. The dried lower part is removed easily and quickly, leaving a clean bottom without any nicks on the upper replacement bulb. There is no point in delaying this until the end of drying. I leave the covering scales.
For information on storing other types of plants that do not overwinter in open ground, read the article Storing tubers and rhizomes in winter
STORING COLUMBLES IN A COOL PLACE

In a private house there are more suitable places where you can keep corms until spring. These are dry basements, storerooms and other rooms where the air temperature is kept within the range of plus 5 - 8°C. There, planting material can be stored in cardboard boxes or in nets (stockings, knee socks) suspended from hooks. The main thing is that the air temperature remains low above zero at all times. Planting material packed in a plastic bag is less likely to remain healthy. If the basement (cellar) is flooded with water, and the air humidity increases greatly, then the corms must be urgently removed and dried, and then a new storage place must be found for them.
In apartments or rooms it is more difficult to find a suitable place. In this case, the refrigerator comes to the rescue. The corms are placed in boxes of cookies, chocolates, tea, etc., which are wrapped in several layers of newsprint. What you need is paper, not plastic bags. The bundles are kept in the refrigerator in boxes designed for storing vegetables. The paper can be secured with tape or tied with rope. It is better if the inside of the boxes is lined with paper napkins or a paper towel. In such conditions, the corms breathe, remain dry and never become moldy. In polyethylene they run the risk (with a high degree of probability) of fogging up, getting wet, moldy, etc. Of course, I check the condition of the planting material several times during the winter. Some amateur gardeners dip the corms in melted paraffin before storing. They consider this option more reliable. I was told that gladioli are preserved well if their corms are pollinated with wood ash before storage.
It's easier with children. I usually put them in toothpaste boxes. If it is important for me not to confuse the varieties, then I first wrap the bulbs in paper napkins or paper handkerchiefs, on which I write the name of the variety. I store them until spring in the same cool places in which the adult corms are located.
WHAT TO DO IF MOLD APPEARS ON THE CORT BULBS?
Mold is most often caused by moisture. Either the corms were poorly dried, or moisture entered during storage. Such planting material must be washed with a sponge with any detergent. Tar or laundry soap works well. The mold must be washed off, the corms must be disinfected and all rotten areas must be cut out. Sections can be treated with brilliant green. After this, the corms are dried well in a dry, warm place and packed again for storage. Of course, the old bags and boxes in which the gladioli were located are no longer used.
Several years ago I read an article where the author suggested heating spoiled (moldy) planting material in hot water. The appearance of the article coincided with an unpleasant event: that year, groundwater leaked into the basement. The paper absorbed moisture, causing mold to appear on some of the corms. Those gladioli that were cleared of it, washed, disinfected, dried and repackaged were not damaged at all. Those treated with hot water (everything was done “according to the instructions”) were not in the best condition. They survived until spring, but later I discarded them.
In winter, gladioli corms stored for storage require periodic inspection. It is necessary to immediately carry out a series of preventive and therapeutic measures if any suspicions arise about the condition of the planting material.
DICHLOVOS AGAINST TRIPS
Gladioli corms can be affected by thrips. At storage temperatures above +10°C, thrips become very active and begin to greedily feed on the juices of the corms. If the planting material has not been thoroughly disinfected before storing in the fall, then gladioli are at risk. All “doubtful” corms are placed in plastic bags and dichlorvos is sprayed inside. The tied bag with gladioli corms is left for a whole day. Actellik treatment also helps.
Traditionally it is believed that the best remedy protection against thrips is garlic. If there is any suspicion of the presence of thrips, the corms are placed in a bag with chopped garlic. The bag is tied, and after a day the corms are taken out, dried and stored.
Gladioli corms overwinter well both in apartments and in private houses. Of course, you need to take into account several “nuances”, otherwise all the efforts of the amateur gardener will be reduced to zero.
FIRST ACTIONS AFTER EXCAVATION
Excavated gladioli corms should be thoroughly washed from the ground. I usually finish digging in the first ten days of October. This year the gladioli sat in the ground much longer. I dig up gladioli only with a garden fork. I wash all the corms (with roots) from the ground with water from a hose or in a bucket of water. I immediately cut off the stem, leave a short stump, then bring the gladioli into the house. In order not to confuse the varieties, I place the corms in different containers, in which I put tags with the name of the variety.
In the house I wash all the corms again. Then I place them in a weak solution of potassium permanganate (or Maxim) for 30 minutes. After this, I remove the corms from the solution and lay them out to dry until the next day. Once again I check the condition of the planting material. Already more thoroughly. All problem areas are clearly visible on the “skin”, lightly colored with potassium permanganate. I store healthy corms, even those with small flaws, separately from the entire collection. After all sanitary treatments, I place the gladioli by variety in cardboard boxes of a suitable size. I put open boxes on kitchen cabinets. It's warm and dry there. I immediately mark the date when the corms need to be removed and stored in a cool place for winter. This will happen in 30 days.
HOW AND WHEN TO REMOVE ROOTS AND OLD MOTHER BULB?
I experimented a lot before I came to the conclusion that it is better to remove the old wrinkled corm with roots not immediately, but after about 1 - 2 weeks. The dried lower part is removed easily and quickly, leaving a clean bottom without any nicks on the upper replacement bulb. There is no point in delaying this until the end of drying. I leave the covering scales.
STORING COLUMBLES IN A COOL PLACE

In a private house there are more suitable places where you can keep corms until spring. These are dry basements, storerooms and other rooms where the air temperature is kept within the range of plus 5 - 8°C. There, planting material can be stored in cardboard boxes or in nets (stockings, knee socks) suspended from hooks. The main thing is that the air temperature remains low above zero at all times. Planting material packed in a plastic bag is less likely to remain healthy. If the basement (cellar) is flooded with water, and the air humidity increases greatly, then the corms must be urgently removed and dried, and then a new storage place must be found for them.
In apartments or rooms it is more difficult to find a suitable place. In this case, the refrigerator comes to the rescue. The corms are placed in boxes of cookies, chocolates, tea, etc., which are wrapped in several layers of newsprint. What you need is paper, not plastic bags. The bundles are kept in the refrigerator in boxes designed for storing vegetables. The paper can be secured with tape or tied with rope. It is better if the inside of the boxes is lined with paper napkins or a paper towel. In such conditions, the corms breathe, remain dry and never become moldy. In polyethylene they run the risk (with a high degree of probability) of fogging up, getting wet, moldy, etc. Of course, I check the condition of the planting material several times during the winter. Some amateur gardeners dip the corms in melted paraffin before storing. They consider this option more reliable. I was told that gladioli are preserved well if their corms are pollinated with wood ash before storage.
It's easier with children. I usually put them in toothpaste boxes. If it is important for me not to confuse the varieties, then I first wrap the bulbs in paper napkins or paper handkerchiefs, on which I write the name of the variety. I store them until spring in the same cool places in which the adult corms are located.
WHAT TO DO IF MOLD APPEARS ON THE CORT BULBS?
Mold is most often caused by moisture. Either the corms were poorly dried, or moisture entered during storage. Such planting material must be washed with a sponge with any detergent. Tar or laundry soap works well. The mold must be washed off, the corms must be disinfected and all rotten areas must be cut out. Sections can be treated with brilliant green. After this, the corms are dried well in a dry, warm place and packed again for storage. Of course, the old bags and boxes in which the gladioli were located are no longer used.
Several years ago I read an article where the author suggested heating spoiled (moldy) planting material in hot water. The appearance of the article coincided with an unpleasant event: that year, groundwater leaked into the basement. The paper absorbed moisture, causing mold to appear on some of the corms. Those gladioli that were cleared of it, washed, disinfected, dried and repackaged were not damaged at all. Those treated with hot water (everything was done “according to the instructions”) were not in the best condition. They survived until spring, but later I discarded them.
In winter, gladioli corms stored for storage require periodic inspection. It is necessary to immediately carry out a series of preventive and therapeutic measures if any suspicions arise about the condition of the planting material.
DICHLOVOS AGAINST TRIPS
Gladioli corms can be affected by thrips. At storage temperatures above +10°C, thrips become very active and begin to greedily feed on the juices of the corms. If the planting material has not been thoroughly disinfected before storing in the fall, then gladioli are at risk. All “doubtful” corms are placed in plastic bags and dichlorvos is sprayed inside. The tied bag with gladioli corms is left for a whole day. Actellik treatment also helps.
It is traditionally believed that the best protection against thrips is garlic. If there is any suspicion of the presence of thrips, the corms are placed in a bag with chopped garlic. The bag is tied, and after a day the corms are taken out, dried and stored.
Gladioli corms have low frost resistance, which is why this crop has to be grown as an annual, dug up for the winter. Even compliance with all winter storage conditions does not always allow you to save gladioli, so preparing for planting is the most important stage in growing them in a summer cottage.
Preparing gladioli for planting in spring
Watercolor-delicate and solemnly bright, simple and terry, monochromatic and variegated - in total there are about two hundred species of this plant in the world. Caring for them does not require special skills, with the exception of preparing gladioli for planting:
- External inspection and cleaning of dry covering flakes. The beginning of pre-planting treatment, allowing you to reject all shriveled, damaged and rotten bulbs.
- Sorted by size and/or grade.
- Disinfection. Treatment with bactericidal and fungicidal preparations (both chemical and natural origin). Necessary for the destruction of spores of pathogenic fungi and pest larvae.
- Germination. Helps achieve early and consistent flowering.
What to do with gladioli after winter storage?
Gladioli, preparation for planting of which is carried out according to all the rules, must undergo a thorough inspection. This stage helps to sort out all the bulbs that did not survive storage - rotted, dried out, deformed. If the degree of damage is small, you can try to save the bulb by cutting out the defect with a clean sharp knife and disinfecting the cut with brilliant green, ash, iodine, activated carbon or potassium permanganate. It is better to throw away specimens completely covered with brown spots.
Insufficient humidity levels and elevated temperatures in storage can lead to partial drying of planting material. There is no need to be afraid of this; valuable bulbs can be revived. What to do if gladioli have dried out over the winter? A short-term (30 minutes) bath in water with the addition of hydrogen peroxide (1 tablespoon per liter), soda (1 teaspoon per liter) or solution will help save them. It is produced immediately before planting in the garden.

When to germinate gladioli in the spring?
Depending on the region in which gladioli are grown, preparations for planting can start either at the beginning or at the end of April. The period for its implementation is determined by the fact that open ground the bulbs should arrive after it has been warmed to a temperature of at least +10°C (April-May). It is recommended to remove tubers from winter storage no earlier than 3 weeks before the planned planting. Earlier germination of gladioli tubers after winter can negatively affect the quality of flowering and the plant’s resistance to open ground conditions.
How to germinate gladioli before planting?
After inspection, cleaning and culling seed material, start germinating gladioli before planting. To do this, the bulbs are simply laid out in a single layer in a warm and dry room. You can use a spacious cardboard box or pallet for these purposes. Important condition proper germination of gladioli - sufficient quantity sunlight. At the same time, direct rays should not fall on the bulbs themselves.
Unlike other plants, gladioli, when properly prepared for planting, produce small (up to 5 cm) sprouts and do not form roots - their root tubercles simply swell, nothing more. Do not germinate bulbs on damp cloth or in substrate. The resulting roots may break off during planting, and stunted shoots will significantly increase the acclimatization time in open ground. And such “seedlings” will take up a lot of space in the apartment.
What if gladioli sprouted ahead of time?
After being dug out of the ground, gladioli are in a dormant state. Its natural duration is short - only 40 days. It can be artificially extended by the right conditions storage (+10°C, 60-70% humidity). As soon as this regime is broken, the bulbs begin to grow. What to do, gladioli have begun to sprout, but it is still very far from planting them in open ground? It is necessary to dry them and place them in a place with low temperature (+5-7°C), for example, on the bottom shelf of the refrigerator.

How to treat gladioli bulbs before planting?
- Preparations “Fundazol”, “Maxim” - soak for 40-55 minutes in a 3% solution.
- Soak a strong (dark cherry) solution of potassium permanganate for 1-2 hours.
- (5 grams) + potassium permanganate (1 gram) per 1 liter of water - soak overnight.
- Garlic solution (100 grams of garlic juice per 1 liter of water) - leave for 2-3 hours.
Diseases of gladioli bulbs
Even for the most caring and carefully observing all the rules of care of amateur flower growers, gladioli begin to degenerate over time: the flowers become smaller and flowering shorter. This is due to diseases and pests of gladioli, which deeply affect the corms and eventually spread throughout the entire area:
- Fungal diseases (fusarium, rot, scab). They arise as a result of the spread of fungal spores throughout the area. Their appearance is provoked by high humidity and thickened plantings. In the initial stage of the lesion, the bulb does not stand out in any way externally, but develops poorly and does not produce a flower shoot.
- Viral diseases. Pathogens are spread by sucking insects.
- Pests (thrips, mites). They feed on the juice of corms, weakening and depleting them.
The following measures help save gladioli from damage:
- Careful pre-planting sorting and processing of bulbs. You should not plant corms with the slightest signs of damage (spots, mold, etc.). It is better to propagate gladioli by children, which are easier to disinfect.
- Maintaining crop rotation. You should not plant gladioli in the same place for more than 3 years in a row.
- Regular weeding. In addition to weeds, it is recommended to mercilessly remove gladioli from the garden beds that show signs of viral or fungal infection: spots and deformations on leaves, rot, etc.
Gladioli bulbs are moldy - what to do?
Mold on gladioli appears as a result of non-compliance with storage conditions (excess humidity, temperature changes and stagnant air). In most cases, it affects the surface of the integumentary scales without affecting the body of the bulb itself, and is easily cleaned off during preparation for planting. If mold is discovered during winter storage, the tubers must be treated with a strong solution of potassium permanganate or any antifungal agent, dried and stored in a cool, dry place until spring.