
Last update: 12-10-2019
Also take into account, in connection with the fluctuations in the course of the currency, seasonal discounts, etc. It may turn out that the same building materials will be much more expensive after a couple of weeks.
Do not forget to make discount cards Building stores, it will save.
Wiring
If there is no shield in the apartment, then put.
Make a separate line for the refrigerator, separate for the boiler, separately light, separate sockets, separately the stove. This is done for convenience in the future.
For instanceWhen in the summer we turn off the water, I can't use many devices at the same time. Either boiler + kettle, or kettle + iron, etc. Otherwise knocks out.
In an apartment with a draft decoration, these works will cost cheaper and faster.
We make floors in the bathroom
Door installation
Order is best in advance, along with the entrance. To do not pick up the color.
My wife and I somehow did not think about it and bought the laminate of reddish-brown first. When they started picking the doors, they realized that it was easier to change the laminate than finding the right door color.
Glue wallpaper
Wallpaper 0.5 meters glued long, it is better to immediately take meter. Some vinyl wallpapers can smell strongly and for a long time (there were almost a month from some wallpapers), and some very soft and they remain dents, it is easy to damage during stickers. Consider this when choosing.
Now there are many alternatives to wallpaper (wallpaper for painting, decorative plaster, decorative stone, etc.), it all depends only on your financial opportunities.
Where there is a risk to damage anything because of inexperience or take a long time - should be ordered for money. For instance, Bought furniture in the room, I decided to collect on my own (it was interesting). In fact It turned out that the assembly instruction is absolutely not informative and had to carry 2 days, although if I ordered an assembly, it would be done for 3 hours. Make conclusions.
This looks like a sequence of repair of an apartment in a new building with us, but the following items can be added to the apartment with an already existing old finish (dismantling of the old finish, garbage cleaning). Although many types of work, most likely, do not have to do.
For those who are going to order repair services, you can save time.
You can also schedule an apartment and see how it will look after repair., I was useful for the program Sweet Home 3DYou can download it free of charge (the link leads to the Russian-language site page).
That's what I have been planned at my wife in the evening.
If you know any other useful programs for repair, write in the comments, I think many will come in handy.
Do you associate with a million spent nerve cells with a million and very long process? We will prove to you the opposite! You still do not believe, but the repair can become pleasure if it is not easy to turn this and, at first glance, a rather boring occupation in a simple and exciting process.
And the main thing in this case is an order when the sequence of apartment repair is observed with their own hands, and all stages of repair in the apartment follow one after another according to a predetermined repairs plan.
So, you still decided and tuned to make repairs in the apartment, a separate room with your own hands. How to make an apartment repairs with your own hands? What is it preferable to start? When and in what sequence to change the doors, windows, repair floors? What is the procedure for performing repair work should be? We will try to answer the main questions in this article.
Stages of repair of the apartment with their own hands: We plan in advance work order

Indeed, all stages of apartment repairs from scratch is important to know and comply with the sequence of work carried out.
If you follow the sequence of events, you can significantly save money, reduce repair time, achieve a better result when finishing workoh
First stage - Global preparation

Each repair begins with global training. First of all, it will be necessary to fulfill all dismantling work: removal of plaster, old wallpapers, blots, door blocks, flooring, and, if necessary, dismantling partitions and their permutation.
There may be such a situation that already completing the repair, when finishing, you will find that I still forgot to dismantle something. Here you have to redo the work, and redo slow, carefully, to minimize new destruction.
Therefore, graduating from dismantling the entire unnecessary, old and subject to replacement, carefully inspect the result of your work: whether you did everything.
2 stage - replacement of glass windows

This work is quite dirty, especially its first part, when old window blocks need to dismantle. After installing the window and the windowsill, immediately close them with a thick film of polyethylene, so as not to scratch and not smeared during subsequent work.
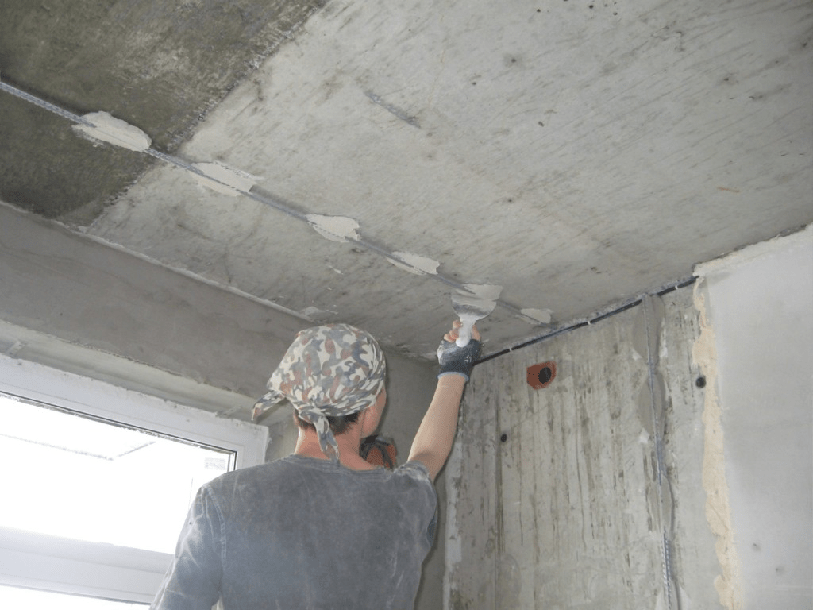
3 Stage - Plastering

Plastering, when performing, require compliance with the following sequence of work: markup for beacon profiles, primer walls, installation of a beacon profile, plastering walls, slopes. Plasterboard walls Shuttering is not subject to. Works on the plaster ceiling, installation and installation of stretch and suspended structures should be carried out only by completing the wiring on the ceiling of ventilation, electrical cabbels, other communications.
4 Stage - Wiring of electrical communications, plumbing work
 The events of the fourth stage belong to one of the most responsible steps of repair - this is the installation of heating radiators (or replacement), gasket and wiring of electrocabilities, low-current wire (there are grounding cables, Internet, telephone, TV, alarm.
Before styling cables, be sure to make outlets and switches output on the plastered walls. Next, proceed to work on the winding of holes and grooves for cables, junction boxes, pickles, install the built-in electrical block.
Be sure to draw the circuit wiring: it is necessary to then not allow a random hit to the place where the wire is laid when you become drilling a hole, clog nails. It is very important in the kitchen, toilet, bathroom in front of the wiring laying, perform pipe wiring, including other related work.
Fifth stage - floor preparation
Warm floor, screed and alignment. When the screed is laid, aligned, it is necessary to wait for its absolute drying. For different materials - different drying time, carefully read the instructions in the instructions or packaging.
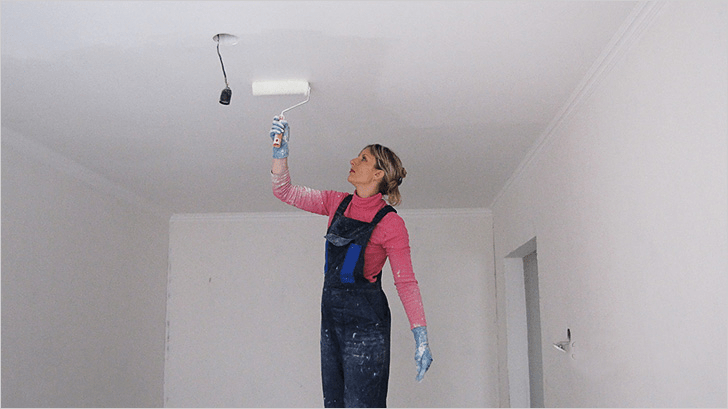
6 Stage of Repair - Getting Started

When the floor is prepared, you can install the doors, then proceed to finishing work. The sequence of finishing works depends on the choice of technologies and the materials used. So, the whots or painting of the ceiling is performed primarily, and, let's say suspended ceiling Mount best when the walls are finished. Laying any floor covering, be it linoleum, tile or parquet, is performed when the walls and the ceiling are ready.

Then you can install plinth, sockets, platbands, all sorts of decorative elements; In the bathroom, kitchen, the toilet is installed plumbing, mixers, various accessories.
Important! Repair, if possible, better all the apartment immediately and entirely. Similar stages of work, this is especially relevant for "dirty", such as the removal of the old whitewash, the installation of windows, not to mention the breakdown and permution of partitions, it makes sense to do in all rooms at the same time, to prevent such a carpet, in the same room The other was just started to wash off the ceiling old bliss.
If you immediately repair the whole apartment problematic, you need to start repair with the longest room from entrance door and continue repair work, gradually approaching the exit. Repair of the corridor and the hallway make last. This is a fairly obvious rule: it is clear that on the fresher-reconnected rooms to carry buckets with a solution, bags with the construction garbage - not the best decision. But the rule is disturbed constantly ...
Read about whether all the secrets and features of the installation of double-glazed windows in residential premises.
Watch the video, how to put the plasterboard under the wallpaper - all plasterboard sheets Before sticking wallpaper, you need to prepare.
By the way, moving from the most remote room from the hallway and with the full repair of the apartment is entirely. To greater extent it concerns the final stage of the work - finishing.
This is how the instructions for repairing the apartment looks like. For those who prefer to read the video format, we offer to see the educational video on the repair of the apartment with your own hands:
The issue of repairing the room is almost always resting in the budget of future works. Most often, the owners of the apartment or at home appear before the choice - to make the room repair with your own hands in a cosmetic version, without postponing the case in a long box, or schedule for an indefinite future capital restructuring with redevelopment and serious design updates. Most of the masters in such a situation are recommended to carry out the cosmetic room repair, during which you can solve the vast majority of problems with the interior of the room.
How to properly approach the organization of repair in one room
It is always inconvenient to start repairing the room and even scary, especially if there is no sufficient experience, and from the helpers at hand only the cheat sheet on the repair of the room with their own hands for beginners. But, as a rule, uncertainty and doubts pass when it becomes clear the amount of future work and the issue is resolved, in which sequence to make repairs in the room.
Therefore, the first thing is the master plan for cosmetic repair, and most importantly, before trying to make repairs in the room, it is necessary to compile a detailed estimate for the materials and consumables. This is a prerequisite, even for repairing in a small room, you will need to make a list of several dozen items.
Where to start repairing in the room - not fundamentally, it is possible to carry out repair work in the sequence that seems more convenient in these specific conditions. Traditionally, the room repair is starting with their own hands from the most "dirty" or drafts and finish with subtle finishing procedures.
A typical list of works or a repair sequence in the room is as follows:
- From the walls, the ceiling and floor is removed by the old finish. The removal of the floor covering gives the largest percentage of dust and dirt, so it is removed primarily;
- Conducting floor preparation is carried out for further laying of a new floor covering;
- Repair of wiring, transferring and hanging lamps, switches, unfold corrugations under television and Internet cable;
- The walls and ceiling are cleaned and sweep. If the plans of cosmetic repairs are supposed to change the wallpaper on a more modern type of finish, then it will be necessary to perform alignment of the walls gypsum plaster;
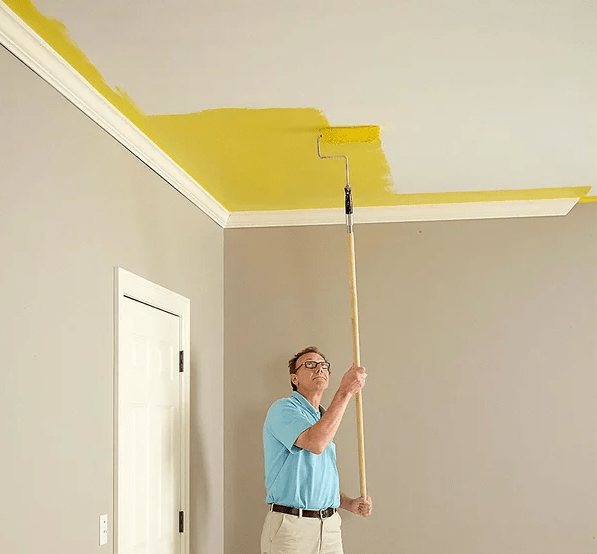
- The ceiling surface is equal to the same way. Under the spins or painting with a water-free ceiling, plastering the lime-plaster mixture and laid decorative coating;
- Decorative wall decoration is performed, glued ceiling plinth, Changes facing interior doors;
- Stay new flooring, plinth are installed, lamps are hung, switches are installed.
Of course, at each stage of the repair room, the photo will be formed a large number of garbage and dust. Not only will you have to regularly remove the room and take the garbage dusties, you will need to try to close the sections with the repair of the protective polyethylene film to avoid dusting the surface.
What should not be included in the cosmetic room repair
The wizard finishers often call the cosmetic repair of the work "for three days" in order to update the interior in the room, more, as a rule, is not required. The list of repair activities do not include the most expensive work:
- Redevelopment of premises with the transfer of interroom partitions;
- Replacement of the heating system;
- Installation of expensive multi-tiered suspended ceilings;
- Glazing balcony and replacement windows on double-glazed windows;
- Warm floor equipment in the room.
It is clear that all the listed components of repair require serious financial costs and attracting qualified specialists to the work. Time to hold such serious events will be required no day and not two. In addition, this is the specificity of the repair in the room, that the willy-nilly dust and the construction trash sprawl across the apartment. Therefore, the situation is regulated in this way - either the cosmetic repairs are made in a separate room, or the whole apartment "gets up" to capital repairs.
In general, in a plan for cosmetic repairs include everything that can be made in a couple of days with their own hands for relatively small money.
The main task of cosmetic repair
The main goal of repair work is to refresh the interior of the room, remove the minor defects and damage accumulated over the years, insanely annoying and interfering in everyday life.
In rare cases, cosmetic repairs becomes a consequence of force majeure circumstances, for example, the flooding of the room with neighbors in the floor above or preparing the room to surrender in the hiring. There may be a lot of reasons, but the main thing is still maintaining the room in a comfortable condition.
Properly performed cosmetic repairs makes it possible to save on the volumes of future overhaul, for example, the fulfillment of the center of the floor and alignment of the walls at least will reduce the costs of time and forces to prepare for overhaul, naturally, provided that the room repairing the photo is made as in good faith and high quality .

The next stage of repair, cost distribution and load
One of the most difficult stages of cosmetic repairs are fair to plan budget planning and procurement of materials. Especially if you plan most of the repair procedures with your own hands. The reason is simple - in lovers and beginner masters, there is no idea about how much the material will be needed on this or that section of the work.
In this case, the problem is solved in two ways:
- Compiled list work and estimate can be shown experienced Masterwhich will help calculate the quadrature of the room;
- Calculate flow Based on the standard recommendations of building materials manufacturers, increasing the stock of glue, plastering, wallpaper, flooring by 10% of the calculated indicators.
In the latter case, the costs of acquiring materials will increase significantly, but ultimately the remains of cement, dry plaster and adhesive can be used for the cosmetic repair of other rooms in the apartment. In addition, the list of often helps to get a wholesale discount, so that there should be no significant failures in the budget of the future cosmetic renewal of the room with a competent organization of procurement.

Preparatory stages of repair in the room
The first, the most time-consuming stage there was always a rough ridge of walls and a ceiling. Usually repairs in the room begins with the removal of furniture items and seal the entrance door to protective awning. You can use a dense polyethylene film or an old blanket. The improvised curtain will protect the rest of the apartment from the noise and dust, which, even with very neat work, the use of the vacuum cleaner and the damp floor cleaning is always accumulated in a room in considerable quantities.
Before repair, lamps are necessarily removed, instead of a chandelier in the room, leave a cartridge with a light bulb. If the room is installed double-glazed windows, it will be useless to tighten the film and the window opening before repair. It is clear that the film is closed and the floor covering, it is easier to minimize placed polyethylene than to wash the dirt in the room every evening.
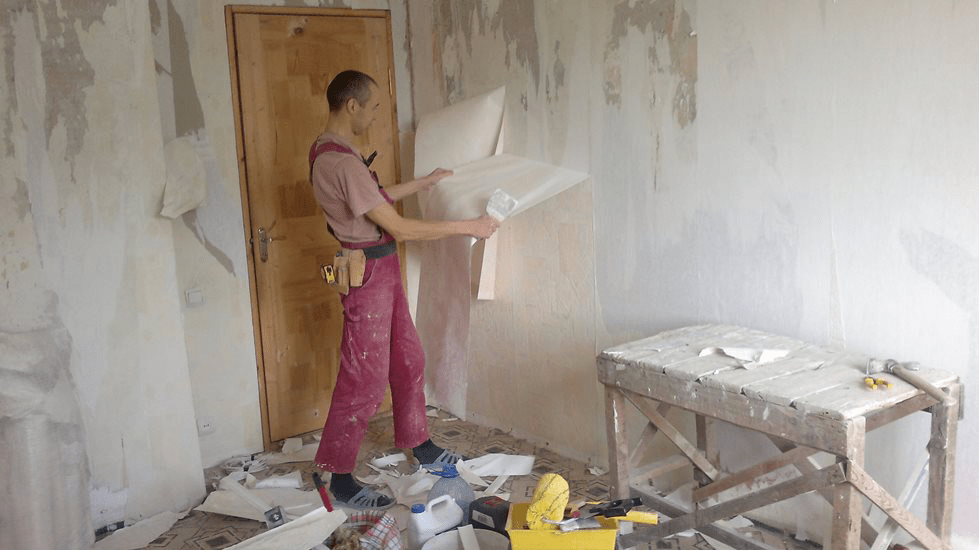
We remove the old finish from the walls
A third of the scheduled time is due to the preparation for cosmetic repairs. During this time, you will need to remove the blots and wallpaper from the walls of the room. If there are areas with damaged plaster, it will take another day in order to knock down the plaster from the walls.

Old wallpaper is removed by either by one panel, or they will be scrooks for a long time with small pieces, it all depends on the glue used. Before removing the wallpaper, the surface is moistened from the sprayer with a small amount of water. After 20-30 minutes, the tag can be removed by flap. For highly strong adhesives, boiling water and steam are used. In any case, after the sprinkle of the old chopper, you will need to go through a vacuum cleaner and a rigid brush to remove the dust and remnants of glue.
Rogging and restoration of the ceiling surface
The ceiling is freed from the decorative coating much faster and easier than the walls. If the plans of cosmetic repair will be a sticker polystyrene plates Or laying plastic panels, then it will be enough to remove the top layer of whitewash.
Comprehensible situation if the ceiling in the room is painted water-emulsion paint Or bit lime. In this case, you will need at least a day to remove the durable layer of the old finish.
The most common option to restore the ceiling during cosmetic repair provides for the alignment of the plane ceiling overlap. In any room of any apartment, the ceiling slabs lie with a differential in several degrees, which leads to a difference in the height of the ceiling near the opposing walls of the room from 2 to 5 cm.
If the time and budget of cosmetic repair allow, it is best to perform the alignment of the ceiling overlap with high-quality plaster plaster.
To do this, plastic rails are coiling and tighten the plaster with a plaster grid. Reiki-beacons glue alabaster, focusing on the pre-stretched marking horizontal cords. The grid is sewn on dowels. The total time required for the ceiling alignment in the room is 5-6 hours of operation.
In one working day you can complete the full repair of the ceiling. The next day, you can rub the surface and paint surface.
Cosmetic repair work with room walls
During the cosmetic repair, the walls are flattering and plastering only in exceptional situations, when this requires a situation, for example, the appearance of a large amount of cracks or the rocking of plaster. In addition, the total area of \u200b\u200bthe walls of the room, as a rule, three times exceeds the area of \u200b\u200bthe ceiling, which in itself requires large costs time and materials.
Therefore, during cosmetic repairs, the preparation process is limited by a cutting of small cracks, followed by shtcloth and surface grinding. Sometimes, in order to align the plane of a separate wall, especially problematic foster is subjected to grinding with electric grinding.

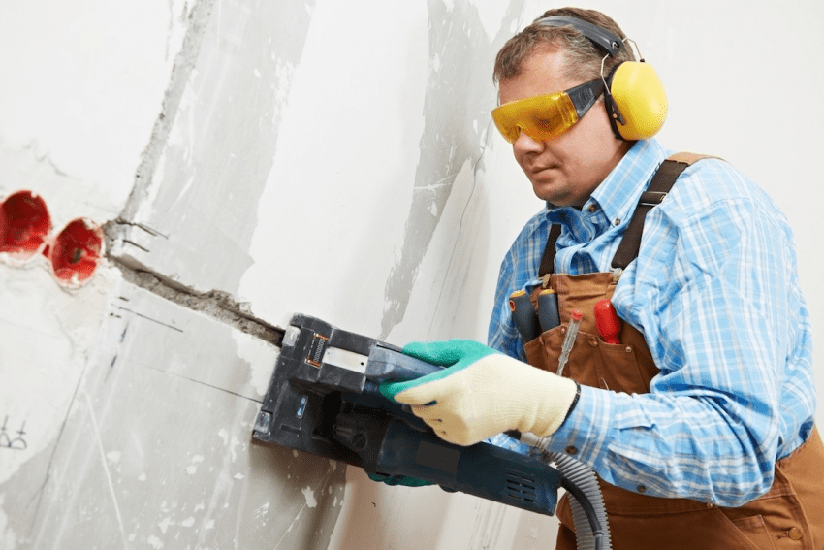
In addition, at this stage of repair work it is easy to change the profile and configuration of wiring wiring in the room. It is enough to labby the channels at the bottom of the walls to the place of installation of new electrical sockets, break through the "glasses" for cutting and install the sockets themselves. Channels laid in channels with wiring can be witching plaster or alabastern weight. All works will take a maximum of 2-3 hours. At the end of the preparation for decoration, the surface is carried away by a vacuum cleaner and ground.
Blood preparation
After the end of the most labor-intensive work with the preparation of the ceiling and walls, you can move to stripping and preparation of the floor. If concrete floors, with a floor-based floor-based coating, then cosmetic repairs can limit the resetting of laminate plates, with a replacement of a lining material or without any. Most often in the room change damaged plates, after which the coating is polished using wax mastic.

Linoleum coatings in cosmetic repairs are cut, the base is determined to concrete, it is ground and closes with a thermal insulating lining based on foamed polyethylene.

If the room is equipped wooden floors, first of all, the flooring themselves are cleaned and repaired, then the joints are clogged and coincided, after which the surface is grouped and preparing under painting.
Do not forget about trash and dust
Any repairs, even the simplest and superficial, are always accompanied by the formation of a large amount of garbage and dust. Before repair, you need to prepare two or three polypropylene bags, in which all garbage from the room will be collected daily. At the end of the day after each finishing operation, the wall and the floor are cleaned from the raised crumbs and residues of the plastering solution, and before finishing the walls are a vacuum cleaner or a wet brushed.
If it is supposed to align the walls of the room with plaster plaster, then the amount of garbage will increase five to six times. It will be necessary to consider in advance and find a way to collect and remove 150-200 kg of cement and sand garbage drops. It is impossible to send it to garbage chute or garbage tanks, you will need to order a special service for the removal of construction waste.
Cosmetic Repair Operations in Room
First performed finishing Ceilings. Usually the repaired and ground surface is ground and stained acrylic paint Light tones.

If wallpapers are used in the interior of the room, ceilings can be decorated with fluiseline or vinyl wallpaper in the tone of the future wall decoration. The usual practice for registration of lamps and chandeliers is considered to use imitation of stucco from polystyrene foam and decorative ceiling plinths.
The finishing of walls in the room is considered one of the most responsible and at the same time labor-intensive cosmetic operations. Even with the fact that half of the walls in the room will be closed with furniture, all the same as a certain part of the walls will be well viewed by all those present in the room. If during the cosmetic repair, it was not possible to highlight the surface of the walls, we can only hide the disadvantages under the wallpaper. It is best to tissue-based tissue trellis or with a pronounced embossed textured surface. There will take 7-8 hours or full time on the room.

Repair doors and floor in a small room
The wooden board of the old layout often has to be hiding under linoleum or laminate. In this case, the surface of the flooring is polished by a cyclical machine, and the joints are crossped with nails, clogged at an angle to the board. At the next stage of repair, the surface of the floor is sewn plates of OSBAfter that, in the room you can lay a linoleum or any other option of flooring.

The situation is complicated if concrete floors are aligned in the level of the screed in the entire apartment. In this case, any floor covering in the room will lead to the appearance of the clad, so laying the laminate or parquet should be planned simultaneously in all rooms.
The final stage is considered to restore interroom doors. Lutka and the door itself, if they are in good condition, can not be changed, but to subjected to restorations with cleaning and surface polishing. Outdoor cladding door box During the repair, traditionally replaced new. The replacement of the door with the carrier box is planned for overhaul, usually so that the doors of one style and execution in the entire apartment or house.

Conclusion
Room repair, even in a cosmetic version, requires careful preparation, first of all, in the details of the future interior of the room, the method of decorating walls and gender. Any attempts to postpone the decision for the future, to make random, as it turns out, will lead to a significant increase in costs and an increase in the time required for the restoration of the room, two or three times.
Repair of the apartment with their own hands where to start - this question at least once in his life asked himself every owner of the housing. As a rule, positive emotions are the upcoming event for those who first received or acquired their own housing. Those who have already come across the work on bringing apartments in order, knows how many trouble they bring, and how much effort will have to be attached to achieve the desired result.
But, if it came time to do an apartment updating, you will have to be patient and the decent amount of which depends on what kind of repair is made decision to hold.
Repair types in the apartment
Repair can be capital or cosmetic, cover the entire apartment or separate rooms. But you should know that repairs in some rooms can become more laborious and will require high costs and forces than work in other rooms.
Overhaul
Capital work implies repair "from scratch" in new apartment Or redevelopment with replacing or transfer of installed elements in old housing. The scope of work will depend on what changes are decided to produce in the apartment.
The total amount of work may consist of the following events:
- It may include demolition or installation of partitions, a combination or separation of rooms, transferring or expanding door openings. If at least one of the listed actions is scheduled, then it is necessary to consult with a specialist who will determine whether it is possible to produce this process. All repair work related to dismantling or installation of walls in multi-storey housemust be confirmed by the permission of the Commission of the Management Organization.
- Replacing and moving plumbing devices, radiators, electrical outlets, carrying out additional lighting.
- Replacing windows and doors.
- Replacing the old trim of the ceiling of walls and floors.
- Embedding furniture if this process is included in plans.
Capital alteration in the apartment is a long-lasting process that cannot be made in two days or a week, while you will have to free the rooms from furniture and all things, as they will interfere with work or can be corrupted by building materials. Perhaps you will have to repair alternately in each of the residential rooms, in this case, you will have to take care of buying a dense polyethylene film to heat the doors from the construction dust and dirt. But, as a rule, overhaul still suggests that the family will have to live elsewhere.
Redecorating
Cosmetic repair usually implies the replacement of decorative trim in one, several or in all rooms. Perhaps, removing the old coating, you will have to adjust the corners, the surfaces of the ceiling, walls and floor.

When performing a cosmetic version of the repair, surface preparation for new decorative materials can be called one of essential processes. Whatever expensive, neither the selected wallpaper, linoleum or paint, if they are laid or applied to uneven with sherbinki surface, the expected effect will not work. Therefore, so that the decorative finish looked properly, without aligning surfaces with a putty or bulk sex, it is not necessary.
By choosing a repair option that is suitable for a specific apartment, you can move to further work.
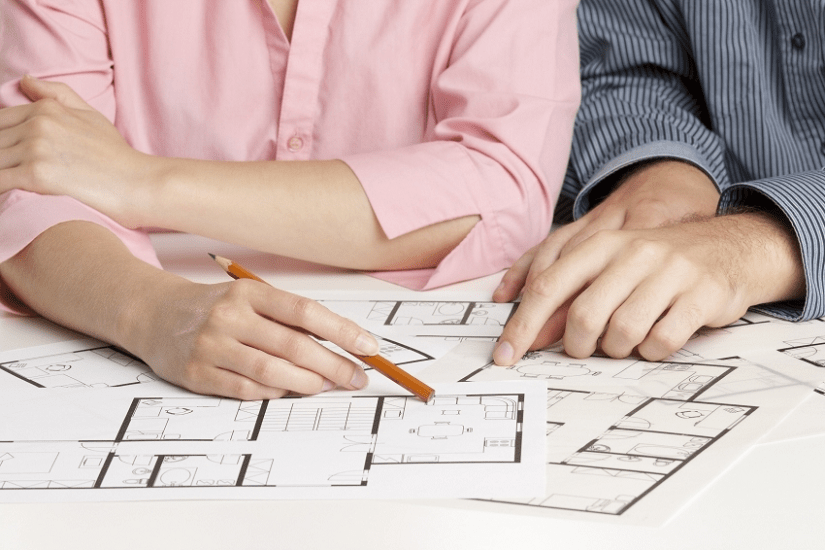
Drawing up a repair plan
The first thing you need to do is to draw up a plan of an apartment in which the exact data on the area and the height of the ceilings of each of the rooms will be displayed, with or without partitions, in one word - in this form, which one should appear an apartment after repair work.

General Repair Planning Rules
IN design project It is necessary to show the desired color of floor coverings, wallpaper, as well as at least the approximate placement of furniture. Using this project plan, it will be easy to calculate the necessary building materials and accessories for each of the apartments. Of course, everything will not take into account, but it will save from some mistakes that are typical for non-professional masters:
- Given the placement of furniture and various household equipment, you immediately need to determine the location and number of electrical sockets and switches.
- It is necessary to try to avoid the shortage of certain finishing materials, since if they have to arrive, it will be very difficult to find the shades of the same tile or wallpaper.
- Having made the project in color, you can visually be convinced by the correctness of the color of decorative coatings, and in how they will harmonize with the shades of furniture.
In the process of drawing up a similar plan, many ideas may appear on the design of the premises, so it is recommended to make a project in several colors, and then choose the most liked option.
The plan can be compiled using a computer program or on a regular A4 sheet. It is necessary to perform it necessarily in compliance with the size corresponding to the present, but on a reduced scale.
If the plan is made manually, then drawing it once, then you need to make several photocopy on which you can apply different shades or different furniture arrangements.
 The presence of a graphic plan will allow "to play" with finishing styles and with furniture arrangement
 You can create a plan for the whole apartment to see her color solution Fully or make a design design of each room.
In addition, it is very convenient for each of the plans to put the number of the stage, and each of them plan a certain job. For example, on one of the drawings you can show re-planning walls, on the other - electrical wiring and placement of sockets, as well as the connection of various devices, on the third - the future placement of furniture and the color solution.
Room division
To know where to start repairing each room, it is necessary to determine what will be located in it.
- In the children's room, it is desirable to separate if the area allows sleeping place from the game zone or from the place to practice the child.
- The kitchen must be spacious, so it needs to be correctly divided into zones, having determined the working and dining place, as well as the installation of various devices.
- If you plan to separate or combining the bathroom, then on the first drawing it is worth measuring and specifying its size and alignment of accessories.

- If the start with the desire to divide it into two separate rooms, it is necessary to measure it very carefully both in the drawing and in place. In this case, you need to immediately determine the thickness of the partitions, as they also occupy a certain area.
Sometimes such redevelopment can affect the hallway, as in some apartments it occupies a fairly large area. It is important to determine here what kind of construction is the partition separating the hallway from the rest of the rooms. If it is capital, it cannot be touched without permits.
- If there is no possibility to divide the room by partition for some reason, you can install a wardrobe or rack as a "barrier". It is also worth noting on the plan.
Selection of materials for decorative trim
The next plan drawing should be dealt with finishing material and its color, since the comfort of being in the room will depend on these factors. By defining the finish, you need to choose it competently. Naturally, the safest person is natural material, such as cork, wood, paper, ceramics and them like, however, some species are not always applied due to high prices or inconsistencies to the selected design. So, what materials can be applied to different premises:

- Children's room and adult bedroom. For the premises of such a purpose, it is necessary to maximize the use of natural finish, which does not cause allergic reactions, "breathing" and possessing soundproofing qualities. If overhaul is performed, before mounting decorative finishThe walls can be equipped with a soundproofing layer - for this, materials such as "Texound", acoustic drywall, traffic jam and others will be suitable. As decoration of the walls and the ceiling, it is best to use shuttering and coating with paints on water based or pasting paper or cork wallpaper. Today in construction stores these materials can be found for every taste and color.

- Living room. For this room you can choose a wider range finish. Linoleum, laminate, parquet, carpet, traffic jam, and other modern materials may be on the floors.
What you need to know about linoleum?
Despite the fact that many new flooring appeared, the linoleum is not going to pass its position in popularity. Useful information about posted in a special publication of our portal.
To design walls, plaster and painting, cork, cork, paper, fliesline, vinyl, textile, glass, and other options can be used.
The ceiling can be plastered, closed with a tension ceiling, one or multi-tiered suspended design or also plated wallpaper.
Modern solution - suspended ceiling!
In this matter, perhaps there are no borders for the imagination of creative owners. In a special article of the portal dedicated to, you can learn a lot of useful information and it is possible to choose one of the options for the design of your own apartment.
- Hall. Materials for the walls and floor of the hallway should have a pronounced abrasion, and be easy to clean, as dirt and dust from the street first fall into this room.
On the floors can be a linoleum or laid ceramic tile.

Walls are covered with vinyl wallpaper or are squeezed by plastic, wooden or laminated clapboard.
The ceiling in the hallway needs to be made light, as there is no natural light in this room most often. Therefore, the suspension ceiling of light color is perfectly suitable here with the built-in backlight.
- Bathroom. or separate bathroom Must have a moisture-resistant finish, which is easily humid cleaning and is not afraid of household chemicals. The traditional material for these premises is a ceramic tile - it does not beautify the already small area of \u200b\u200bthe room, and is also a durable, non-abrupt and easily detergent material. Ceramic tile is perfect for finishing both walls and gender.

In addition to the tile, plastic panels are increasingly used to cover the walls of the bathrooms, especially since today there are a wide range of this material in construction stores.
The ceiling in the bathroom can be made of the same plastic panels, moisture-resistant drywall under painting, but the most optimal option For the bathroom or combined bathroom will be stretch ceiling.
Special requirements - to the ceiling in the bathroom!
Increased humidity, high likelihood of direct water jets - all imposes specific requirements for finishing. How to decide on the type - read in the special article of our portal.
Color spectrum
An important role in the designer design of the apartment rooms is the color scheme, as it must fully contribute to the creation of a comfortable setting. Therefore, this factor must be thought out very carefully.
The harmony of the design of the rooms will depend on the shades properly selected for each other. In this process, you can focus on this table.

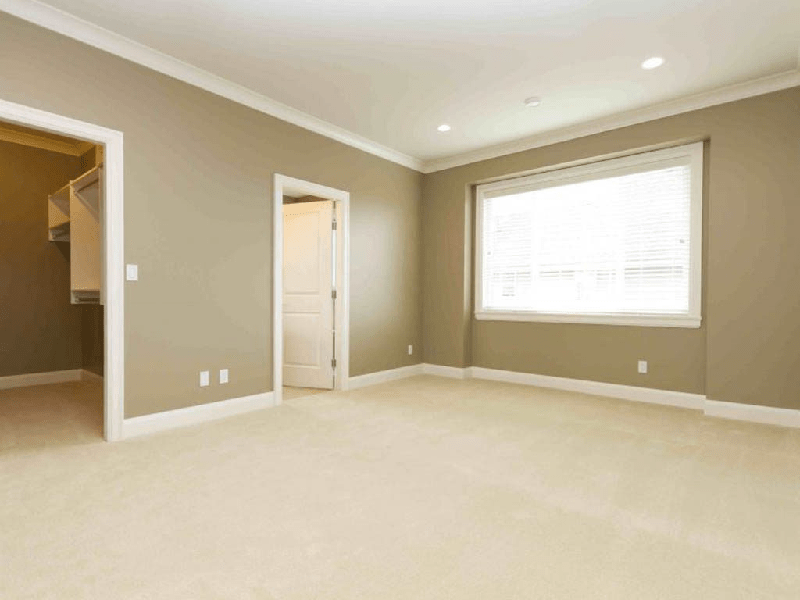
So that the room was light, you should select soft white-beige warm shades. This is especially true of the ceiling surface, as its light color enhances electrical lighting. So quite often in modern interiors Plafones lamps and chandeliers turn down, towards the room, and to the ceiling.
Children's room always want to make bright so that her coloring caused joy and optimism. However, it is impossible to be carried away, it is necessary to remember that the child will not only play in this room, but also rest, so the recreation area is recommended to issue in more relaxed tones.
The bedroom for adults should have rest, and therefore it is recommended to arrange in pastel soft and enough light shadeswhich in the evening will help to fall asleep pleasantly, and in the morning - wake up with an optimistic setting.
The color selection affects the psychological and physical condition of the body, as if a person does not fall out or does not rest properly, its life activity and immunity decreases, therefore, the selection of shades should be taken to the selection.
Dark shades in combination with brighter colors can only be used in a well-lit room, otherwise they will act on the psyche, especially children's, very oppressing.
Deciding with the materials and their color gamut, All surface areas are measured, on which the selected finish will be made. Next, a list is drawn up essential materials indicating their quantity.
With a composed list, you can go shopping the necessary materials.

- Immediately need to say that it is not necessary to purchase everything you need for repair on the spontaneous building markets, where, although lower prices, no one will give quality guarantee. Holding on such "economy", sometimes you have to pay a double, or even a triple price. Cheap Material, applied to the wall or laid on the floors, is unknown as behaving behavior, and maybe they still have to replace it with high-quality. And this is not only extra spending, but also lost time and strength. Cleaning the surface from a new low-quality finish is an extremely unpleasant lesson, as the mood will be completely corrupted. Therefore, it is recommended to acquire construction material A verified seller who can provide quality certificates for all products.
- Purchase material is needed with a margin, about 15% of its total calculated volume. Such an approach will help to perform work calmly, not afraid of something that is not enough. By the way, you can immediately clarify whether the store takes the remaining surplus back - this approach is often practiced.
- When choosing products in quality, it is worthwhile to examine them very carefully, as well as explore the certificates that you need to request from the seller. For example, purchasing such materials such as ceramic tiles, laminate or wallpaper, you must check the batch number in the packaging - it should be the same, otherwise the products can be significantly different in the shade and even in quality. This difference can sometimes be seen only in the process of work, aligning near piece copies or canvas from different parties - this moment can also complicate the quality of quality repairs.
- Very seriously, it is necessary to approach the choice of new doors and windows, as it will be replaced later, it will be quite difficult and expensive, since this process will definitely affect the recently renovated surfaces.
Reliable entrance door - safety and comfort guarantee
The entrance door not only protects against the unreasonable "guests", but also provides maintenance of a comfortable microclimate in the premises. It is not noone, and to prevent mistakes when, familiarize yourself with useful information In the special article of our portal.
- Carefully choose and accessories for the bathroom. It is not necessary to succumb to the flow of fashion to acquire plumbing items made from new-water materials, as they may not always be suitable for specific cases. First, it is recommended to study their characteristics and calculate all the "pluses" and "minuses".
- Heating radiators are carefully selected. Nowadays, you can find these devices made from different materialsBut not any of them can be suitable for installation in the central heating system. By purchasing radiators, it should be relying not only to their operational capabilities, but also pay attention to the manufacturer and the availability of a quality certificate.
Useful information about heating radiators
These heat exchange devices cannot be chosen only in terms of their external view - It is necessary to take into account their operational capabilities and thermal power, depending on both the area and some other important criteria. All this - in a special publication of our portal dedicated to .
- Several words should also be said about the compositions that will be necessary to process surfaces before assessing the finishing materials on them are various primers and antiseptic solutions. Such means will create better adhesion between the materials and protect the walls and the ceiling from the occurrence of plates of mold.
After the necessary materials are purchased, repair can be reinforced by phased repair.
Stages of repair and construction work

Preparation of surfaces
One of the most important stages in carrying out any kind of repair is the preparation of surfaces, as it will depend on it, how neatly and tight will be held on the walls and the ceiling decoration Materials. The preparatory stage includes activities such as cleaning surfaces from old coatings and seal detected flares, which could appear during the operation of housing.
1. The first step from the walls are the old wallpaper or paint.
Wallpapers can be removed in several ways, depending on how tightly they adjacent to the wall:
- With a spatula, which are praised by the canvas and are neatly removed completely or large pieces.
- If the wallpaper is glued reliably and do not want to break, they need to wash it with a roller with water, and to carry out these manipulations several times. When paper gets, it can be easily removed by a spatula.

- The third option will fit if vinyl wallpapers are reliably passed on the walls that are quite resistant to water. In this case, they can be sipped using a special device - ironing or steam generator. If there is no such device, but there is an iron with a sweeping function, it can also be used, but it is impossible to apply the metal surface to vinyl. It is brought to a distance of 100 ÷ 150 mm to the wall and processed by ferry. After that, the old decorative coating should move away from the wall and can be carefully removed with a spatula.
The paint coating is removed using a construction dryer or grinding with an installed brush.
2. Next, you can move to cleaning the ceiling. If the ceiling plaster has cracks and chips, and it is not planned to do the suspension ceiling, then the old blame, and sometimes the plaster will have to be removed. This process is quite laborious, and it is also carried out with the help of water, which internally wash the surface, and then remove the old coating with a spatula or a grinder with an iron brush.
 "Weak spots old plaster Be sure to read
 If the suspension will be mounted, it is optional to remove the coating from the ceiling - it will be enough to treat the surface of the antiseptic and strengthening primer.
3. The next step is removed from the floor. However, producing cosmetic repairs, sometimes this process is not carried out, especially in cases where the floor is in good condition and quite suits the owners.

4. After removing old coatings, cracks or other large defects are defined on the walls and joints of the planes. They must be embellished, otherwise they can manifest themselves through a new decorative decoration.
For this, small cracks are expanding, drunk and closed cement solutions, putty or sealant. which sometimes appear at the joints of the surfaces, can be filled with mounting foam.
5. After cleaning the walls, a layout is made electric cableIf planned reinstalling sockets. To lay the cable in some rooms, you may have to cut the shoes in the walls to hide them.
6. If the heating circuit is replaced, then at the time when the walls are cleaned, there is a markup for the brackets for radiators, and the holes are prepared in the walls. It must be done on the walls without finishing, so that it is not ruined.
Replacing windows and doors
The process of removal and installation of these interior elements is usually produced by specialists, as it is quite a time-consuming work that requires certain skills and accuracy, special tools. Therefore, if there is no such work experience, it is better not to take on a similar work.

Installation of the entrance door is also better to entrust qualified specialists, because the safety of housing will largely depend on the reliability of its installation.
Interior doors are installed at the final stage of work, so this work can still be postponed.
Dismantling and installing partitions
The next step is to dismantle or install a partition, if it is planned and permissions are obtained for these works. As the construction and demolition of the wall can be carried out independently.
How difficult to build a light interior partition?
When knowledge of technology and accurate execution of work with a similar task, you can quite cope with your own. How to spend, and what materials are necessary for this - this information with detailed instructions Can be found in a separate publication of the portal.
To dismantle the partition between the bathroom and the toilet can also be independently, if it is erected from brick or gypsum plates. For this process, a hammer, a sledgehammer will be required and, possibly, a Bulgarian with a metal disk - if the partition is reinforced by the reinforcing grille.

It is impossible to say that this work will be easy, but as a result you can get a fairly large room in which it is quite possible to carry out a refreshing redevelopment.
Leveling ceiling and walls
When windows and doors will be installed, and the sealed cracks and the gaps are completely dried, you can move to. This process is simple, anyone can perform it - the main thing, to carry out it gently, not passing a single area of \u200b\u200bsurfaces. The primer is carried out with a roller, and hard-to-reach places are processed by a brush.
Then, after complete grazing of the projected walls and ceilings, they need to be aligned. To accomplish this work, you need certain experience, therefore, before breeding a large amount of putty, you should try your hand at a small segment of the wall, applying a little solution.
If the walls have a sufficiently smooth surface with small flaws, it will be enough to use a putty composition. But in the event that the surface has large distortions, the alignment will have to be carried out on beacons. However, if the area allows the area of \u200b\u200bthe room, the alignment of the walls can be performed by sheets of plasterboard.
 Very time-consuming, but very important stage - wall alignment
 For whatever technology, neither the process of alignment of surfaces, after drying the layer of plaster and putty, walls and ceiling should be shortened again.
The ceiling requires the perfect alignment if it is not planned to close the tension or suspended ceiling.
How to highlight the ceiling surface?
The process of holding is quite complicated and requires special skill. Therefore, if it is decided to make this work independently, it is worth paying attention to the recommended article of our portal.
The process of alignment of surfaces also includes finishing of slopes on window and doorway. They can be created by plasterboard, plastic panels or shuttering.
Paul alignment
The next, the fifth stage is the surface of the floors. This process in the apartment can be held different ways - This is a bulk self-leveling solution, dry screed or flooring on lags, followed by closing with plywood or other sheet material.
All these processes can be performed independently, after a thorough study of technological instructions that can also be found on our portal.
The use of self-leveling building compositions
One of the methods for equalizing the surface of the floor is the use of special building mixtures. About technology is described in detail in the relevant publication of our portal.
If there is no confidence that it will be possible to qualitatively cope with such work on its own, then it is better to contact the specialists.
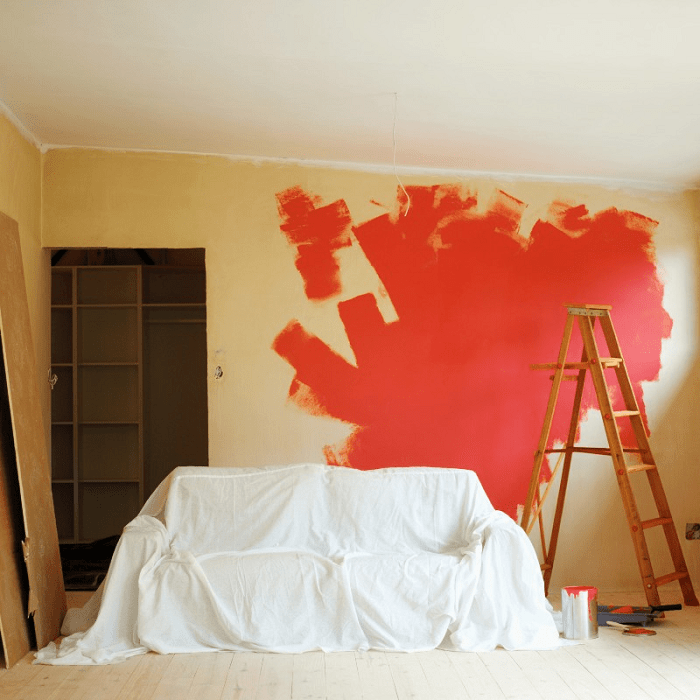
Decorative wall decoration in residential rooms
The next step is made by decoration of the walls - pasting them with wallpaper or painting. These works are not so complicated, and may well be fulfilled on their own, so they can be saved on them.
If the finish is carried out with wallpaper, and they have a specific drawing, you need to immediately calculate its step so that the ornament is ideal on the wall.

Before chopping the canvas, the wall markup is made vertically and horizontally. The lines are littered with the painted cord along the ceiling and one of the corners. The first vertical wallpaper will be aligned on the vertical extreme line, and the subsequent are already focused on it and on the upper horizontal color strip.

If the walls are planned, it is carried out using a roller, which is worn for convenience on a special bar.
Glued and dried on the walls wallpaper are machined along the top line of the foam or paper border, which gives the finish general design Premises
Installation of floor covering in rooms
The process of laying an outdoor coating should be carried out very carefully, so as not to damage and not stain the decorative wall decoration. If the linoleum or carpet or carpet is laid on the floor, then before fixing it on glue or under the plinths, it is unfolded and left for about a day in order for it to dealt. The cloth of this material is cut in length, about 10 ÷ 12 mm less than the length of the room, and the width is laid by 5 ÷ 7 mm from the wall. Such gaps are necessary for the free temperature expansion of the material.

It should be noted that any material laid on the floors should have similar gaps. So, when laying a laminate, special inserts are used, which are removed only after the completion of the flooring coating throughout the area of \u200b\u200bthe room.

The installation of flooring installation of plinths is completed.
Installing interroom doors
Interior doors are installed at the last stage of work, so as not to be mistaken in the height on which the door will be installed, since the leveling layer and flooring will raise the floor to change the floor level.
In the transfer of the stages of work, the issue of repairing in the bathroom was deliberately omitted. This event has its own nuances that need to be considered separately.
Such is the approximate procedure for preparing for repair in the apartment and its phased implementation. It is clearly understood by the desire of the owner of the housing to fulfill it with minimal cost, hoping for your own strength and abilities. But still it is necessary to soberly assess your capabilities - it is possible that optimal decision He will appeal to specialists.
At the end of the publication - an interesting video with the advice of a specialist in carrying out the initial stages of repair in the apartment.
Video: Where to start repairing in the apartment
When repairing the apartment, it is necessary to follow the sequence of stages. Violation of this rule leads to numerous returns to the already made part. As a result, temporary and financial costs increase significantly.
For proper planning Work is achieved:
- Significant economy of finance.
- Optimization of repair time.
- Achieving the high reliability of the results and aestheticness of the appearance of the premises.
With bad planning, there are invariably unforeseen work. It is necessary to make a detailed list of works, ranging from laying a warm floor if the apartment is in a new building, and ending with the placement of furniture.
Start
A typical start-up error is the purchase of all the desired materials. It is better not to start with it. Basically, a simple inhabitant can be repaired in economical mode. You need to choose materials with an optimal ratio price quality. Naturally, you can first buy consumables to perform one step. It is easier to use the services of professionals, otherwise the compilation of the estimates will be very tiring. Next you need to decide on the interior of the rooms, including the kitchen, bathroom and toilet.
Initial work in capital repairs
Regardless of the implementation of the repair (professionals or do it yourself), it always includes the required stages in any selection of the interior direction.
Preparatory work consist in removing old materials (wallpapers, tiles, linoleum, etc.) if the apartment had an finishing finish, the closure of any surfaces that should be kept in pure form. It is cleaned by everything that can interfere with repair. If humidity is present, the room is drying, for example, the old bathroom.
Development of a plan before repairing an apartment
Mandatory work on roughing, examples of materials
Septures in economical mode are usually created from foam blocks or drywall, as well as bricks. This use sound insulation materials: the plaster of a special composition. Gypsum Carton is usually installed using metal carcasov, in addition to them inserted mineral woolUnlocking sound.
Next, wall alignment is carried out with the help of plaster and formation cement tie.. Watching can be carried out using standard compositions, such as sand and cement or plaster mixtures. Important elements when plastering are beacons installed under the square. Due to such devices, an even angle is reached, approximate to 90 °.
Electrician and plumbing
If the housing is old with wiring passing inside the walls, then removing the wires are completely optional. It is enough to de-energize and insulate. The new network is paving a little elsewhere. The final wiring of the power grid and plumbing is carried out after plastering the walls and the fill of the sexual screed. As a result, the absence of inaccuracies is achieved when installing sources of electricity and plumbing equipment, for which the convenient output of pipes is important.
Finishing works, more about drywall
The finishing work phase has its own procedure, while it is necessary to comply with specific norms so that the finish is durable, and not "floated" in the first days of the apartment's operation after repair. Before starting finish work, you must once again recall your preferences, acquire materials if they are not yet purchased.
After the draft decoration, the room is kept for some time to make moisture from the walls. For example, when installing drywall, as an option of finishing finish, it is necessary to withstand the time (1-2 weeks) after the walls are plastered with a mixture of sand and cement. Plasterboard is becoming increasingly popular because it is inexpensive, it is easy to install and allows you to achieve completely even walls.
If you violate the regulations for the work, the probability of the appearance of cracks on drywall increases significantly. When installing the sheets of material, a carefully fixed profile is required. Additionally, a glass cholester and a special putty, masking joints are used to obtain a smooth surface.
Tile
Put smoothly and reliably tile without special skills difficult. It is better to entrust this stage of finishing by a specialist, having previously consulted about the purchase of materials. It is necessary to resolve the question whether many inserts and decor are planned on the walls. Plumbing is installed only after fully carried out finishing work until the joints are wiping between the tiles.
It is desirable that the plumber installed that person who worked with tiles. Tile cracking when mounting plumbing - a frequent phenomenon. Usually the master replaces it.
Wall decoration tiles (photo)
Learn more about works with walls and floors
Unlike, where the standard way of finishing the surface is a tile, in the rooms more often paint the walls and glue wallpaper. First, the level of alignment of surfaces and angles is performed. The finishing stages for alignment of the walls include: applying deep penetration primer, overlaying the painting mesh (2 h 2 mm), the first and second layer of putty. The smaller the surface will be, the better the wallpaper or paint (water-emulsion or acrylic) will be lying.
Finish repair does not cause difficulties when smooth walls. Clamping Wallpaper B. three-bedroom apartment When working two people usually takes 2-3 days. Specific deadlines depend on the complexity of texture and wallpaper pattern.
The sexual coating, according to most professionals, should fit at the end of the repair, regardless of the material (laminate, linoleum, parquet, carpet).
Briefly about the stages of repair and importance of knowledge of the process
Regardless of the selection of the artist's repair or decision make it independently the stages of work need to know. An aware owner of the apartment better controls the process and follows the master, clearly aware of the temporary and financial costs. From the artist who does not like the owner's subsidism, you need to urgently refuse. A specialist must discuss all the steps with the customer in the course of repairs. Consensus helps to achieve a better result. You should not be afraid to "torture" masters questions. He is a specialist and is obliged to enter the client's course.
Brief repair plan:
Definition with dimensions. Room area, height and width of walls, sizes of openings, assessment of irregularities of the room (floor drop and ceiling), marks of future or current switches and sockets. You can designate the appropriate floor level and ceiling.
- Dismantling of all unnecessary, from what you want to get rid of or replace. In the new building, this stage of repair is relevant only with the demolition of partitions.
- Replacing heating radiators (if necessary). It is impossible to leave this stage for later, it will be more expensive.
- Cleaning garbage after dismantling or at the entrance to the new building. Usually the apartment with draft finish is not removed, contaminated with sand and dust.
- Purchase of the necessary materials for all repairs or the next stage, depending on finance.
- Electrician Laying a new network or upgrades (improvement, repair) old.
- Fill concrete screed indoors. All this should dry, you need to wait time and do other rooms.
- Plastering walls of rooms with bathrooms, their leveling before the start of the finish finish.
- Finish finish of the walls of the bathroom and toilet (painting, laying of tiles).
- Installation of plumbing and pipeline.
- Check the evenness of walls in residential rooms and work on their alignment.
- Installation of slopes and window sills.
- If the screeds in the rooms are not mounted, then you need to proceed to them.
- Door installation. Before installation, it is necessary to estimate their compliance with the size of the opening.
- Planning work with the ceiling, selection of finishes (whitewashes, tension, suspended). If the ceiling is planned or bleached, then work is performed at the last stage of the draft finish.
- Sticking wallpaper. Depending on the material in this process there are nuances. For example, the vinyl canvas smell. there is soft wallpaper, push for which immediate leaves dents.
- Floor finish, installation of plinths.
- Recommendations for some stages of apartment repair
- How to make the installation of plumbing with the least effort? It is better to use metal plastic pipeswhich are mounted without special tools.
- Paul in rooms. With dry tie less problems Due to the speed of installation than with cement. Coatings can be different. The most expensive and warm is a traffic jam.
- Select the type of ceiling. Rarely, when a smooth location of the ceiling is obtained during construction. Do alignment or choose a stretch ceiling. The last option is of course easier and faster.
- Wallpaper. It is better to choose meter in the width of the canvas. Sticking half-level takes much more time.
Read more about New Building
New house Be sure to exploit the shrinkage process, so the use of expensive material is money for the wind. Inevitably the appearance of cracks on the walls and sublishes in the complexes of heating and water supply. It is better to leave your choice on the domestic product.
It begins with the definition of the size (height oscillations, ceiling, the slope of partitions). Requires the use of a water or modern laser level. Preliminary measurements make it possible to determine the technologies of finishing and elimination of drops.
Any demolitions or construction of partitions, the materials of which are a hard blast or foam block, less often brick, require harmonization in BTI, otherwise a fine is inevitable demanding: return the apartment to the original state at its own expense.
Next stage:
- replacement of windows;
- window sills;
- heating systems (radiators).
If necessary, at this stage, taps are installed. Installation plastic windows Must be carried out with a shrinkage. Experts, realizing this, leave special gaps, resulting in the window not deformed.
Alignment of walls to plastering using lighthouses. Better process Conduct before installing the strengthening grid. In the rooms where the laying of the tile is planned to create ideal straight corners (90є). In the case of smooth joints of the underlooking material will be the same size.
Next, the time of the first stages of the installation of plumbing systems, electricians, ventilation are occurring. On the this stage Patching pipes of sewage and water supply, cable broach, installation of peatters. It is impossible to carry out such work without the prior plan. It is better to use plastic pipes that are not deformed during shrinkage. Next are the standard stages:
- floor screed (dry or wet);
- cutting works.


