The problem is that update packages constantly released by Microsoft, even with automatic search and installation enabled, are not always installed. In this case, the system displays a message stating that the Windows 10 update package could not be installed. Why this happens and how to fix such failures, read on. There are not so many methods, but in most cases they turn out to be quite effective and eliminate problems that arise.
Why updates cannot be installed possible reasons
As for the manifestation of such failures, there can be quite a lot of situations: from the banal impact of viruses to errors in the system itself.
Sometimes the system may report that it was unable to install some Windows 10 updates or configure them due to lack of free space in the system partition, clogged with incorrectly downloaded cache update files, the Internet connection being blocked by a firewall, etc. But this doesn't happen often.
Windows 10 update fails to install: what to do first?
However, let's see what can be done in such a situation. If the user sees a message that the Windows 10 update cannot be installed, the failure may be due to the incorrect functioning of the service itself, which is responsible for the operation of the Update Center.

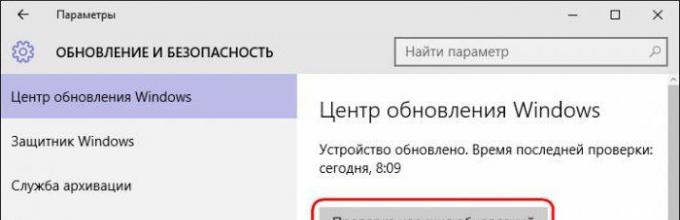
The first thing you can do is try to search for available updates manually. To do this, use the settings section, called directly from the main “Start” menu, where you select the update and security menu, after which in the “Update Center” you press the button to check for updates. At the end of the search, everything that is found will need to be integrated into the system or select only what needs to be installed.
At the same time, in the same section, use additional settings and make sure that the recommended automatic mode is used to check and install updates.
Troubleshooting using system tools
Another method for fixing a situation where the system fails to install the Windows 10 update is to use the built-in troubleshooting tool, which is called from the classic “Control Panel” (control command in the “Run” console), where in the system and security section, select the search bar and fixing problems.

Next, you select to use the “Update Center”, click the “Advanced” button in the new window, after which you can run as administrator (you can also check the box on the automatic application of patches line).

Next, the troubleshooting process is activated. The results will most likely indicate that the Update Center database itself is damaged, after which you need to use the line to apply the patch. After this, a report of the resolved failures will be shown.
Fixing crashes with a utility from Microsoft
Let's consider one more remedy. Let’s assume that even after using the described tools, the updates could not be installed (the Windows 10 update log may contain information about errors).
In this case, you can go to the official Microsoft website and download a small utility from it to prevent errors of this kind from occurring. It's called Windows Update Diagnostic.

After running the utility, you just need to follow the instructions, after which the report will show the problems that were resolved or not. If there is an entry regarding the Service registration component, you will have to check the integrity of the system Windows files(sfc /scannow in a command line running with admin rights).
Activating the Update Center service
However, the system may be unable to install Windows 10 updates simply because the service itself is in a deactivated state.

You can check this in the corresponding section, which is called by the services.msc command in the Run console. Here you need to find the Update Center service, double-click to edit settings and check it. If the service start button is active in the window, it means that it is really turned off. We press the start button, and at the same time check the start type (it needs to be set to manual, as it was by default).
Actions with the system registry
Rarely, of course, but sometimes you can encounter update errors associated with duplication of user profiles. This problem can only be fixed using the Registry Editor (regedit in the Run menu).

In the HKLM branch, you need to go down the directory tree and find the ProfileList directory there, as shown in the image above. Each directory should check for the presence of the ProfileImagePath parameter. If several sections contain a link to the directory of the same user, the extra lines must be removed. They can be identified quite simply. Only those for which the value of the RefCount parameter is set to zero, or those lines whose names contain “.bak” at the end will be superfluous.
SoftwareDistribution Catalog
Finally, very often problems with installing updates are associated with the SoftwareDistribution folder and its contents, which is located in the main directory of the system. To fix the problem, this directory must be renamed by adding, for example, “Old” at the end of the name and first disabling the Update Center service, as shown above, but booting the system in safe mode.

This can also be done from the command line starting with administrator rights (or from removable bootable media), where the command ren c:\windows\SoftwareDistribution SoftwareDistribution.old is entered. After this, the system is restarted in normal mode. Next, you can check for updates. If the installation goes without problems ( new folder with the initial name will be created automatically), the renamed directory can be deleted and the update service can be re-enabled.
Updates won't install on Windows 10: what are possible reasons and ways to get out of the situation? Version 10 operating system from Microsoft is designed in such a way that, ideally, updates simply cannot be installed. The only possible solution, if the issue is a conscious refusal of updates, may be to postpone their downloading and installation for some period. This number of updates does not include security updates, and this feature is only available in the Pro and Enterprise editions of Windows. Full access to managing system updates, in particular with regard to the complete refusal to install even security updates, is possible in Windows 10 only with the help of third-party special programs. Working with one of these - Windows Update MiniTool - was discussed recently, in. Below we will consider the opposite situation - how, on the contrary, to eliminate problems that prevent the installation of updates in the Windows 10 system.
1. Simple recipes from Microsoft
To troubleshoot problems with updates, Microsoft recommends simplest recipe– you need to exit the Update Center, wait 10-15 minutes, and then try again to check for updates.

And in order not to worry about this at all, the software giant insists that the automatic update installation type is set in the Update Center settings.


2. Solving the problem with installing updates using the Computer Troubleshooter tool
Run the Computer Troubleshooter in Windows 10.
Right-click on the Start menu and select “Control Panel”

"Find and fix problems"

"Troubleshooting using Windows Update"

Click "Additionally"

"Run as administrator"


Diagnoses problems related to Windows Update.

After running the diagnostics, the Computer Troubleshooter will offer you a solution, click “Apply this fix” and Windows 10 Update problems will be resolved.


3. Enable the update service
Official Windows distributions come in mandatory with the Update Center service enabled. The same cannot be said about pirated builds, in particular Windows 10, in which the update service can be disabled to resolve the issue of activating the operating system. Let's check if this service is enabled, and if it is disabled, enable it. We will get to system services using the “Run” command (hot keys Win + R). Enter:
services.msc

After clicking “Ok” the section will open system services. Double-click to open the Windows Update service.
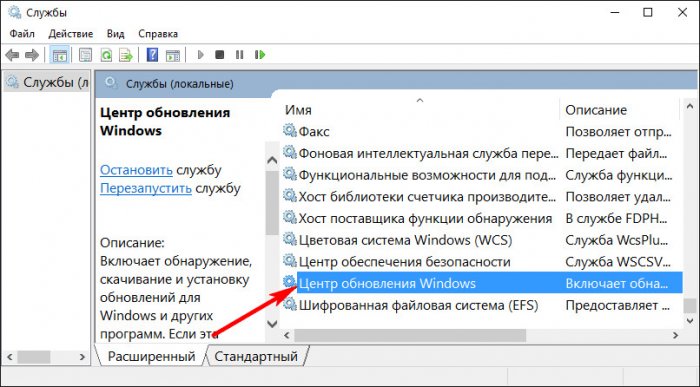
Let's start the service.

4. Microsoft Update Troubleshooter
For each version Windows Microsoft on the website publishes an additional troubleshooting tool - a special utility, which, like the standard tool, is designed to troubleshoot problems with updates automatically. Download this utility.

Many users of Windows 7 and 8 were surprised to find that they couldn't switch to Windows 10. There are two reasons for this: either the “Get Windows 10” icon is hidden from the user, or the deadline for a free update has passed. In principle, it could be both, but most likely, you are simply no longer perceived by Microsoft as a user capable of upgrading to Windows 10. We will look at why the system is not updated to Windows 10 and what to do in each specific situation below.
In the meantime, let us inform the forgetful and lazy that, starting from July 29, 2016, free updates from “seven” and “eight” are simply closed for all categories of users. Yes, yes, you're just late! We were late, despite all the company’s warnings and various tempting offers. After all, you were offered to take part in testing the system before this date?
Things may not be like that, of course. It is very likely that you have installed Windows 10 on your computer. We looked at it and switched back to “seven”. If you did this before July 29, 2016, then everything is fine - you can update as before. But what if the “Get Windows 10” icon is not found?
If you did not participate in the testing program before the specified date, then in this case there are “moves” with which you can get a fresh OS at your disposal without paying a penny for it. Let us remind you that now the “Home Edition” costs about 8,000 rubles. We will consider the questions in order:
- What loopholes do those who missed everything have?
- How to properly install Windows 10 on a computer using a special Microsoft utility?
What to do if the “Get Windows 10” icon has disappeared from the system tray?
Why and where does the “Get Windows 10” icon disappear? This usually happens for the following reasons:
- The icon does not appear due to a system failure.
- The icon has been removed from the notification area.
- Automatic updates are disabled on your computer.
- All required service packs for Win7 and Win8 are not installed on your computer.
The first problem is solved different ways, the difficulty of which is determined by the nature of damage to programs or Windows.
The second problem can be solved quite simply:
- Go to the Start menu - Control Panel.
- Go to the “Notification Area Icons” section.
- We find the “GWX” icon here - this is what we need.
- To the right of the icon there is a drop-down menu from which you need to select “Show icon and notifications”
If there is no “GWX” icon in the section, then move on to the next item in the list of problems. The solution is to go to “Control Panel” - “Administrative Tools” - “Services”, open the list of services, find the “Windows Update” service there and start it as usual. Then enable automatic system updates by going to “Start” - “Control Panel” - “Update Center” - “Settings” - “Install updates automatically.”
Finally, the third problem is solved by running a system script called win10fix_full.bat. You can download it on the page technical support Microsoft. The script will check for all necessary updates in the system, and it will look something like this:
 What should someone do if they installed this version of the OS on their computer, but then deleted it from the disk?
If you have already installed on your Windows computer 10 and did this until July 29, 2016, then your way back is not cut off. You need to install a new system from a USB drive, in other words, from a regular flash drive. On the Microsoft page https://www.microsoft.com/ru-ru/software-download/windows10 you can download a utility specifically designed for creating a bootable USB flash drive. Download and run this program, with a flash drive inserted into the USB drive. In the media selection window, specify the USB drive, like this:
 Then the program will ask you a couple of questions regarding the bitness of your system (32 or 64 bits), as well as the version of the future Windows 10 (Home or other), after which the process of creating bootable media will begin. Installing from such a flash drive is not at all difficult; you just need to click on the “I don’t have a key” button in the activation window. Otherwise, the installation proceeds exactly the same as usual.
Don't forget to save all the most valuable things you have on your hard drive somewhere in a secluded place: on an external drive or on a separate hard drive partition. This method is not suitable for everyone, but only for those who were not too lazy to try Windows 10 on their computer in time, at least as an experience. What should other users do?
Loophole for sloths
Why Microsoft deceived us by feeding us myths about tens being free for all users of versions 7 and 8 is a mystery. But after July 29, 2016, all hopes for such luxury were dashed to dust. Let's say you weren't at all interested in upgrading to Windows 10.
Why should you become an outsider just because of the wishes of MS management? Why are others allowed, but you can’t? Is there a way out of this situation? It turns out there is a way out. It is located on a separate Microsoft page. Here is this page: https://www.microsoft.com/ru-ru/accessibility/windows10upgrade/
 When downloading the installer, you only need to confirm that you are a person with disabilities, that is, you use either a screen magnifier or an on-screen keyboard. No one will ask you for any certificates or documents. This is such a strange gullibility on the part of Microsoft. Why the company behaves so dashingly - only God knows.
On the other hand, shouldn’t we ask people for a certificate from the clinic? Westerners are not used to lying and using pirated software. Therefore, the degree of trust in him is certainly higher. But you need to understand that this loophole can also be closed. In any case, control of the region from which the system is downloaded will most likely be introduced. Sooner or later, an inspection from Microsoft will come to all of us.
Now the next point of our program:
How to properly install Windows 10 on a computer using a special Microsoft utility?
You can legally install the system on your computer different ways. Particularly interesting is the installation option using a special proprietary utility called MediaCreationTool. You can get it at: https://www.microsoft.com/ru-ru/software-download/windows10. What does this program do? She frees us from all suffering. There is no guarantee that your Win7 or Win8 has all the service packs needed to upgrade your computer to Windows 10. And why should they be there? Many users simply disable automatic system updates. So that none of them will even see the “GWX” icon. MediaCreationTool eliminates all these hassles. It independently pulls all service packs from the network and installs them into the system. Next, she will install “dozens” on your computer (for fans of illegal products, we can recommend an alternative - the activator utility Re-Loader Activator 1.4 RC 3).
 What conclusions follow from all of the above? Firstly, the installation of the “tenth” version differs quite significantly from the XP installation. Secondly, a fairly powerful protection system has been built against illegal users. Thirdly, that Microsoft has again been caught in all sorts of “tricks” (if not to say “frauds”). Therefore, for those who do not want to fall for the bait and pay money in the amount of 8,000 rubles. We can advise you to switch to Linux or calmly stay on XP. Surely no one will get you here. Write to us if something doesn't work out for you.
Hello, my dear readers, site guests, as well as those who are simply interested in computer topics.
Preface
So, I would like to say right away that in the article I will present all the methods that really help solve the problem with the update center. I'll explain what to do, and you be careful.
The reason that the central heating system constantly slows down lies in the operating system itself. It came out not so long ago and some bugs in the OS remain to this day. Therefore, it is very important to install upcoming service packs and updates.
System rollback
This method is suitable for those who get errors 1607 and 1703 when opening the update center. So, open Windows and right-click on the start button. There we select the system parameter.


A window will appear in which you need to click on the restore button.


A list should appear containing all the restore points. I only have one, but you may have 5-10. We simply select the one whose date is much earlier than the day when problems with the update center began.

Then click done. By the way, here is a video with instructions.
Uninstalling updates
It happens that when installing updates, the central heating center begins to produce bugs, for example, error 0x80070422. In this case, you need to uninstall the latest service packs and updates; perhaps they were installed crookedly, so they begin to slow down. We go to the control panel, and there we open the update center. Then click on the magazine.

Now click on the line called uninstall updates.

Now, select the update from the list below, and click the delete button at the top.

A warning sign will appear asking you to click yes.

Then restart your computer.
Reinstalling Windows
It happens that the operating system has to be demolished and reinstalled due to a damaged update center. If the OS fails to update, it will not last even a month and will still have to be demolished. If error code 1900204 appears, then it’s time to get ready to reinstall. We reboot the laptop, and then go into the BIOS.

Go to the download section and select the first line there.

Now in the primary boot device we expose our flash drive with Windows.

Press F10 and reboot the computer.

This method works on any Microsoft system, even a pirated one. After the reboot, the launch from the flash drive will begin.

Press any key and the Windows 10 installation program will launch.

If error 0x800705b4 or error 0x80070422 appears, then simply repeat the operation and reboot. Choose a language. I put Russian everywhere, you put what is more convenient for you. Then click next.

In the next window, click the only installation button.

You can skip the serial number entry screen. Then download the activator and that’s it.

At the next stage, check the box and click next.

Now select the full installation.

If the system gives you error 0x80240fff, just skip it. You need to select a hard drive partition. We create a partition from an unallocated space and select it as a key partition, where we will install Windows.

Now the installation process itself starts. It will last as long as your laptop is powerful. On weak machines this may take 40 minutes. On powerful ones - 15-20. This procedure loads the processor, so it is desirable that it be quite modern.

We'll enter the key later. We just skip this step.

We use standard operating system settings.

Next, enter the administrator name and that’s it. After complete installation The system update center should automatically start downloading various updates. If you see that the download takes 0 kb, check whether the CO is enabled at all.
Conclusion
OK it's all over Now. I described three to you simple ways, which are guaranteed to help solve problems with the update center on Windows 10. I hope the article was useful to you, and you will share it with your friends on Facebook, classmates or other social projects.
Operating system updates are necessary to keep it in optimal condition for comfortable work. In Windows 10, the update process itself requires virtually no user interaction. All important changes in the system that relate to safety or ease of use take place without the direct participation of the user. But there is a possibility of problems occurring in any process, and Windows updating is no exception. In this case, human intervention will be necessary.
Problems updating the Windows 10 operating system
A variety of problems may arise when installing updates. Some of them will be expressed in the fact that the system will immediately require updating again. In other situations, the error will interrupt the current update process or prevent it from starting. In addition, an interrupted update may even lead to undesirable consequences and require a system rollback.
If your update doesn't complete, do the following:
And now that your system is safe, it’s worth finding out what was causing the problems and trying to correct the situation.
Any installed antivirus, if configured incorrectly, can block the Windows update process. The easiest way to check is to simply disable this antivirus while checking. The process of disabling it depends on your antivirus program, but it is usually not difficult.
Almost any antivirus can be disabled via the tray menu
Disabling the firewall is another matter entirely. Of course, you shouldn’t disable it forever, but you may need to pause it to install the update correctly. To do this, do the following:
- Press Win+X to open the Quick Access Toolbar. There, find and open the “Control Panel” item.
Select Control Panel from the Quick Access Menu
- Among other Control Panel items is “Windows Firewall”. Click on it to open its settings.
Open Windows Firewall in Control Panel
- On the left side of the window there will be various settings for this service, including the ability to disable it. Select it.
Select "Turn on or off" Windows Firewall" in its settings
- In each section, set “Disable Firewall” and confirm the changes.
For each network type, set the radio button to "Disable Firewall"
After disconnecting, try updating Windows 10 again. If it is successful, it means that the reason was indeed the restriction of network access for the update program.
Unable to install update due to lack of space
The update files must be downloaded to your computer before installation. Therefore, you should never fill your hard drive space to capacity. If the update was not downloaded due to lack of space, you need to free up space on your drive:
- First of all, open the Start menu. There is a gear icon there that you need to click on.
From the Start menu, select the gear symbol
- Then go to the "System" section.
In Windows Settings, open the System section
- There, open the “Storage” tab. In "Storage" you can track how much space you have free on which disk partition. Select the partition on which you have Windows installed, because this is where updates will be installed.
Go to the “Storage” tab in the system partition
- You will receive detailed information about what exactly is occupied by the space on your hard drive. Review this information and scroll down the page.
You can study what your HDD, via "Storage"
- Temporary files can take up a lot of space and can be deleted directly from this menu. Select this section and click "Delete temporary files."
Find the “Temporary Files” section and delete them from “Storage”
- Most likely, most of your space is taken up by programs or games. To remove them, select the “Programs and Features” section in the panel Windows management 10.
Select Programs and Features from Control Panel
- Here you can select all the programs you do not need and remove them, thereby freeing up space for updating.
Using the Uninstall or Change Programs utility, you can remove unnecessary applications
Even a major Windows 10 update shouldn't require too much free space. However, for the correct operation of all system programs, it is advisable to leave at least twenty gigabytes free on your hard or solid-state drive.
Video: instructions for cleaning up space on your hard drive
Windows 10 updates won't install
It's good if the cause of the problem is known. But what if the update downloads successfully but fails to install without any errors. Or even the download does not go well, but the reasons are also unclear. In this case, you should use one of the methods to correct such problems.
Fixing problems with updating through the official utility
Microsoft has developed a special program for one task - fixing any problems with Windows updates. Of course, this method cannot be called completely universal, but the utility can really help you in many cases.
To use it, do the following:
- Open the Control Panel again and select the “Troubleshooting” section there.
Open Troubleshooting in Control Panel
- At the very bottom of this section you will find the option “Troubleshooting problems using Windows Update.” Click on it with the left mouse button.
At the bottom of the Troubleshoot window, select Troubleshoot using Windows Update
- The program itself will start. Go to the "Advanced" tab to make some settings.
Click on the "Advanced" button on the first screen of the program
- You should definitely choose to run with administrator rights. Without this, such a check will most likely be of no use.
Select "Run as administrator"
- And then press the “Next” button in the previous menu.
- The program will automatically search for certain problems in Windows Update. The user is only required to confirm their correction in the event that a problem is actually discovered.
Wait until the program detects certain problems
- Once the diagnostics and corrections are completed, you will receive detailed statistics about the corrected errors in a separate window. You can close this window and after restarting the computer, try to update again.
You can review the fixed issues in the diagnostic completion window
Manually downloading Windows 10 updates
If all your problems are related exclusively to Windows Update, then you can download the update you need yourself. There is an official update catalog specifically for this opportunity, from where you can download them:

Make sure updates are enabled on your computer
Sometimes a situation may arise that there are no problems. It's just that your computer is not configured to automatically receive updates. Check it:

Windows update version kb3213986 is not installed
Cumulative update package version kb3213986 was released in January of this year. It includes many fixes, such as:
- fixes problems connecting multiple devices to one computer;
- improves the background operation of system applications;
- eliminates many Internet problems, in particular, problems with Microsoft browsers Edge and Microsoft Explorer;
- many other fixes that improve system stability and fix bugs.
And, unfortunately, errors may also occur when installing this update package. First of all, if the installation is unsuccessful, Microsoft experts advise deleting all temporary update files and downloading them again. This is done as follows:

Another cause of problems with this update is outdated drivers. For example, an old driver for a motherboard or other hardware. To check this, you should open the “Device Manager” utility:
- To open it, you can use the Win+R key combination and enter the command devmgtmt.msc. After that, confirm the entry and the device manager will open.
Enter the command devmgtmt.msc into the Run window
- In it you will immediately see devices for which drivers are not installed. They will be marked with a yellow exclamation mark or labeled as an unknown device. Be sure to install drivers for such devices.
Install drivers for all unknown devices in Device Manager
- In addition, check other system devices.
Be sure to update all drivers for system devices if Windows update fails
- The best way is to right-click on each of them and select Update Drivers.


