For every mother, her baby’s heels and palms are the most valuable thing in the world. We always kiss them, we call them “sweeties,” and we really want them to stay so small and cute for a long time. But children grow, and so do their heels. To preserve the memory of these tiny arms and legs, you can take as many photographs of them as possible, you can make a plaster or clay cast.
And we want to offer the most creative, in our opinion, way. Let's create decorative pictures with prints of the child's hands and feet. We offer you 7 of the most original options, which can be hung both in the nursery and, for example, in the kitchen. By the way, pastel shades of colors look most harmonious in such drawings.
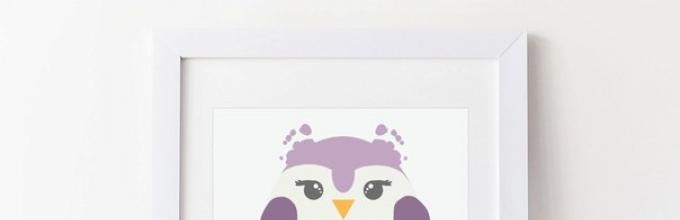
An owl whose wings and ears are the imprint of a child's foot.

Butterfly wings made from children's footprints.

Rays of sunshine from footprints.

Flowers are the imprints of children's little feet.

Family tree made from the handprints of dad, mom and baby.

A good whale with fins made from footprints.

Life flows, children grow up, mothers and fathers set them free, but only touching memories remain in the soul of how small they were... Parents try in every way to capture their children: they take photos, videos. We offer one more interesting way- make casts of the baby’s arms and legs.

Time is so fleeting... It would seem that not so long ago children learned to walk, and today young grandparents are looking at photo albums and souvenirs related to the childhood of their grandchildren's parents. More and more generations are brought up on such memorabilia. Family stories supported by “material evidence” are always much more valuable than those that have nothing to attach to them. One of these cute “proofs” that mom and dad, it turns out, were little too, can be panels self made with casts of arms and legs. There are several ways you can make casts of your baby’s arms and legs with your own hands, and we’ll tell you about the most accessible ones.


How to make a cast of a baby's hand and foot print?


Sand cast of arms/legs
We will tell you about the simplest method, which can be easily handled by a mother who does not know the art of sculpture. The cast can then be decorated with buttons, shells and chains.
Useful for creativity:
- fine sand;
- biscuit tin;
- alabaster;
- brush.

How to do it?
1. Sand is poured into a box and leveled. The child's imprint is made in the center.
2. Next, the alabaster powder is diluted very quickly with water to the consistency of thick sour cream.
3. It is poured into the cast in a thin stream. The thickness of the material above the sand is from 2 to 4 cm.
4. Leave the container for 20 minutes or more, take out the cast and clean off the grains of sand with a brush. Then you can start decorating the cast.


Decorative panel "Casts of the handle of the leg" from auxiliary materials
- Let's do salty dough From half a glass of salt and a glass of water, add enough flour to make an elastic dough. To prevent it from sticking to the arms and legs, you need to knead it and let it stand for a while. If desired, you can grease the palms and soles of the legs with vegetable oil, but with a well-kneaded dough you can do without it.
- If the baby is only a few months old, he may pull his oiled hands into his eyes and may involuntarily wipe them on his mother’s clothes. It is not always possible to make impressions when the child is sleeping, because the arm will need to be pressed, and it is generally better to make the leg while standing for good pressure. After all, all the lines of fate must be imprinted!

3. Don't think that we made too much dough, because it needs to be divided into 4 equal parts to take prints from two arms and two legs. Gently press the baby’s dry hand or foot into the resulting thick cakes. If the drawing cannot be made clear, you can crumple the dough and repeat the procedure again.
4. Before taking prints, select suitable containers or boards for the pieces of dough, because dough impressions are only the first stage of work. You could leave them, but after a few months the dough will lose its shape.
5. We got four cakes with indentations in the form of feet and hands.
6. Now you can dilute dry plaster or alabaster to the consistency of thick sour cream. Stir them thoroughly so that there are no air bubbles or unstirred clots. Do not forget that alabaster hardens very quickly, you need to work with it extremely quickly, with gypsum you can work more slowly. Pour the resulting solution into the recesses to their edges and leave until completely dry. After this, we clean the casts from the dough, preserving the structure of the imprinted skin.

7. It is best to paint with gold or bronze from spray bottles. These materials highlight texture much better than other paints and will look great on your panel.
8. On a prepared rectangle or square of thick cardboard, we glue the resulting casts, a photo of the baby, either with a special gun with glue, or with liquid nails; around you can put an ornament of buttons, pieces of plastic, feathers and other beautiful little things. And we insert the casts into the frame.
Some people use plastic instead of salt dough, others buy special kits for making impressions, but the dough inspires more confidence because it is environmentally friendly.

Dough casts of arms and legs - video
Homemade ceramics "Hand-leg casts"
- Instead of dough, you can use wet sand. But to do this you need to find good, clean, fine sand or thoroughly rinse the existing one. Then pour it into the selected container.
- Let's say you have chosen a round or oval container, in the center of which the baby's leg can easily fit, and along the edges you can place shells, circles, a chain, beads - everything that can be imprinted beautifully and in relief on the wet sand. The entire resulting composition will need to be filled with the same alabaster or plaster, and when everything is dry, the surface must be cleaned of sand and painted.

3. You won’t need to stick anything onto the cardboard, but you will have to select a frame to match the formed round or oval plaster panel. However, if you immediately decide on a beautiful and neat container and do not take anything out of it, its edges can serve as a frame, only a hole in the upper segment will have to be drilled in advance so that the head of the screw on which you will hang the decoration fits into it.
4. A more logical material here might be clay rather than gypsum. And you will get an excellent ceramic disc. All that remains is to figure out where and how to burn it. But this is for those who have experience working with clay.

Ideas - baby's prints


Capture memorable moments of your child's childhood different ways: photographs, first drawings, growth scale, joint crafts, etc. One of the most popular ways to preserve warm memories is to make casts of the baby’s hands and feet. And you can make the basis for them with your own hands.
Believe me, your child will be pleased to look at his hands and feet in the future. And you will experience warm feelings looking at this beauty. Many people now make prints to order and keep them for years. But if you make the material for the impressions yourself, the result will not change at all.
And making the material is as easy as shelling pears. Roughly speaking, we need cool salted dough.

What do we need?
- flour (1 cup)
- salt (1 cup)
- warm water (1\2 cups)
- paints
- coating varnish
How to make casts of children's hands and feet?
Mix flour and salt and carefully pour in water. The dough should not stick to your hands. If it still sticks, add a little more flour.

Roll out the base and give it the desired shape (circle, square, star, etc.). If you have something to cut, you can make a base unusual shape.

Now we leave a hand or foot print in the center. You can use a toothpick to write the name and year.

Place the product in the oven, preheated to 100 degrees, and leave to bake for 3 hours. If the layer is very thin, you can reduce the temperature to 80 degrees. When the time is up, we take out the craft and leave it to “rest” overnight.
The next day we paint the cast with any paints. When the paints have dried, we fix them with varnish (preferably 2-3 layers) so that the product will never deteriorate.

The easiest and cheapest way is to print with any paint on paper. It’s better to take finger paints or watercolors, apply them to an arm or leg, and put an imprint on a landscape sheet. Then you can beautifully design the free space around the print. To prevent the sheet from fraying over time, it is better to laminate it and only then put it in a frame.
Plasticine prints
There is another simple way to make an imprint: buy modeling clay or modern plasticine (the one that dries itself in the air) at any store. Choose the color you like best. You need to take the mass and flatten it into the desired shape, and only then press well with your handle or foot. Don’t forget to make a hole for the ribbon so that you have something to hang your “home heirloom” from later. Leave the workpiece overnight and it will dry.
Homemade salt dough print
This type of printmaking is more labor-intensive, but the result will be more interesting.
For the test we need: 1 cup flour, 1 cup salt, 2 tbsp. sunflower oil and 0.5 - 1 tbsp. water. Knead the dough. Let it sit for half an hour, maybe in the refrigerator.
- Knead the dough, roll it into a ball, then roll it out with a rolling pin, about 1.5 - 2 cm thick;
- Take some foil, place a piece of dough on it and chill the dough in the refrigerator;
- Lubricate the baby’s hand (leg) with sunflower oil and press it into the dough;
- Don't forget to make a hole in the dough for the ribbon so that the finished “work of art” can be hung;
- If you are satisfied with the print, it should be left to dry for 2-3 weeks;
- After about a week, you can turn it over, carefully removing the foil;
- When the print is dry, paint it with acrylic paints.
Salt dough cast
This type of cast making is also quite painstaking. For it we need salt dough, plaster, acrylic paint. Make the dough according to the recipe given above.
Take a larger lump of dough so that the imprint is deep. We print a handle or leg on this lump of dough. We take plaster. You need to dilute the plaster in a ratio of 1/3 gypsum to 2/3 water. To begin with, we dilute a little plaster and lubricate the contour with a brush and leave for 10 minutes so that the plaster dries. Next, prepare the second part of the plaster and fill the print to the edges. Leave to dry for 15 minutes.
When the plaster dries, you will need to bend the soft dough. Do this very carefully so as not to damage the impressions. The remaining pieces of dough on the casts must be carefully removed. That's it, now you can start coloring!
Sand casts
Sand casts look very beautiful and creative. We will need: sand, plaster, frame.
- We take dry river sand and sift it through a sieve;
- Then the sand needs to be moistened, add a little water to it;
- We take a mold (frame) and fill it with wet sand, then make an imprint in it (spread your palm and press lightly on it);
- Then take the plaster. It is necessary to dilute the plaster in the following ratio: add 2/3 water to 1/3 gypsum;
- Fill the mold with plaster on top and leave until hardened;
- Shake off the remaining sand and your sand print is ready!
Casts from creative kits
If you do not want to spend a lot of time studying the issues of making impressions, then purchase a ready-made one. With it you can even make a baby's fist. In such kits, everything is already included in the kit and you just need to follow the step-by-step instructions.


A wonderful master class on how to make prints of your baby’s hands and feet as a souvenir. To make a cast of your child’s feet and hands, dear moms and dads, grandparents, you will need patience, strong nerves and, above all, calm, and even better - sleeping baby.
In addition, you will also need:
150 g flour
- 75 g salt
- 2 tablespoons of vinegar
- 1 spoon vegetable oil
- 300ml water
- two shallow ramekins
- plaster
- an old plaster pan (which you wouldn’t mind throwing away)
Pour flour, salt into a Teflon bowl (so that the mixture does not stick to the walls) and add water in which the rest of the products were previously mixed. Cook over medium heat, stirring constantly. After about 3 minutes the mixture will begin to stick together, continue to cook, stirring. Finally, the mass will form a ball, which you continue to turn over and heat - when the flour warms up, the mass will stop sticking to your hands. Finally, let the finished mixture cool and you’re ready to start!
1. If you are going to make two impressions, divide the mixture into two parts and fill the molds with it. 
2. Well, now the hardest part is to make an impression of the baby’s hand or foot. It is desirable that the impression be at least 7 mm deep, but deeper is possible. If it doesn’t work out the first time, it’s okay, take out the mixture, knead it and put it back in the mold. The impression is made in the following order: first the base of the palm, then the palm, then each finger; if you start the impression from the fingers, it will not work. 
3. We’ll leave the resulting impressions for now, and in the meantime we’ll mix the plaster: it should be neither thick nor liquid, it should be flowing so that the impression is well filled. 
4. Do not rush to remove the print, let it harden well, preferably until the next day. The next day, carefully remove the dried cast, clean off any adhering mass and place it in the oven at 50-60°C on parchment (it may not withstand high temperatures and may crack). 
5. Dry plaster is light, you can brush the finished cast of the legs and arms so that it is smooth and clean. Don't forget: accuracy and patience! 
6. If you want, you can paint our children’s paws with gold or silver paint and place them in a frame. 


